How to Add a Grid to
Images and Photos
Arclab® Watermark Studio
for Windows PC
Grid Drawing Tutorial
With Arclab Watermark Studio, you can easily add a grid, raster or tiles to your pictures and photos. It does not matter if you want to add the grid to a single or multiple images. With the program you can process a large number of images at once.
Start Watermark Studio and select the images to which you want to add the grid:
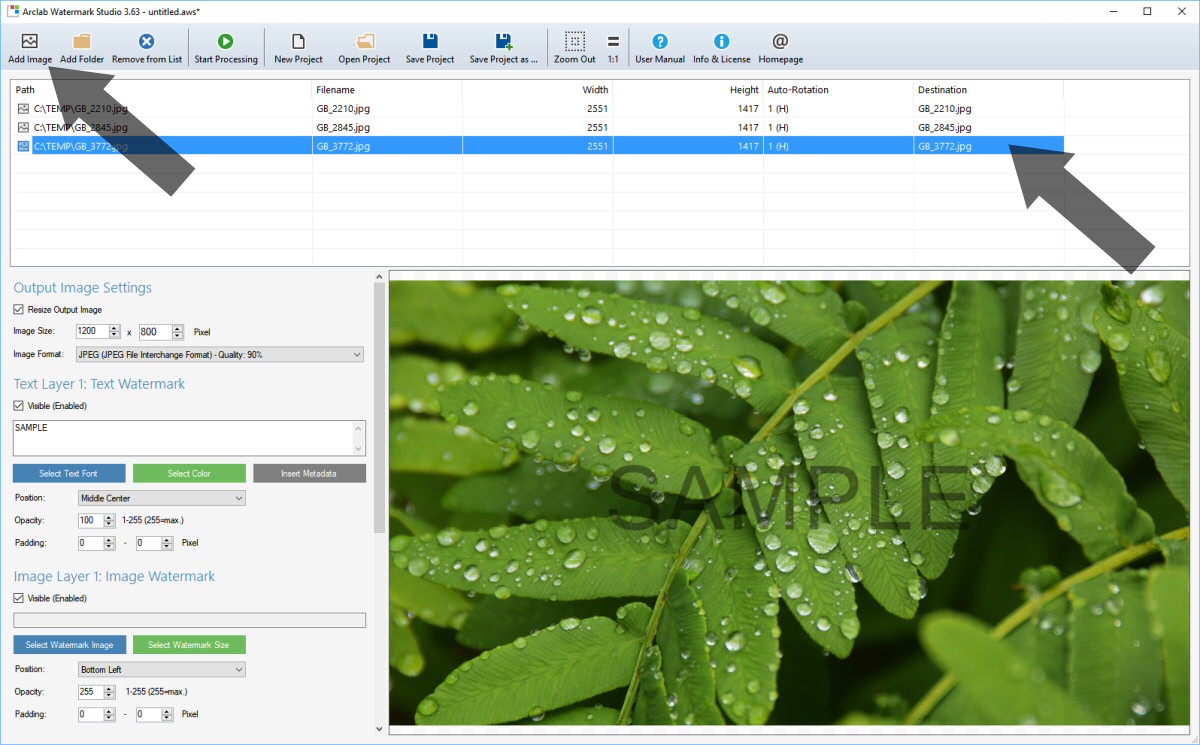
Click on one of the images to show the preview image.
Sample: 100px Black Grid
Select "Position: Tile" and click on "Select Watermark Image" (in "Image Layer 1: Image Watermark").
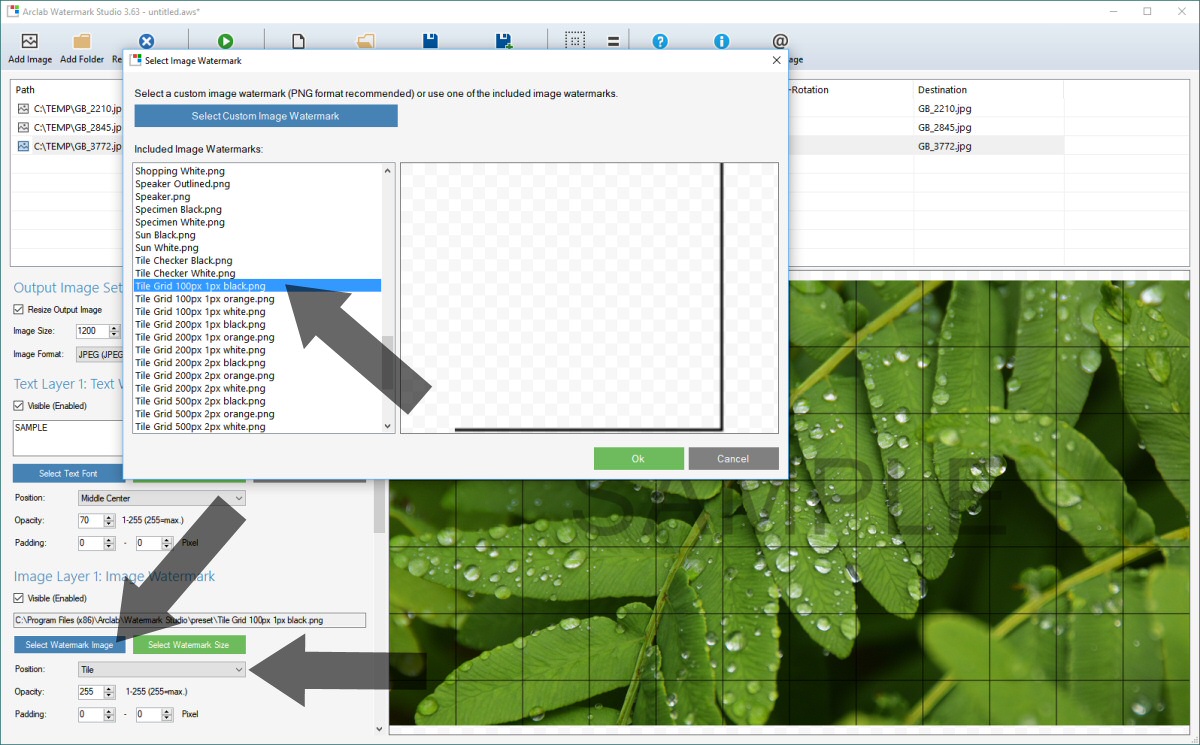
The selected graphic or watermark is inserted as a tile in the image
so that you get the desired grid.
The raster tiles contained in the program
can be recognized by the file name, which begins with "Tile".
Of course, you can also use your own graphic as a raster tile. All you
need is the grid tile in the appropriate size as a transparent (32bit) PNG.
Sample: 250px Raster
Select "Position: Tile" and click on "Select Watermark Image" (in "Image Layer 1: Image Watermark").
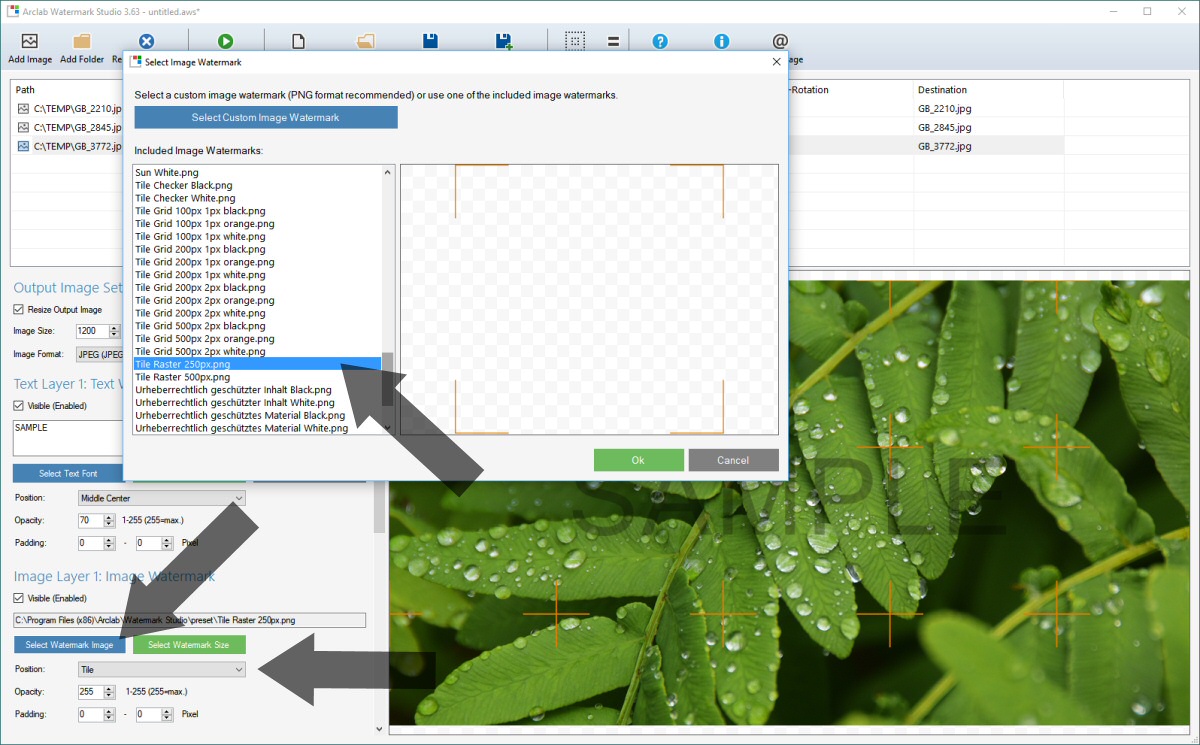
The selected graphic or watermark is inserted as a tile in the image
so that you get the desired grid.
The raster tiles contained in the program
can be recognized by the file name, which begins with "Tile".
Of course, you can also use your own graphic as a raster tile. All you
need is the grid tile in the appropriate size as a transparent (32bit) PNG.
Opacity and Image Size
The following example uses tile "Tile Checker White".
You can customize
the opacity (transparency) of the tile as well as the size of the watermark
tile to fit your needs.
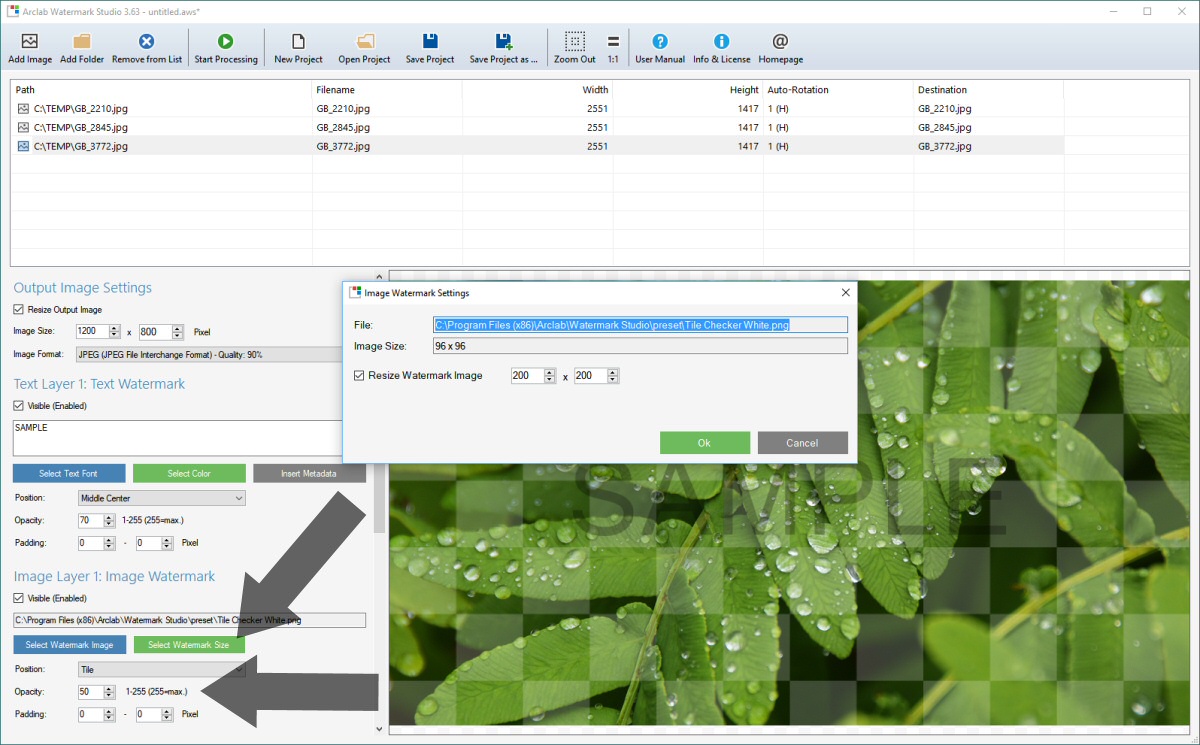
Click on "Watermark Size" to change the tile size.
Enter the "Opacity" between 1 and 255 (255 = max).
Test Watermark Studio
Explore Arclab Watermark Studio with our test version for MS Windows.
The test version is fully operational and allows you to test all features
of the software.