Add iCalendar Appointments
Arclab® Web Form Builder
How to add an iCalendar Appointment to an Email
An appointment can be added to every email or autoresponder email as an iCalendar file attachment (*.ics). The appointment is therefore linked directly to the corresponding email and is only attached to this email. This makes it possible to attach a different appointment to each email. Of course, you can also send emails without an appointment attached.
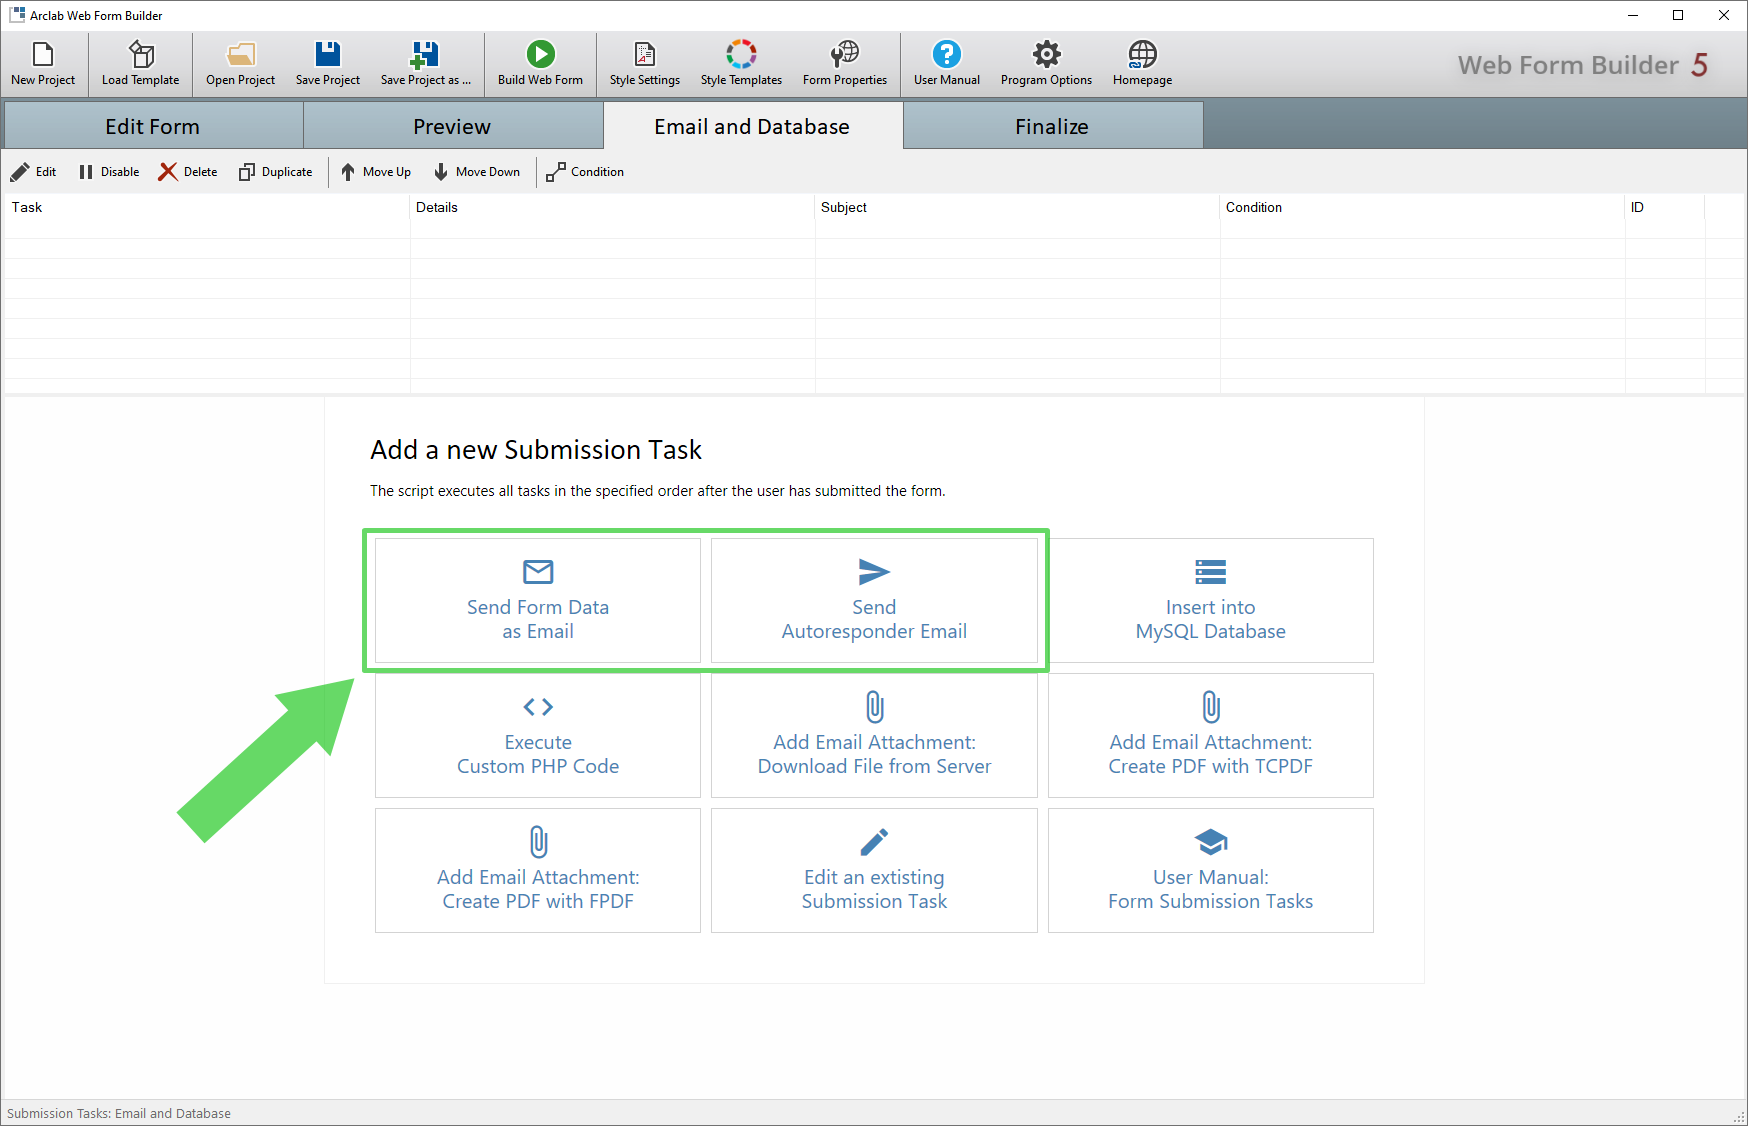
Add a new Submission Task of type "Send Form Data as Email" or "Send Autoresponder Email", or select an existing task.
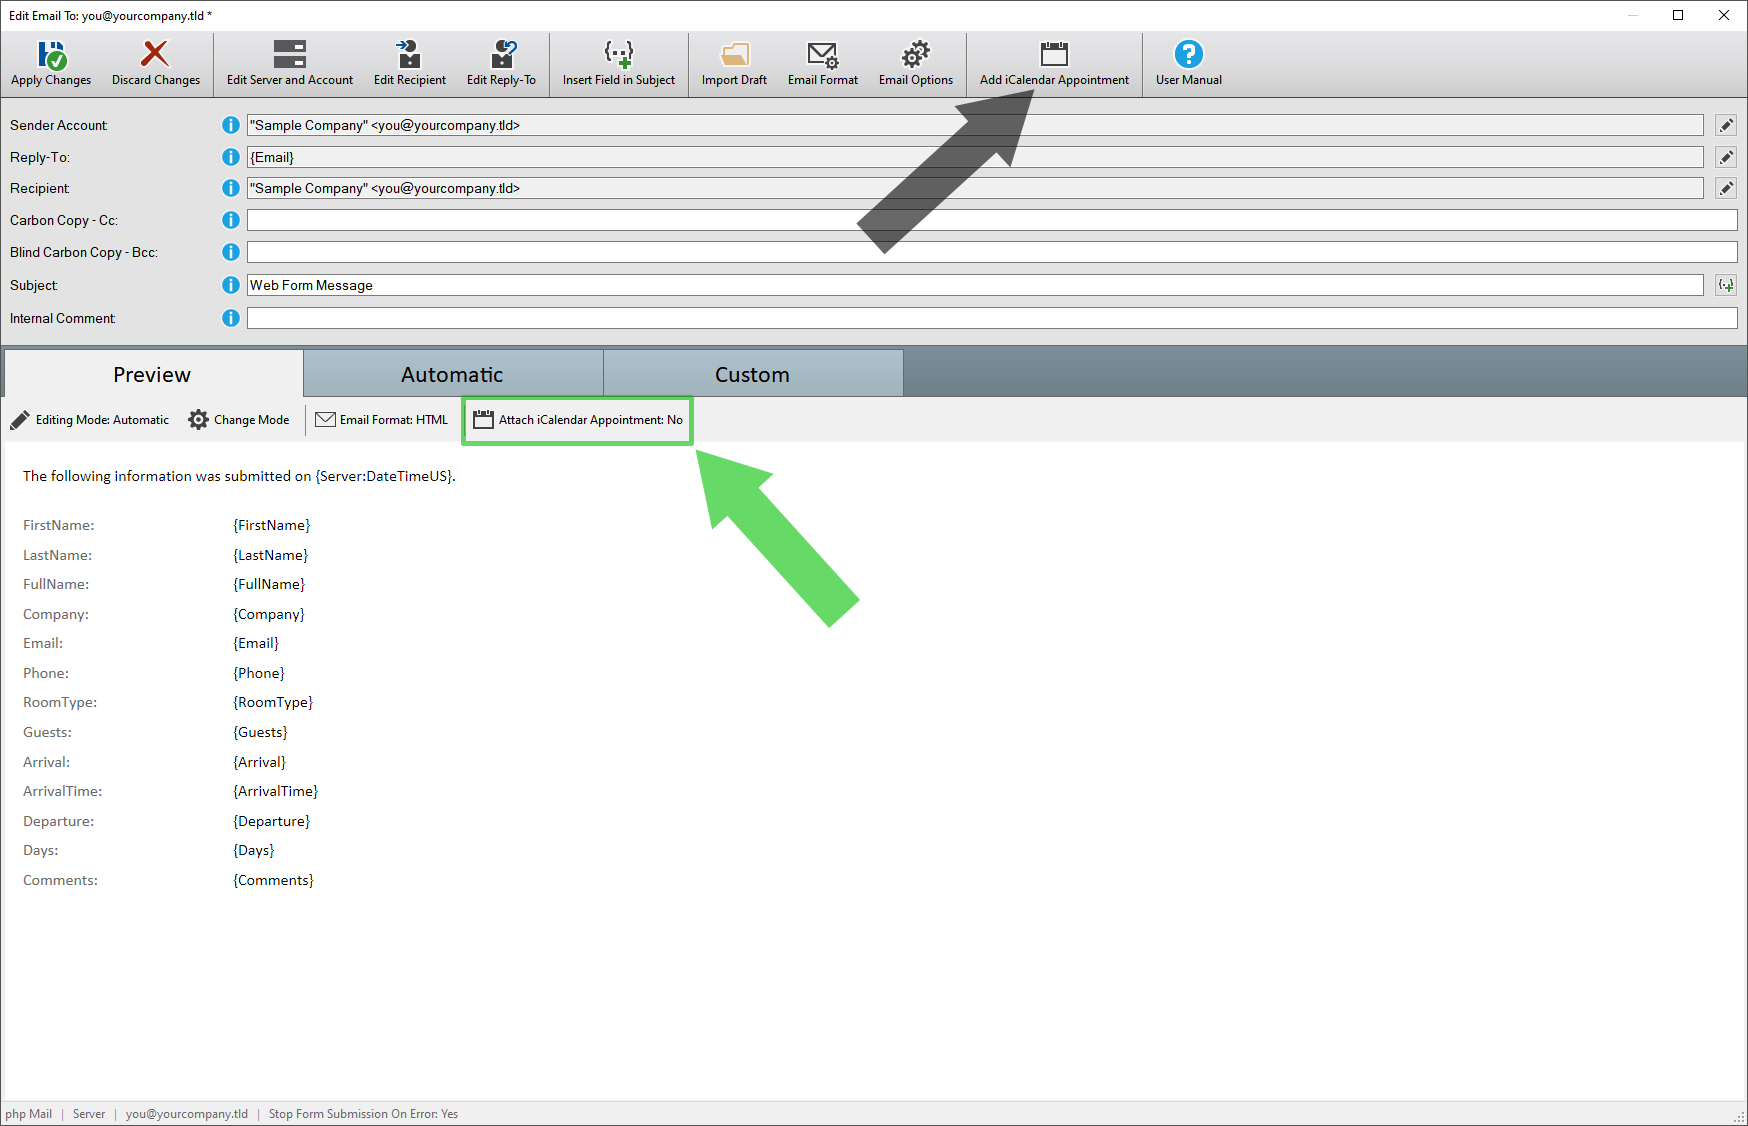
Click on "Add iCalendar Appointment" in the top menu.
Alternatively, you can also click on "Attach iCalendar Appointment" on the
"Preview" tab.
It is also displayed here whether an appointment should be
attached to the email or not.
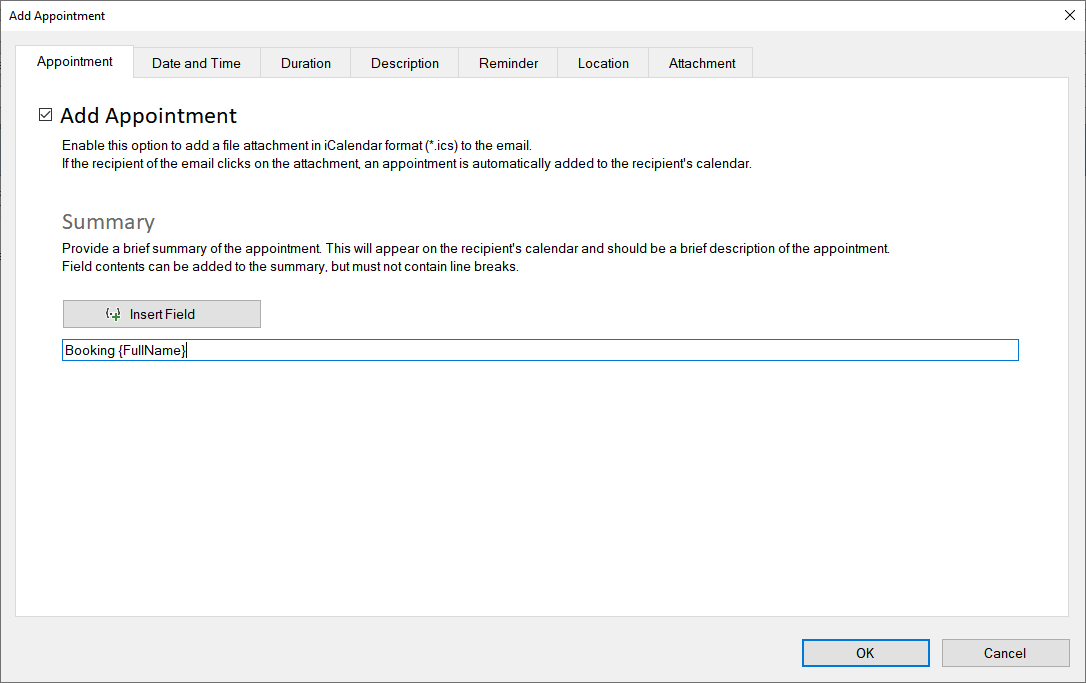
On the "Appointment" tab you can activate or deactivate the appointment via "Add Appointment".
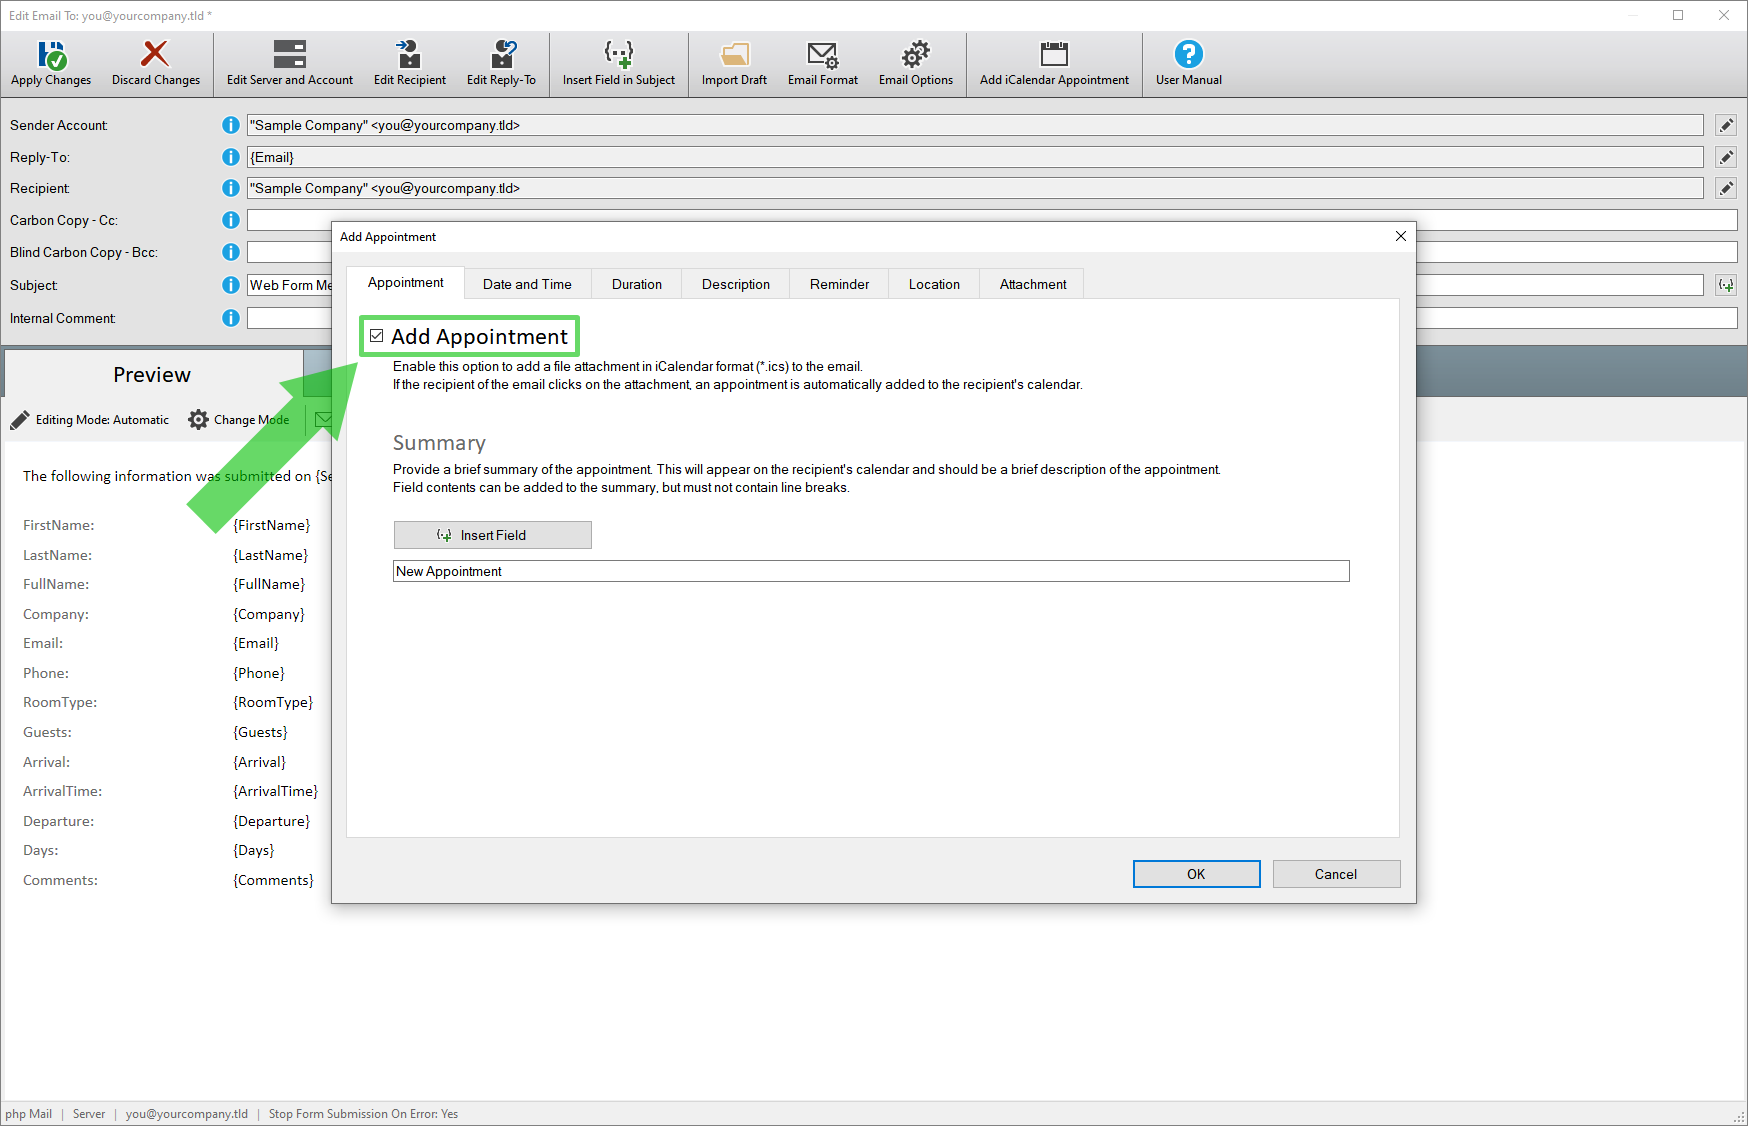
Appointment Summary (Title)
Provide a brief summary of the appointment. This will appear on the recipient's
calendar and should be a brief description of the appointment.
Field
contents can be added to the summary, but must not contain line breaks.
Make sure the text doesn't get too long as it will be displayed in the calendar
overview.
If you click on "Insert Field", the selected field will be inserted into the edit box at the position of the cursor.
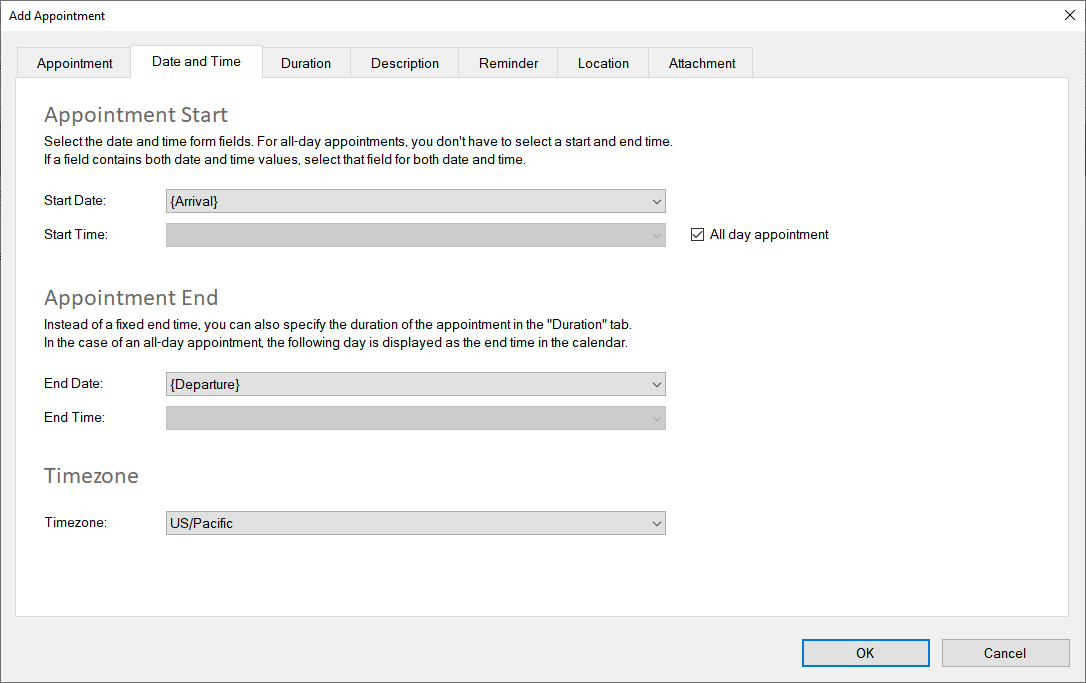
Appointment Start and End
In this dialog, select the start and end of the appointment. To do this,
select the appropriate date and time fields.
You can also use the same
field for date and time, as long as the field contains both date and time.
Appointment End vs Duration:
You can also leave the end of the appointment blank
and instead select the duration of the appointment on the "Duration"
tab.
This is particularly recommended if the end of the appointment is
determined by the user selecting a period of time.
All-Day Appointments:
In the case of an all-day appointment, the selection for the start time
and end time is deactivated.
In this case, the appointment starts at
00:00 (midnight) and ends at the same time the following day.
You can
use the same field as "Start Date" and "End Date" for a single day "All
day appointment".
Date and Time Fields:
Here you can use DateTime fields, hidden fields as well as selection-based
fields such as drop-down
lists, checkbox groups or radio button groups.
For
selection-based fields,
you can specify the text that appears on the form and the value that the
form submits.
While the "Text" displayed in the form can be freely selected,
the "Value (Field Content)"
must correspond to the syntax.
Whenever you can enter the date and/or time freely, you must use the following syntax:
- MM/DD/YYYY (Sample: 12/24/2023)
- MM/DD/YYYY hh:mm (Sample: 12/24/2023 14:30)
- DD.MM.YYYY (Sample: 24.12.2023)
- DD.MM.YYYY hh:mm (Sample: 24.12.2023 14:30)
- YYYY-MM-DD (Sample: 2023-12-24)
- YYYY-MM-DD hh:mm (Sample: 2023-12-24 14:30)
- hh:mm (Sample: 14:30)
Static Date and Time:
If you want to set a static date (and time) for the appointment, first
create two "Hidden Fields"
of the "Date and Time" type and specify the static start and end times for
the appointment there.
Instead of a DateTime field you can also simply
use a "Hidden Field" >
"Generic Variable" as long as you follow the syntax given above.
For
example, if you only need a field for the "End Time" of the appointment,
you can simply use a "Hidden Field" of the "Generic Variable" type and enter
the time there in the syntax hh:mm.
Timezone:
Be sure to select the correct time zone for the appointment. If the recipient of the iCalendar appointment is in a different time zone, the time is automatically adjusted or converted by the recipient's calendar to the local time zone.
Appointment Duration
Instead of a fixed end time for the appointment, you can also specify
the duration of the appointment.
Please note that this information overwrites
the date and time of the end of the appointment.
To set the appointment duration, you can simply enter a number (without
decimal places) or select any field.
If you select a field, you have
to make sure yourself that this also contains a number without decimal places
and further text.

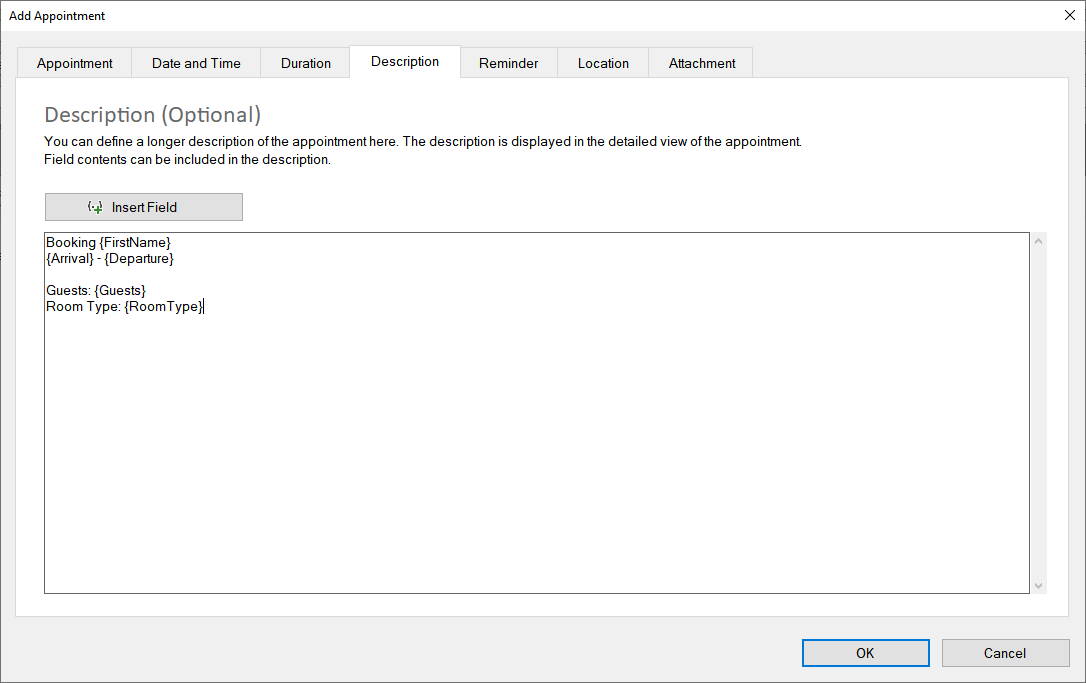
Appointment Description
You can define a longer description of the appointment here. The description
is displayed in the detailed view of the appointment.
Field contents
can be included in the description, so you can compose any text here.
If you click on "Insert Field", the selected field will be inserted into the edit box at the position of the cursor.