Insert into MySQL Database
Arclab® Web Form Builder
Submission Task: Insert into MySQL Database
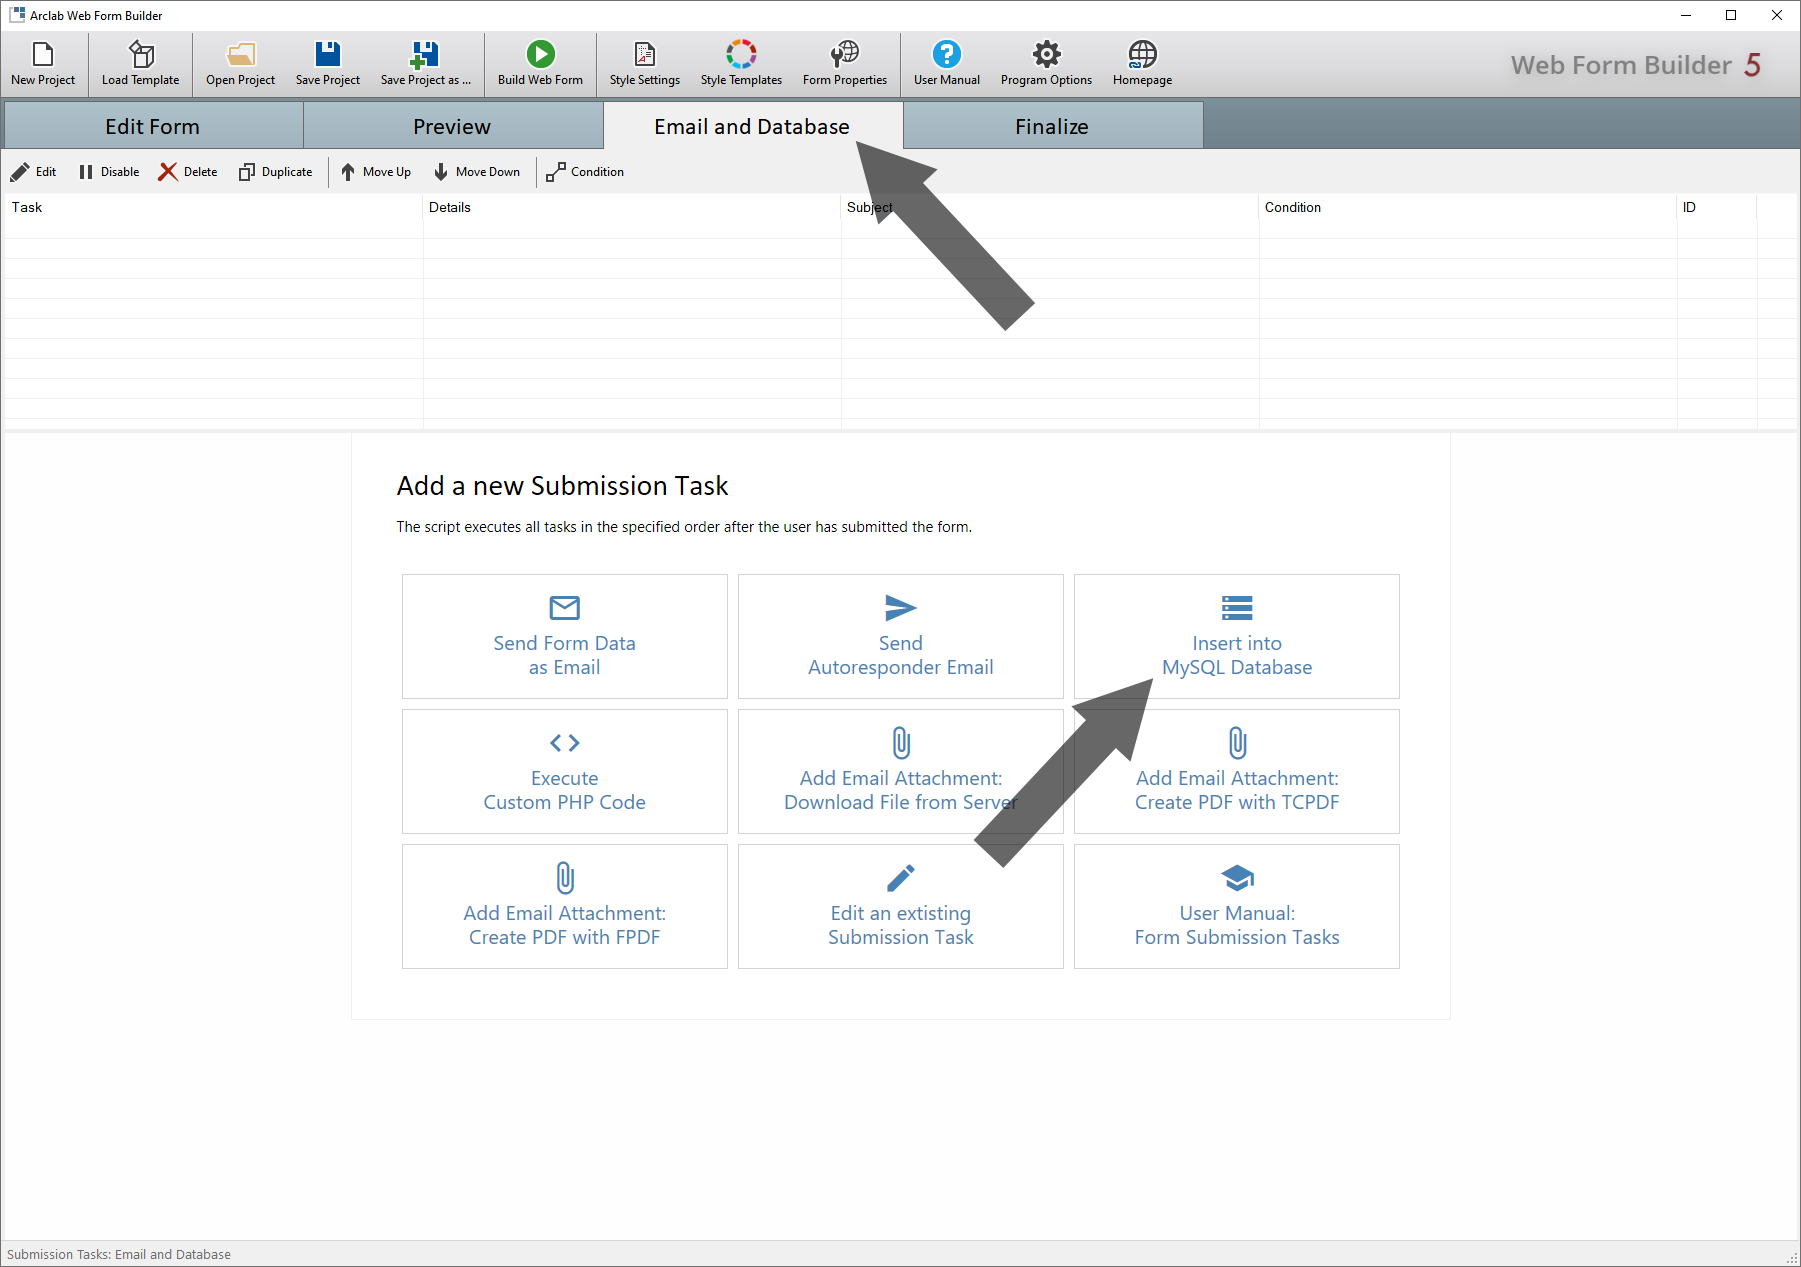
Go to "Email and Database" and select "Insert into MySQL Database"
to create a new database connection.
Select the task and click on the edit
icon to edit an existing task. You can also change the order, delete or pause
tasks here.

Field Relationship
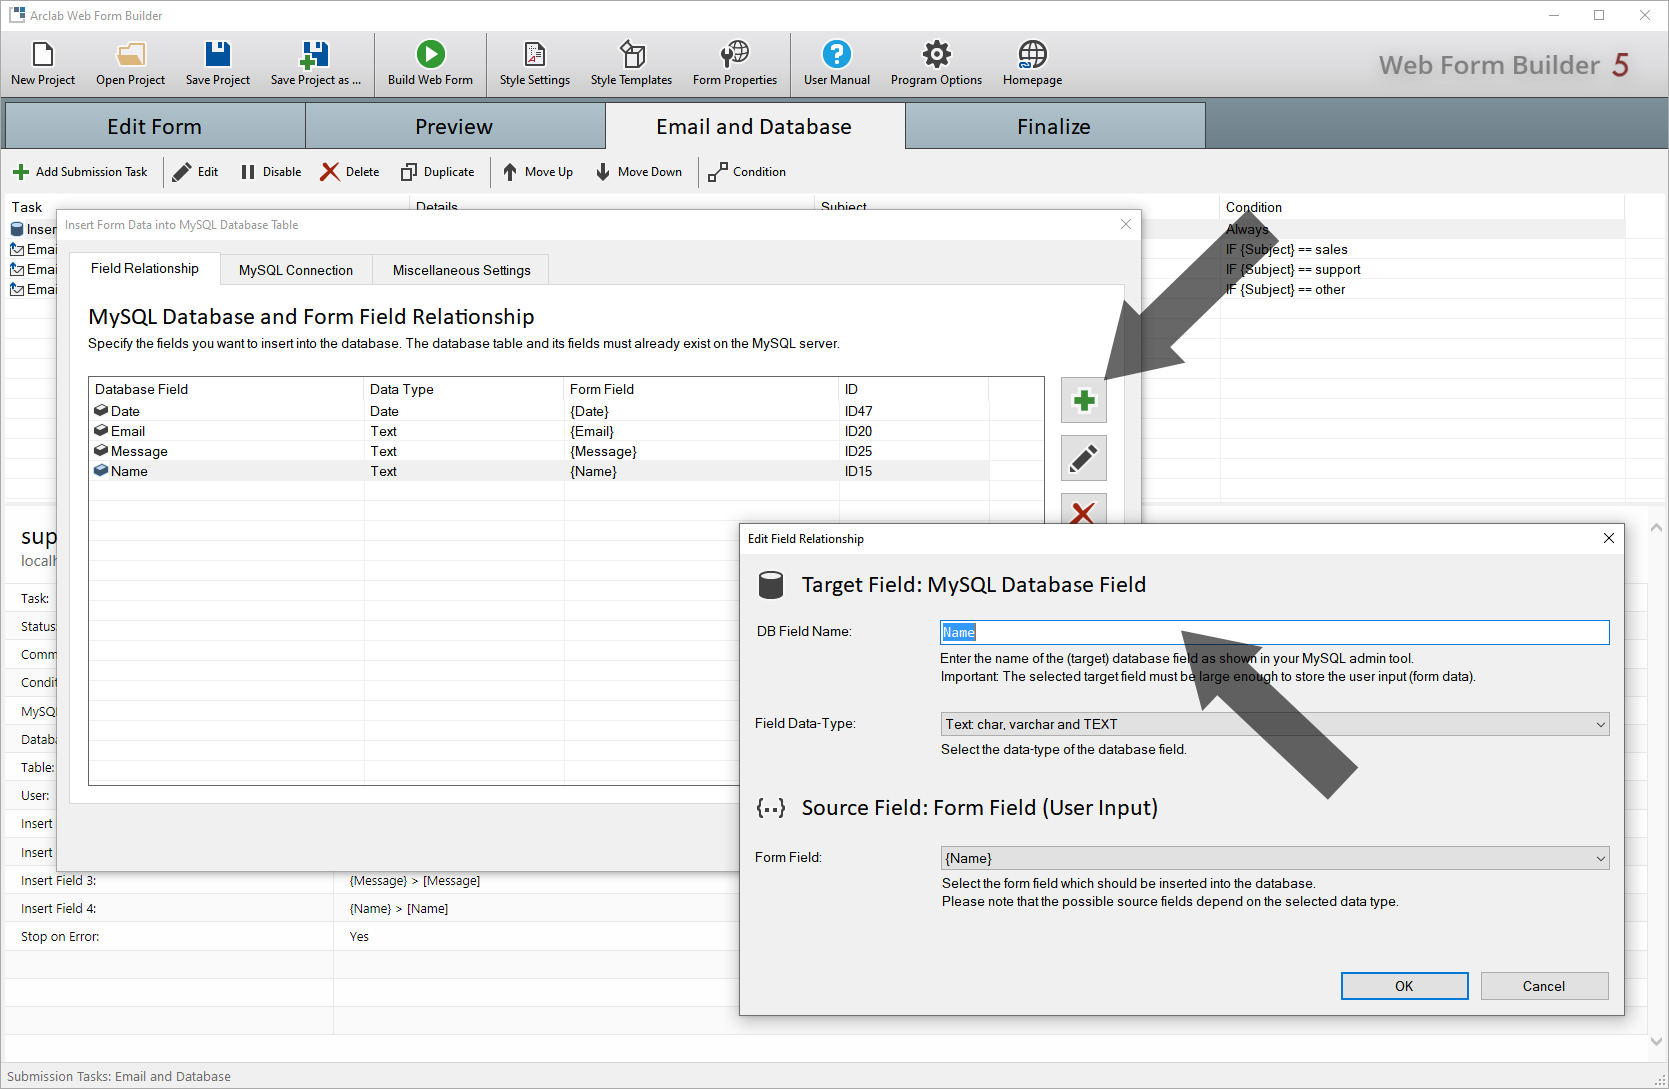
Click on the "plus" symbol to add a field:

With the Arclab Web Form Builder you can also easily connect the fields of the database to the fields of the form.
- DB Field Name:
Enter the name of the database field as shown in your MySQL admin tool.
Important: The selected target field must be large enough to store the user input (form data).
- Field Type:
Please select the data type that most closely matches the data type of the field in your MySQL database.
The script then automatically performs the appropriate conversion.
Please note here that you e.g. can not insert text into a date field and there is no conversion which could fix this. Especially for text fields, you should pay attention to the maximum character length of the text field of the database. If the text value is longer than the field in the database, the function always fails. - Source Field: Form Field (User Input)
Select the form field which should be inserted into the database.
Please note that the possible source fields depend on the selected data type.
For example, you can not insert binary data into a numeric field.
Please note the following: All fields of the database which are not NULL capable must be assigned to a corresponding form field (in the same task).
The exception here are A_I (auto-increment) fields, which are often used as primary keys. These A_I (auto-increment) fields must not be assigned as they are automatically filled by the database.
This means that all fields that are not automatically filled by the database and are not NULL capable must be filled with data from the form, otherwise error E201 will be displayed.
MySQL Connection Details
The script uses the php extension "MySQLi" to insert data from the form into the database.
If "MySQLi" is not available, you will receive the error message when opening the web form in the browser:
Error: MySQLi extension not installed!
In this case, please contact your web administrator or provider to activate
the php extension MySQLi.
See also:
http://php.net/manual/en/book.mysqli.php
The information on this screen is only necessary if it has not already been predefined in the MySQL configuration file.
- MySQL Server:
Enter the hostname of the MySQL server. The default value is localhost (same host as web server).
- MySQL Database:
Enter the name of the MySQL database on the MySQL server. - MySQL Database Table:
Enter the name of the MySQL table within the database into which the data is to be inserted.
If you want to use a new table, create a new table and the corresponding fields (using your MySQL admin tool) first. - MySQL User:
Enter the MySQL username. The user must have permission to insert data into the table. - MySQL Password:
Enter the password for the specified MySQL user. Leave unspecified (empty) if no password is required.