Insert Web Form in Xara/Magix Web Designer
Arclab® Web Form Builder
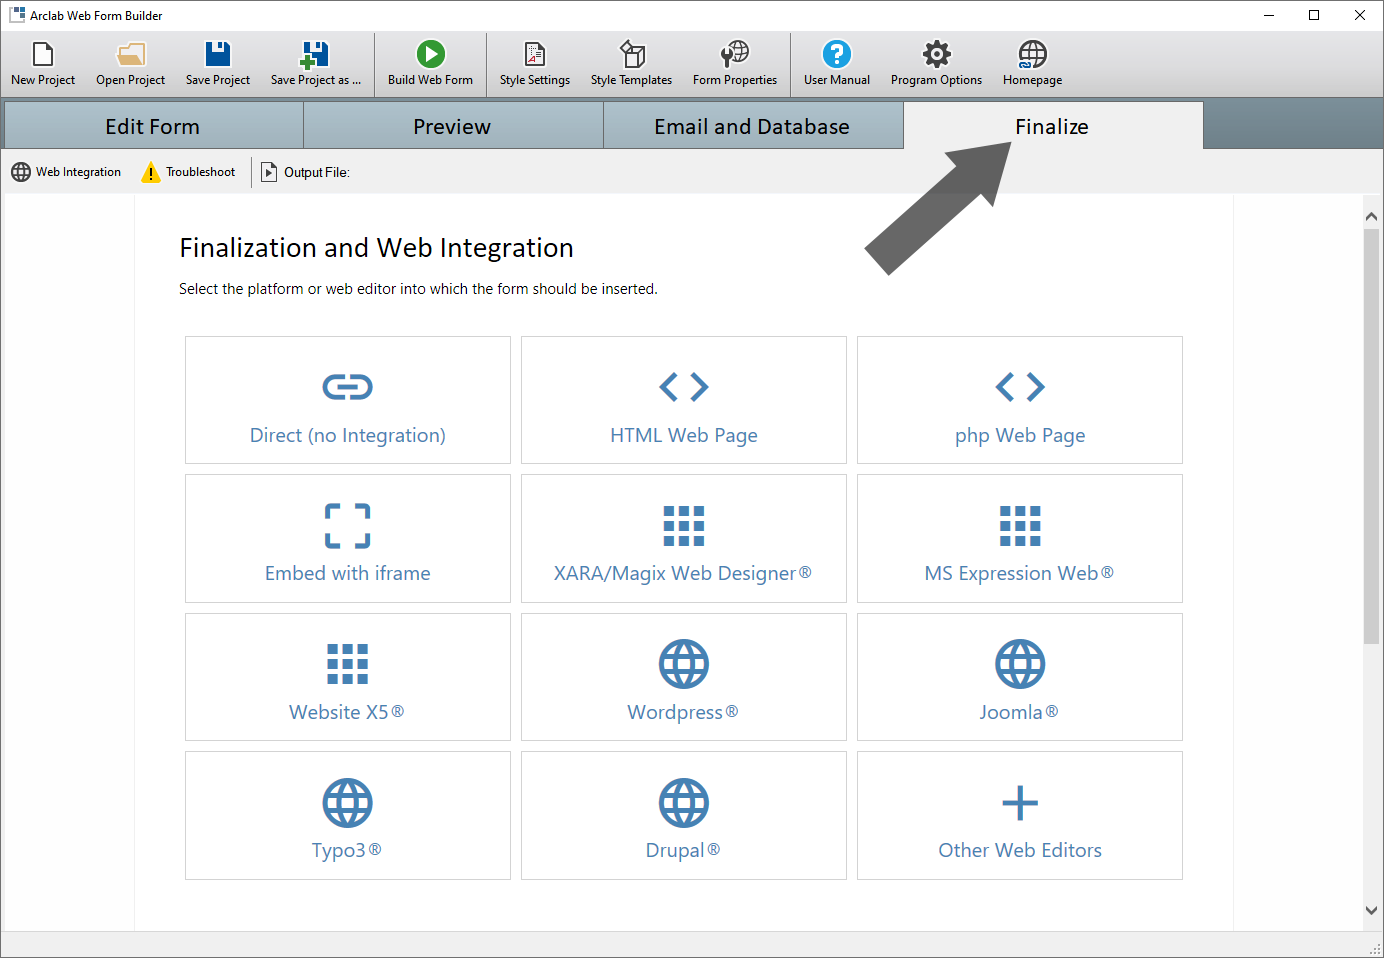
As of version 5.2.2++, the instructions for web integration
are included directly in the program.
Simply click on "Finalize" and select
your platform or web editor.
You can download Arclab® Web Form Builder
for Windows PC and test the forms on your own website.
The trial version is
fully functional. (No registration required)
Insert Form in Xara/Magix Web Designer® using an iframe
In addition to the method shown here, it is also possible
to insert the form directly into the website without using a widget.
To do this, click on "Finalize" in the program and select "XARA/Magix Web
Designer".
Important
- The "Embed a Website widget" is used here instead
of the script code to insert the form.
If the host page already contains the script code for inserting the form, please remove it before continuing. - Please note that an iframe separates the form from the host page, which means that fonts and backgrounds cannot be automatically adopted from the host page. The form is displayed exactly as you see it in the program.
Build and Upload the Form
- First create the form (php file) by clicking on "Build Web Form".
- Upload the form file generated by the program to your website.
- You can use the built-in "Publishing" function
to upload the form automatically after building it.
Of course you can also use an external FTP client or a web interface to upload the form file to your website.
Test the Form
- Open the uploaded form in your web browser, e.g. https://www.yourdomain.tld/webform.php
Edit the Host Page
- Start Xara/Magix Web Designer and open the host page, which should contain the form.
- Use the menu "Insert" and open the "Online Content Catalog".
- Insert the "Component": "Embed a Website widget" from the "Online Content Catalog".
- Enter the full URL of the form in the widget and click on "Generate Code".
- Some websites are configured so that iframes can only be used within
the same domain.
In this case, a preview is not possible, but the form will be displayed correctly after you have published the web page. - Save and publish the modified host page.
Website Variants
- If the web page consists of several variants for mobile devices, simply repeat the above step for each variant or copy the widget and paste it into the other page variants.
- You can use the same form (php) file for all page variants or you can also use a separate form (with a different filename), for example with a smaller font size or a different layout. The form is displayed exactly as you see it in Web Form Builder.
Possible iframe Restrictions on Your Website
- A website can be configured so that iframes are completely forbidden (DENY) or only allowed if the form is on the same domain (SAMEORIGIN). This is to prevent the content of your website from being displayed within a third-party website.
- If an iframe is only allowed if the host page and the form are on the same website or domain, the form may not be shown in the preview of your editor. Simply upload the host page and the form file to your website and it should work fine.
- If the use of iframes on your website is completely prohibited, you can e.g. create a new directory for which these restrictions do not apply and upload the form (php) file to this directory. You can achieve this relatively easily by relaxing the restrictions in an additional ".htaccess" (Apache) file in the new directory. Having a separate directory with relaxed restrictions has the great advantage that the rest of your website is not affected. Please contact your web administrator if you cannot make the required settings yourself.
- Of course, you can also integrate the form directly into a web page without using an iframe.
Insert Form directly in in Xara/Magix Web Designer®
First select in the program how many website variants
the page has.
To do this, click on "Finalize" in the program and select
"XARA/Magix Web Designer".
In the example below, the integration into
a website with only one website variant is described.
Build and Upload the Form
- If you have not already done so or made changes, click on "Build Web Form" to generate the PHP file containing the form.
- Upload the form (*.php file) to the folder on your website which also contains the host page.
Edit the Host Page
- Start Xara/Magix Web Designer and open the host page, which should contain the form.
- Use the "Rectangle Tool" from the menu and create
the area in which the form should be inserted.
You should now see an empty (black) rectangle. - Right-click inside the empty rectangle, select "Web Properties" and switch to "Placeholder".
- Select (Placeholder) "Replace with HTML code" and click on "HTML code (body)".
- Click on "Copy Code" in the program to copy the
code below:
<div id="awf-form"><script>
var awf_file='webform.php';
var awf_x=new XMLHttpRequest();awf_x.open('GET',awf_file+'?js=awf');awf_x.onreadystatechange=function(){if(awf_x.readyState===4&&awf_x.status===200){var s=document.createElement('script');s.innerHTML=awf_x.responseText;document.head.appendChild(s);awf_Run('awf-form');}};awf_x.send();
</script></div> - Paste the code into the textbox in "HTML code (body)".
- If the host page and the form file are not in the same folder
on your website, you have to adjust the path accordingly.
If both files are uploaded to the same folder, the path is:
var awf_file='webform.php';
If you upload it to e.g. the subfolder forms, the path is:
var awf_file='forms/webform.php';
Alternatively, you can also use the full URL of the uploaded form file:
var awf_file='https://www.yourdomain.tld/folder/webform.php'; - Save and publish the modified host page.
- Please note, that you cannot preview the form in Xara/Magix Web Designer, because php can only be executed on a server.