Mailing Lists - List Settings
Arclab® MailList Controller
The "List Settings" can be accessed from the section "Mailing Lists". Select the list and click on "List Settings".

build Basic List Settings
"Basic List Settings" can be accessed from the section "Mailing Lists". Select the list and click on "List Settings".
settings List Name and Description
"Name" that identifies your list. You can use any name you want, but you should give the list a unique name.
The list name is used in autoresponder messages and
as x-mailer header field (by default).
Don't include any confidential
information in the list name.
You can place a note in the "Description", e.g. to give yourself a closer descriptions of the list. The description does not appear in any message.
settings Email Address and Friendly Name
The list "Email Address" (email account) is the primary setting:
- The email address is used as sender for all messages sent from this list.
- If you enable incoming mail, then the program can process user requests sent to this email address, e.g. subscribe/remove requests.
Please note, that each list with enabled incoming mail requires a unique email address, which is not used by another list.
The "Friendly Name" is shown in the recipients mail
client as "From", e.g. use your company name.
Use a name here,
not an email address!
build Database
"Database" can be accessed from the section "Mailing Lists". Select the list and click on "List Settings".
Shows information about the database and custom fields for personalization.
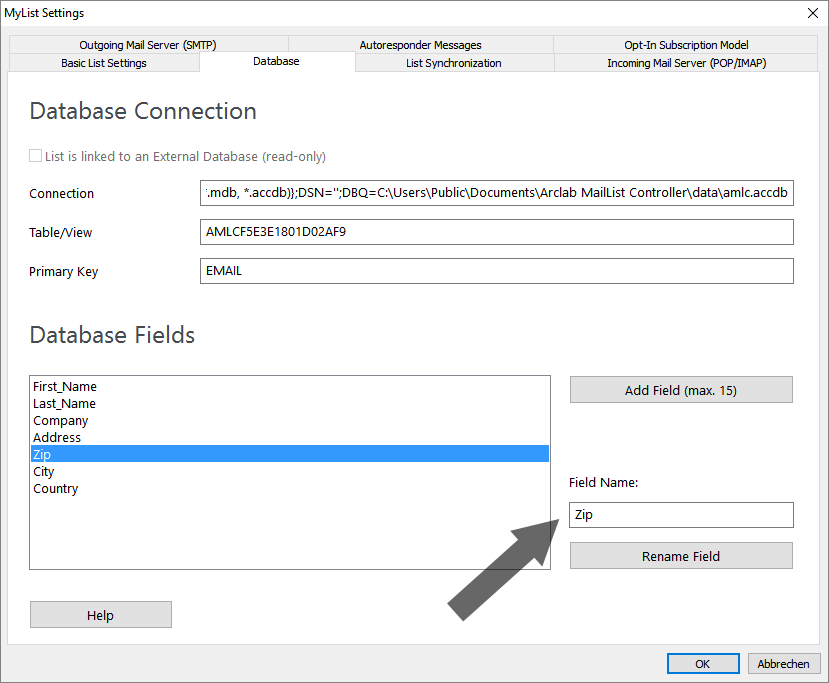
Mailing List:
- Use "Add Field" to add a custom field to the mailing list.
- Click on "Rename" to change the name of a field.
- It’s required to change your subscribe forms if you change/add database fields.
- Fields cannot be removed.
- It’s not possible to use empty fieldnames.
- Please create a new list if you want to remove existing fields!
Linked List:
- Fields cannot be added or removed inside the program (linked to external database).
- Please re-create the list if you have added, changed or removed fields (columns) in the external database.
build List Synchronization
"List Synchronization" can be accessed from the section "Mailing Lists". Select the list and click on "List Settings".
settings Enable Incoming Mail (List Synchronization)
The program receives incoming mail, like e.g. subscribe requests, during
a list synchronization ("Sync").
A "Sync" is done by
default every 60 minutes. You can change the "Check Email every ... minutes"
timer in the "Options".
Important: Each list with enabled incoming mail requires
a unique list "Email Address", which is not used by another
list.
The program disables incoming mail if you use the same list "Email
Address" for multiple lists, because otherwise the first list would receive
all returned/subscribe/remove messages and the other lists (using the same
"Email Address") would never get any incoming message.
IMAP Server:
- The program will process all list messages in the "Inbox" folder, e.g. subscribe requests.
- Other messages (non-list messages) will be left in the "Inbox".
- Processed messages will be moved to the folder "MailList Controller".
- Please clean your IMAP folders from time to time to free up space on the IMAP account.
POP3 Server:
Using a POP account works a bit different:
The program will process
all list messages, like subscribe/remove requests, and removes the messages
from the mail account.
Please define how the program should handle non-list messages, like replies
or questions.
You can choose between 3 options:
- Leave non-list messages on POP mail account: Any non-list message will not be removed from the POP mail account. Please check the account from time to time (using your normal mail program or web mail) to process the non-list messages.
- Remove all messages and forward non-List messages to forward address: Please make sure, that you use an email account, which is not setup in any other mail program when using this option. All non-list messages will be removed from the mail account and forwarded to the email address specified as "Forward Address". Important: Don't enter the list email address here! The email specified as forward address should be an email address, which you check frequently, e.g. your support email address. The program will forward and remove all messages from POP mail account!
- Remove all messages from POP mail account: Warning(!) ... this option removes all messages from the POP mail account!
settings Subscribe and Remove Subject Keywords
Enter a single keyword. Leave the "Subscribe" or "Remove" keyword empty to disable the subscribe or unsubscribe function.
Default "Subscribe" keyword: Subscribe
Default "Remove" keyword: Remove
It's recommended to use a web
form if you want to enable a person/contact subscribe to your "Mailing List".
A linked list is read-only - the program cannot process "Subscribe" requests
for linked lists (add the user to the external database instead).
A contact
can unsubscribe from a list by replying with the "Remove" keyword in the
subject line.
See also:
build POP/IMAP Server and Account for Incoming Mail
"POP/IMAP Server and Account for Incoming Mail" can be accessed from the section "Mailing Lists". Select the list and click on "List Settings".
Please enter the account details for the email address specified as list "Email Address".
The account details should be provided by your mail
administrator or mail provider.
In most cases you can also retrieve the
"Settings for POP/IMAP" using the web interface of your mail account or
web server.
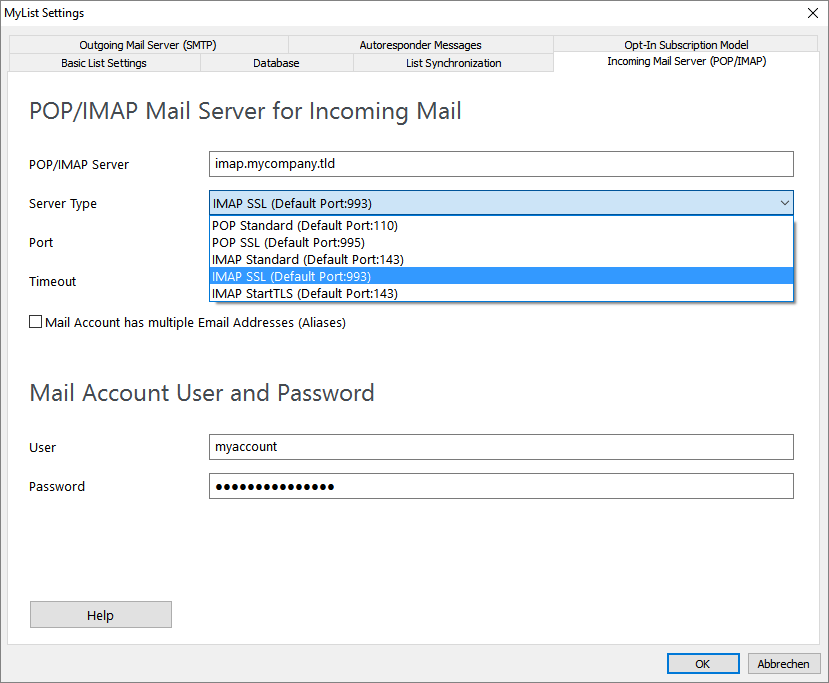
settings POP/IMAP Server and Server Type
Enter the POP or IMAP server and select the "Server Type".
MailList Controller supports POP and IMAP servers, but using an IMAP account is recommended (if your account supports IMAP). If you want to connect to your MS Exchange server, then you need to ensure that IMAP is enabled on the MS Exchange server before. See also: How to connect to a MS Exchange Server
Authentication is only possible via user name and password. Web-based authentication, XOAUTH2 or "MS Modern Authentication" cannot be used because the program does not have a web service or backend. If your account does not allow access via user and password, please use another account that allows access via user and password, e.g. from your web space provider.
settings Email Account User and Password
Enter the "User" and "Password" for
the email account.
Sometimes the user (name) is identical with the email
address, but it can also be different.
build SMTP Server and Account for Outgoing Mail
"SMTP Server and Account for Outgoing Mail" can be accessed from the section "Mailing Lists". Select the list and click on "List Settings".
Please enter the account details for the email address specified as list "Email Address".
The account details should be provided by your mail
administrator or mail provider.
In most cases you can also retrieve the
"Settings for SMTP" using the web interface of your mail account or web
server.

settings SMTP Server and Authentication
Enter the "SMTP Server" and select the "Authentication"
required for the SMTP server.
The program supports all authentication
types including SSL and StartTLS and works with any SMTP mail server.
See also: How to fix Outgoing Mail (SMTP)
Settings | How to connect to a MS Exchange Server
Enter the "User and Password for the mail account if you have not entered the user and password in "Incoming Mail Server (POP/IMAP)".
Authentication is only possible via user name and password. Web-based authentication, XOAUTH2 or "MS Modern Authentication" cannot be used because the program does not have a web service or backend. If your account does not allow access via user and password, please use another account that allows access via user and password, e.g. from your web space provider.
settings Limit Outgoing Mail (Limit/Pause)
Some mail provider use limits for outgoing mail, e.g. 2000 messages per hour.
"Limit" can be used to adjust the program to such a limit. If the limit was reached, the program stops the mailing and re-schedules the mailing to continue after the specified amount of hours.
Other mail server require to wait a specific time after sending out a
specific number of messages.
"Pause" can be used to
add a wait time between the messages.
See also: FAQ: Limited mail accounts
settings Alternate Send Mode: Mail Server Pickup Folder
This option can be used if you are running a local mail server, which has a pickup directory. In this mode, the program does not send using SMTP. It creates an .eml file in the “pickup” folder for each message, which will be used directly by your mail server. The mail server picks up the .eml file and sends the message.
Select "Mail Server Pickup Folder" as "Authentication"
and select the pick-up folder on your mail server.
The default location
is Mailroot\Pickup when using MS IIS SMTP Service.
MailList Controller will create the messages in the “pickup” folder very
fast: up to 100.000 messages in less than 5 minutes, so it might be required
to slow down or limit the number of messages per hour (otherwise your server
might run out of resources).
Please note, that the program does not
receive any confirmation from your mail server and your mail server is responsible
for the mailing and error processing. Please refer to the user manual of
your mail server for further details.
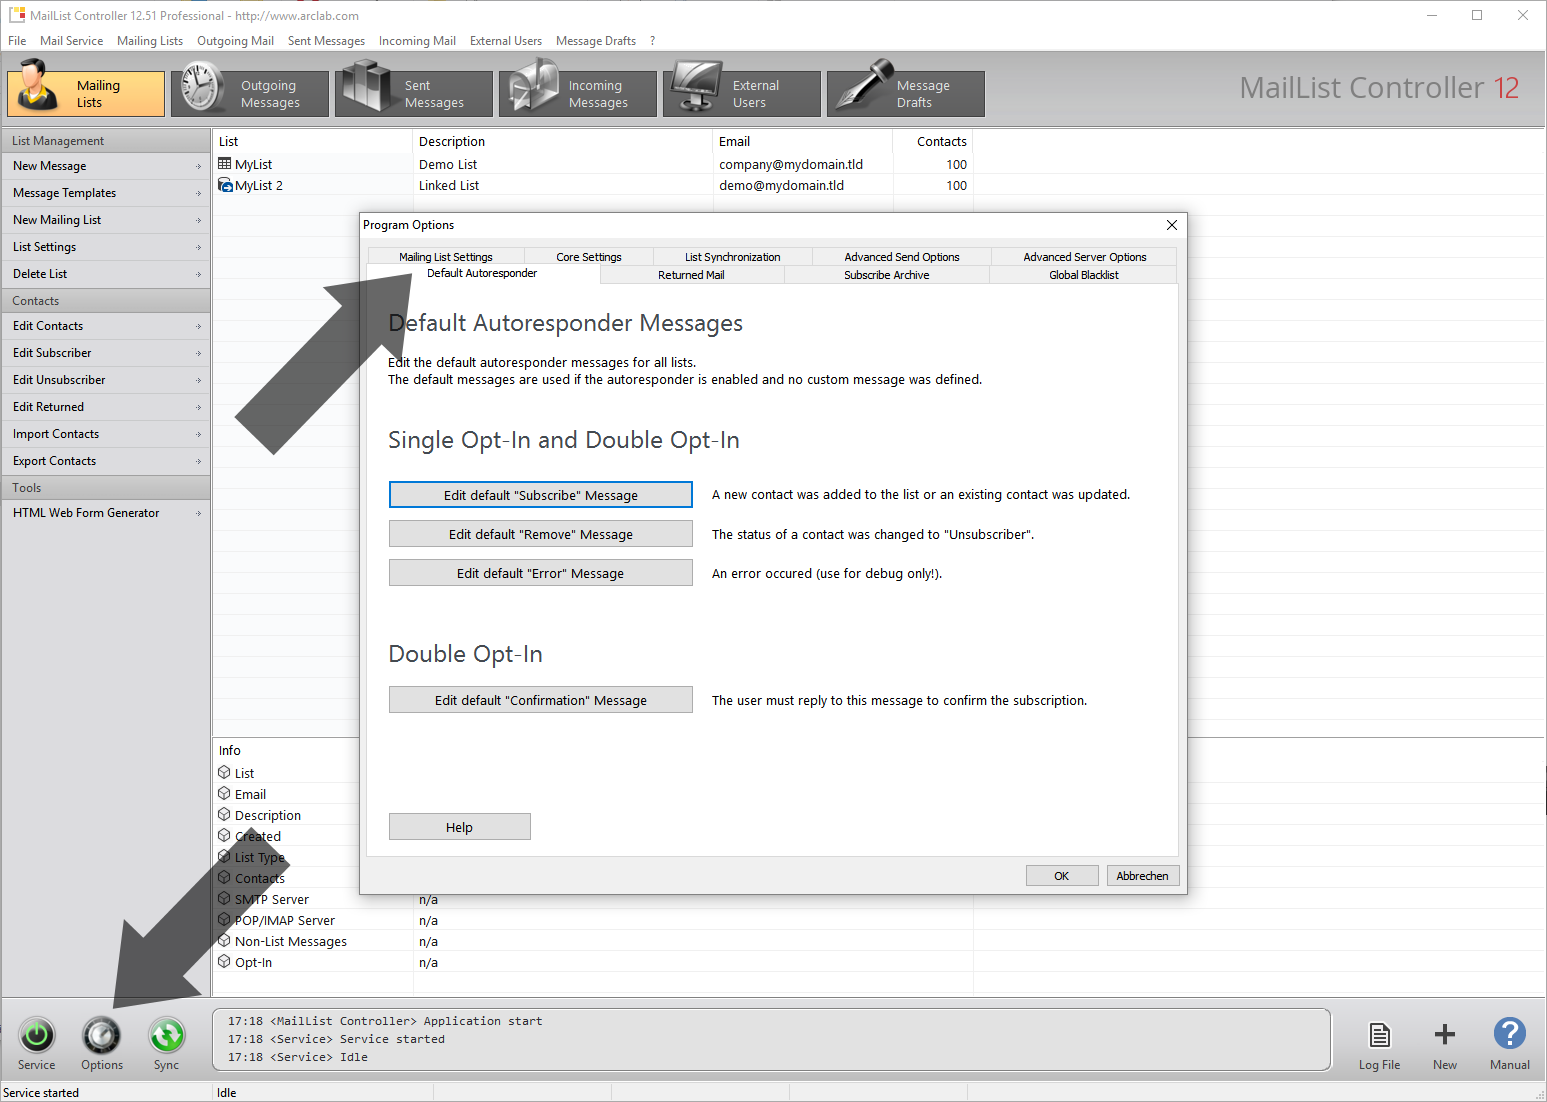
build Autoresponder
"Autoresponder" can be accessed from the section "Mailing Lists". Select the list and click on "List Settings".
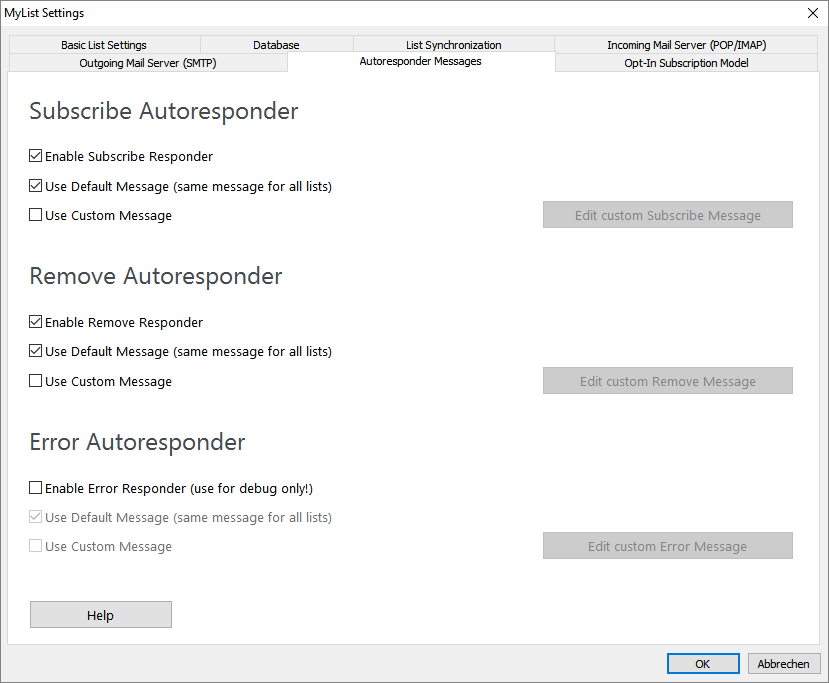
MailList Controller can send an automated message after a contact has subscribed or removed.
Enable or disable autoresponders for the list. It’s possible to use either the default autoresponder, which could be modified from the "Options" (program options) or use list specific autoresponders. The "Error" responder is disabled by default, because it can generate multiple error messages, which might confuse the list contact.
The "Error Autoresponder" is for diagnostics and should not be used in livemode.
Click on "Edit custom ... Message" to edit the list specific autoresponder message:
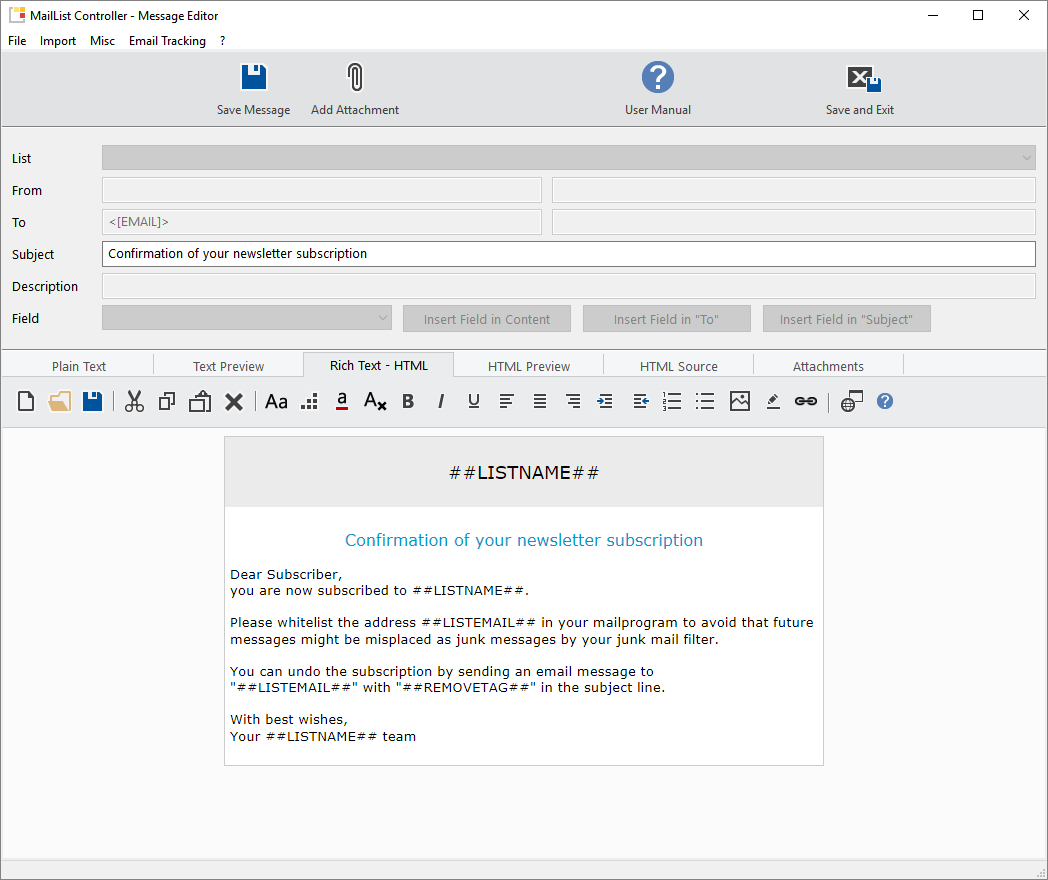
You can use the following placeholders inside an autoresponder message:
- ##LISTEMAIL##
- ##LISTNAME##
- ##LIST##
- ##ADDTAG##
- ##SUBSCRIBETAG##
- ##REMOVETAG##
- [EMAIL]
- Other fields are not available inside an autoresponder message.
The "Default Message (same message for all lists)" (default autoresponder message) can be accessed from "Options":
build Opt-In Subscription Model
"Opt-In Subscription Model" can be accessed from the section "Mailing Lists". Select the list and click on "List Settings".
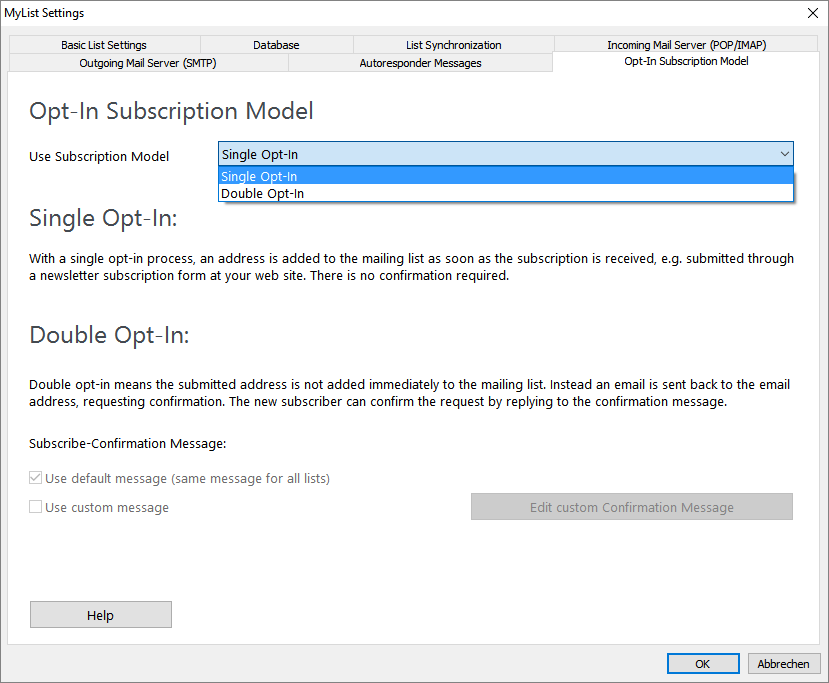
settings Single Opt-In
MailList Controller supports both, single and double opt-in subscriptions. With a single opt-in process, an address is added to the mailing list as soon as the subscription is received, e.g. submitted through a newsletter subscription form at your web site.
settings Double Opt-In
Double opt-in means the submitted address is not added immediately to the mailing list. Instead an email is sent back to the email address, requesting confirmation. The new subscriber can confirm the request by replying to the confirmation message. The email address is only activated, if the recipient responds to the confirmation email. The confirmation process is failsafe and very simple, the email address can be confirmed by a click on "Reply". The new contact is added with status "Pending" first. After the new contact has confirmed the subscription (replied to the confirmatin message) the status will be changed to "Subscriber".
The "Subscribe-Confirmation" message works the same
way as other "Autoresponder" messages.
You can use the
global confirmation message or setup an individual confirmation message
for the mailing list.
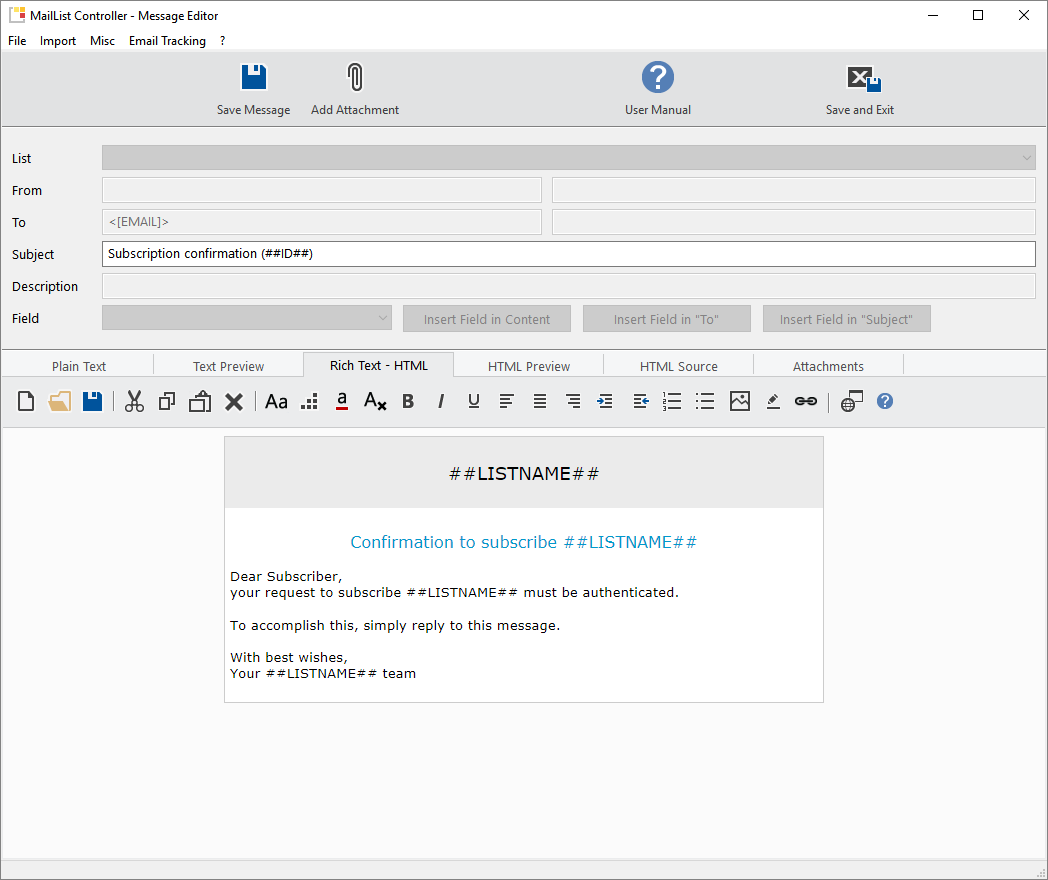
Important: Don't remove the placeholder ##ID##
from the subject of the "Confirmation Message"!
##ID##
contains a checksum of the email address. The program will not accept the
message if the ##ID## is missing.