Input Elements with Label
Arclab® Web Form Builder
Input and Label Layout
Arclab Web Form Builder allows a completely free arrangement of input elements
and labels.
With the help of a "Grid" (e.g. 2 Columns) you can define the
layout into which you can then insert the input elements and labels in the next
step:
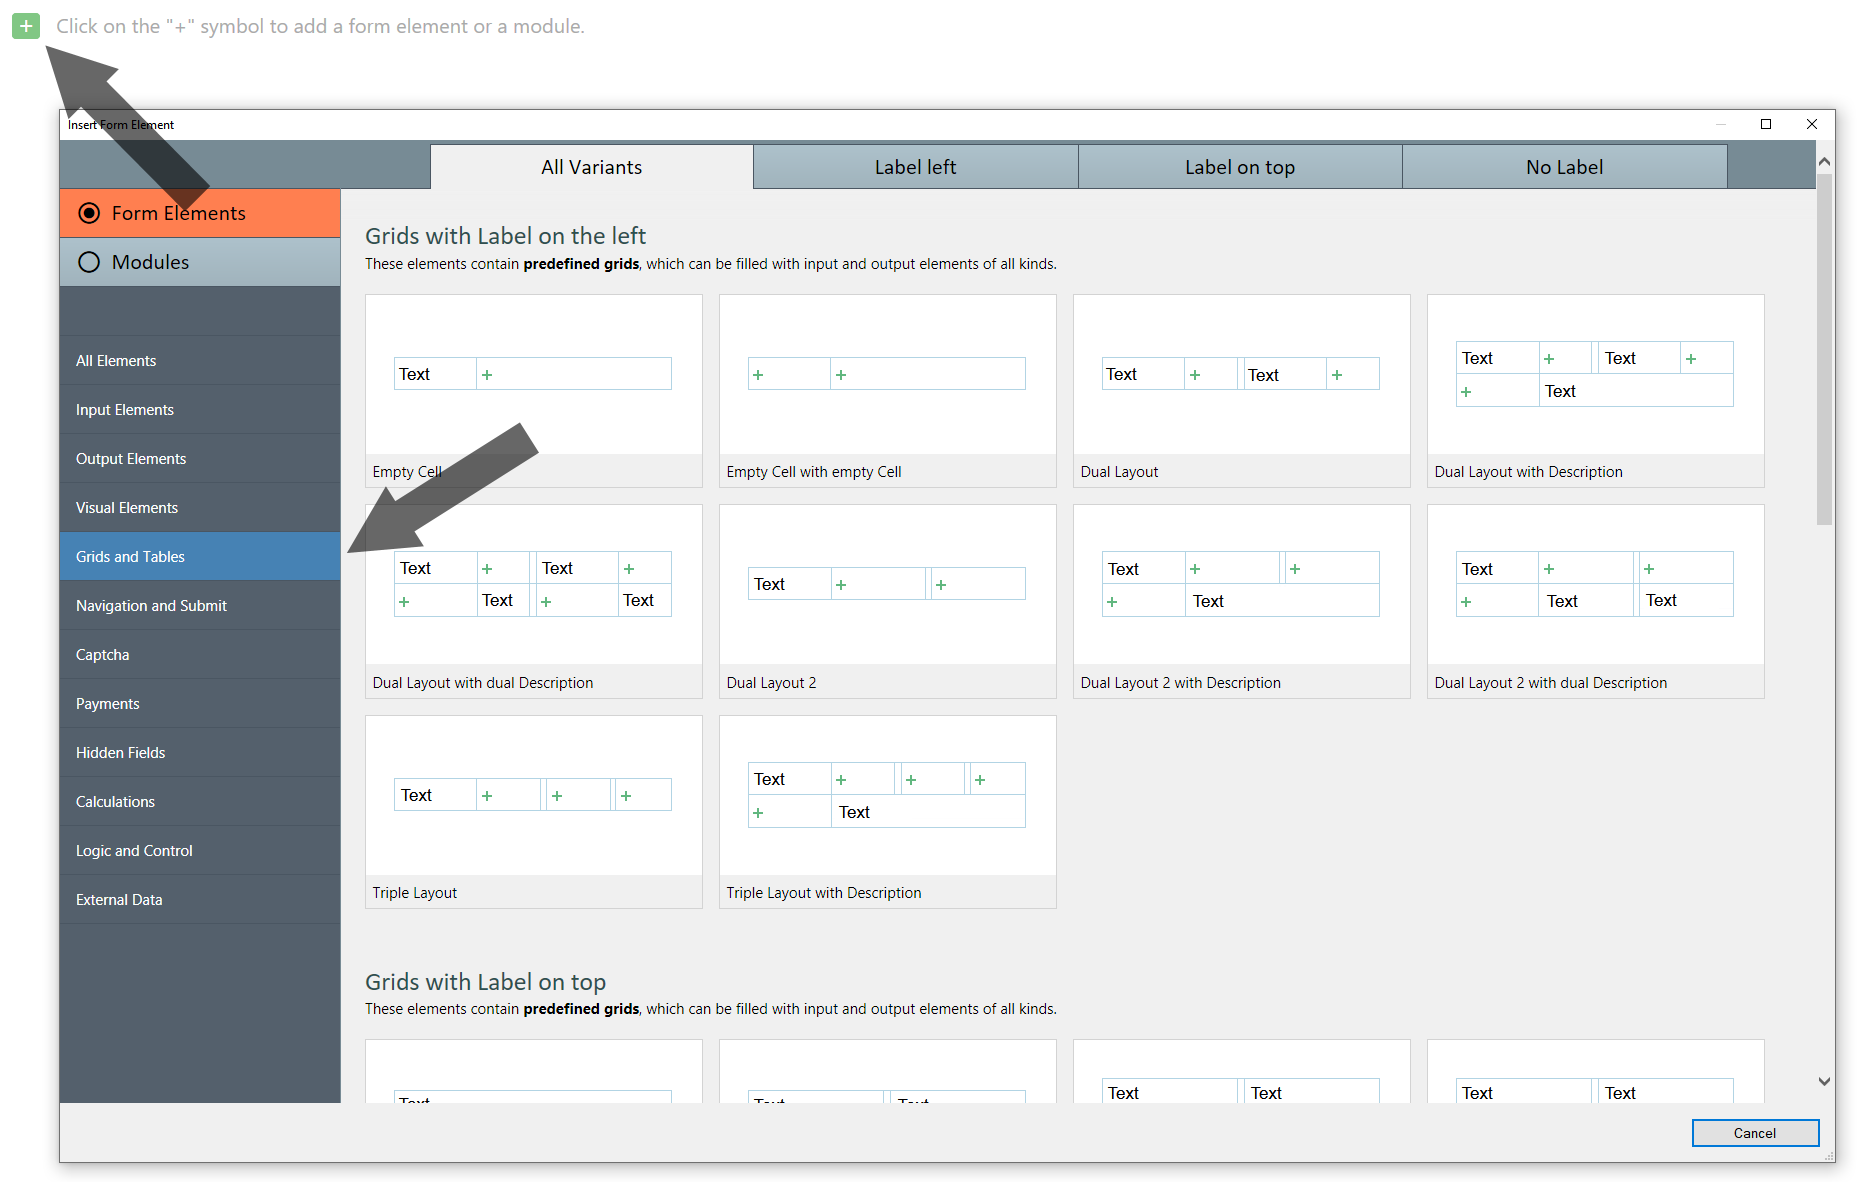
Since input elements with label are frequently used in practice, there are already elements with label in the program for this purpose, which simplify the editing.
However, it is important to understand that this is only a combination of a grid with 2 cells, a label and an input element.
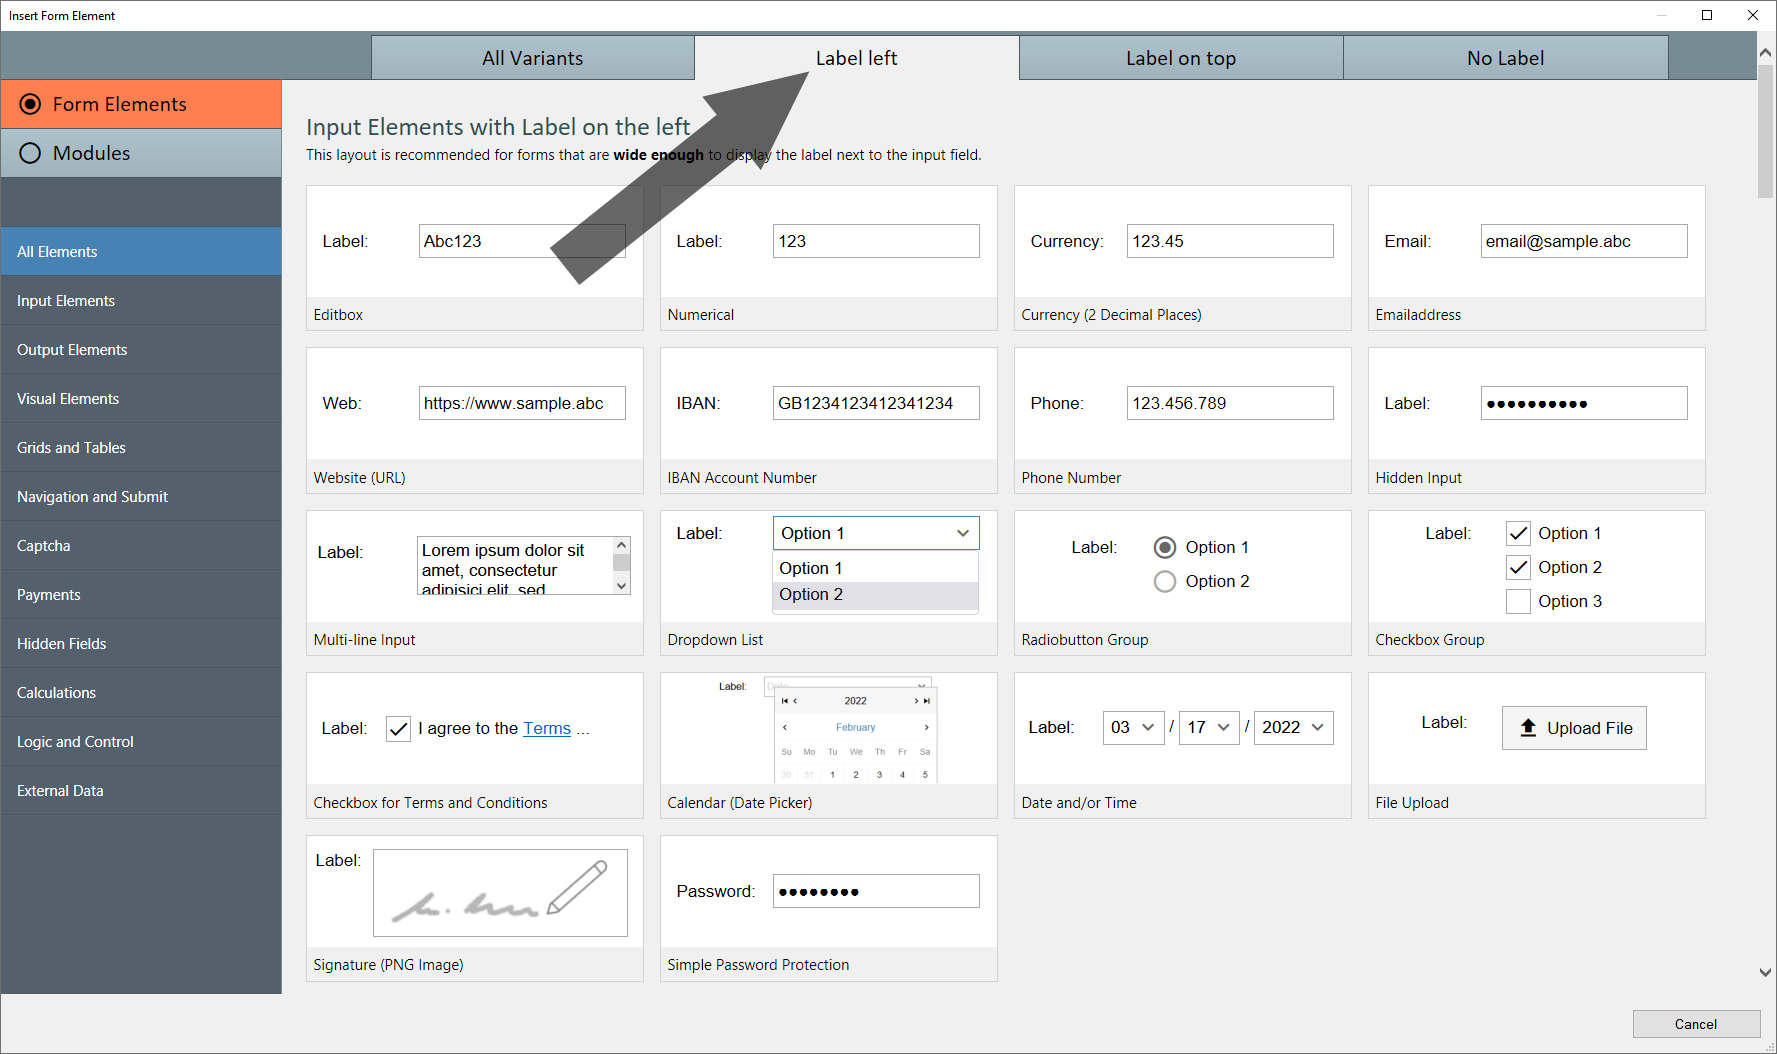
Input Elements with Label on the Left
Insert an element in the layout "Label Left":
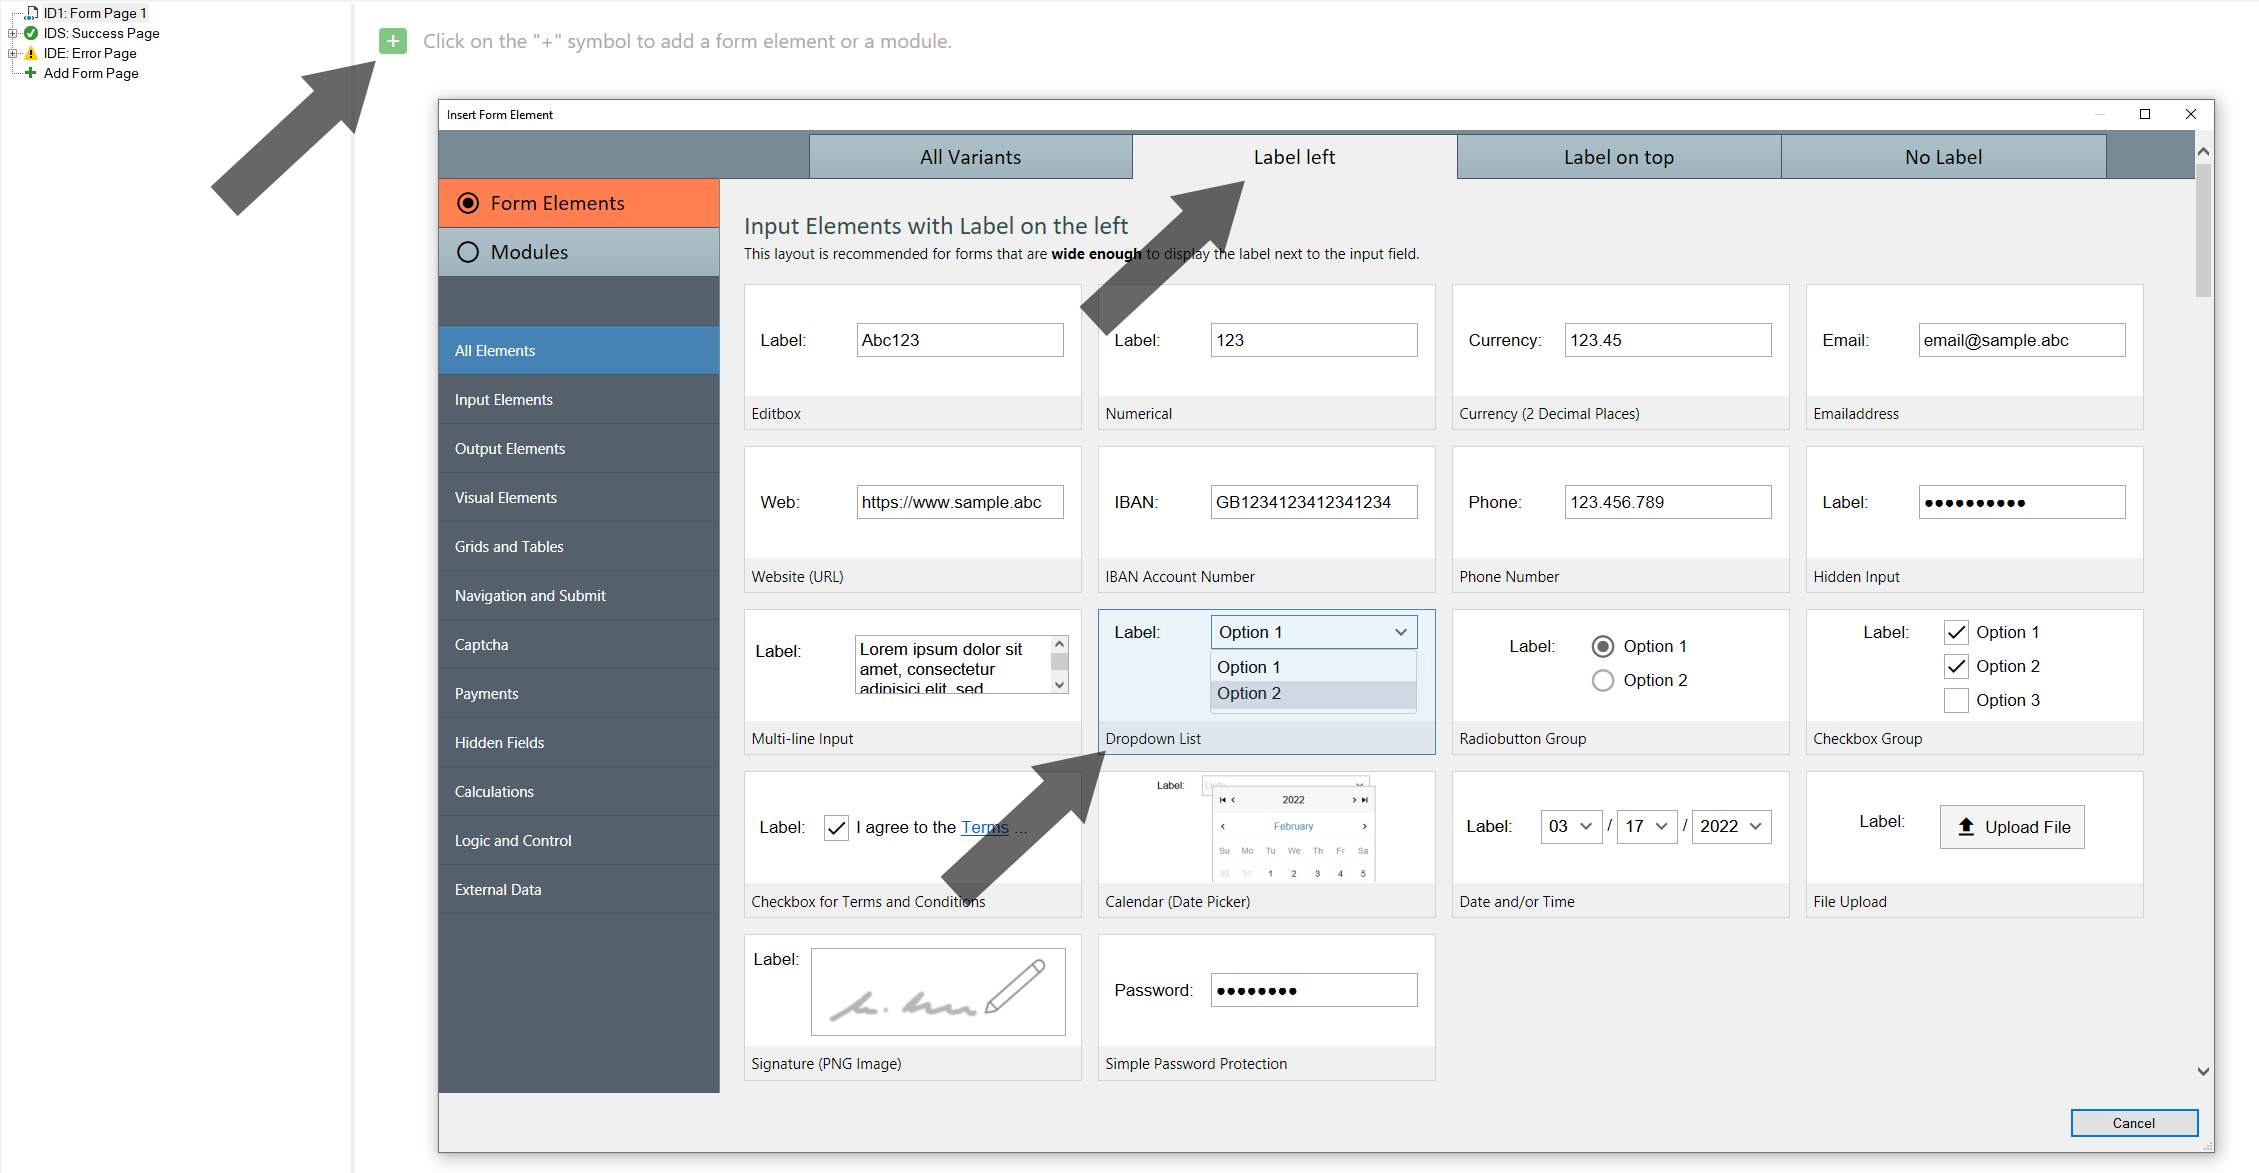
The following example adds a "Dropdown List" (with Label on the left) for selecting an option:
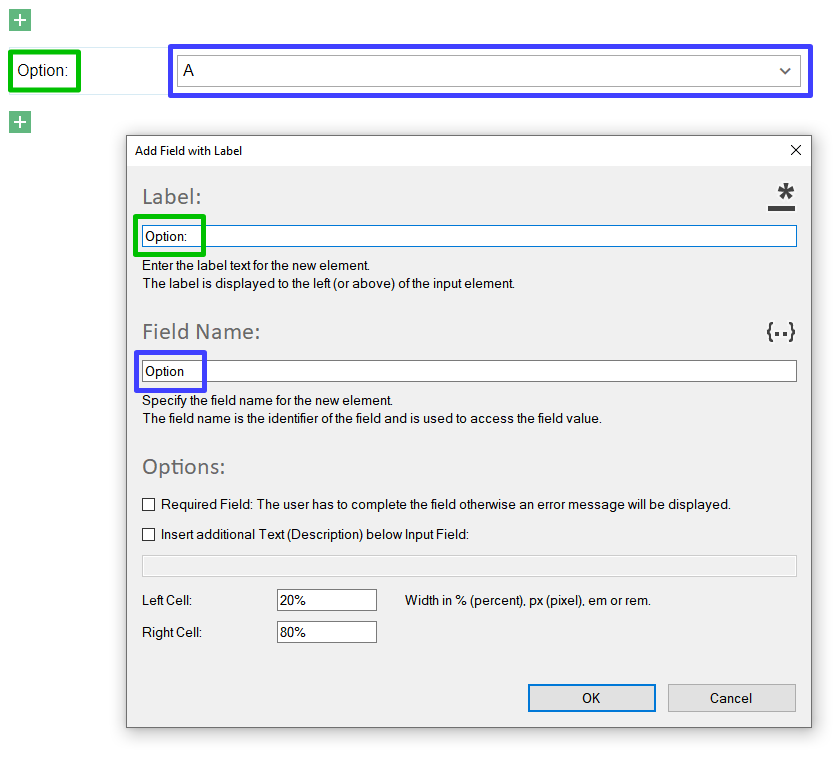
If you want to insert additional text or a description under the input field, then select the option: "Insert additional Text (Description) below Input Field" and enter the corresponding text in the input field below. The text can be changed after inserting e.g. add a link or change the text color.
Input Elements with Label on Top
Insert an element in the layout "Label on top":
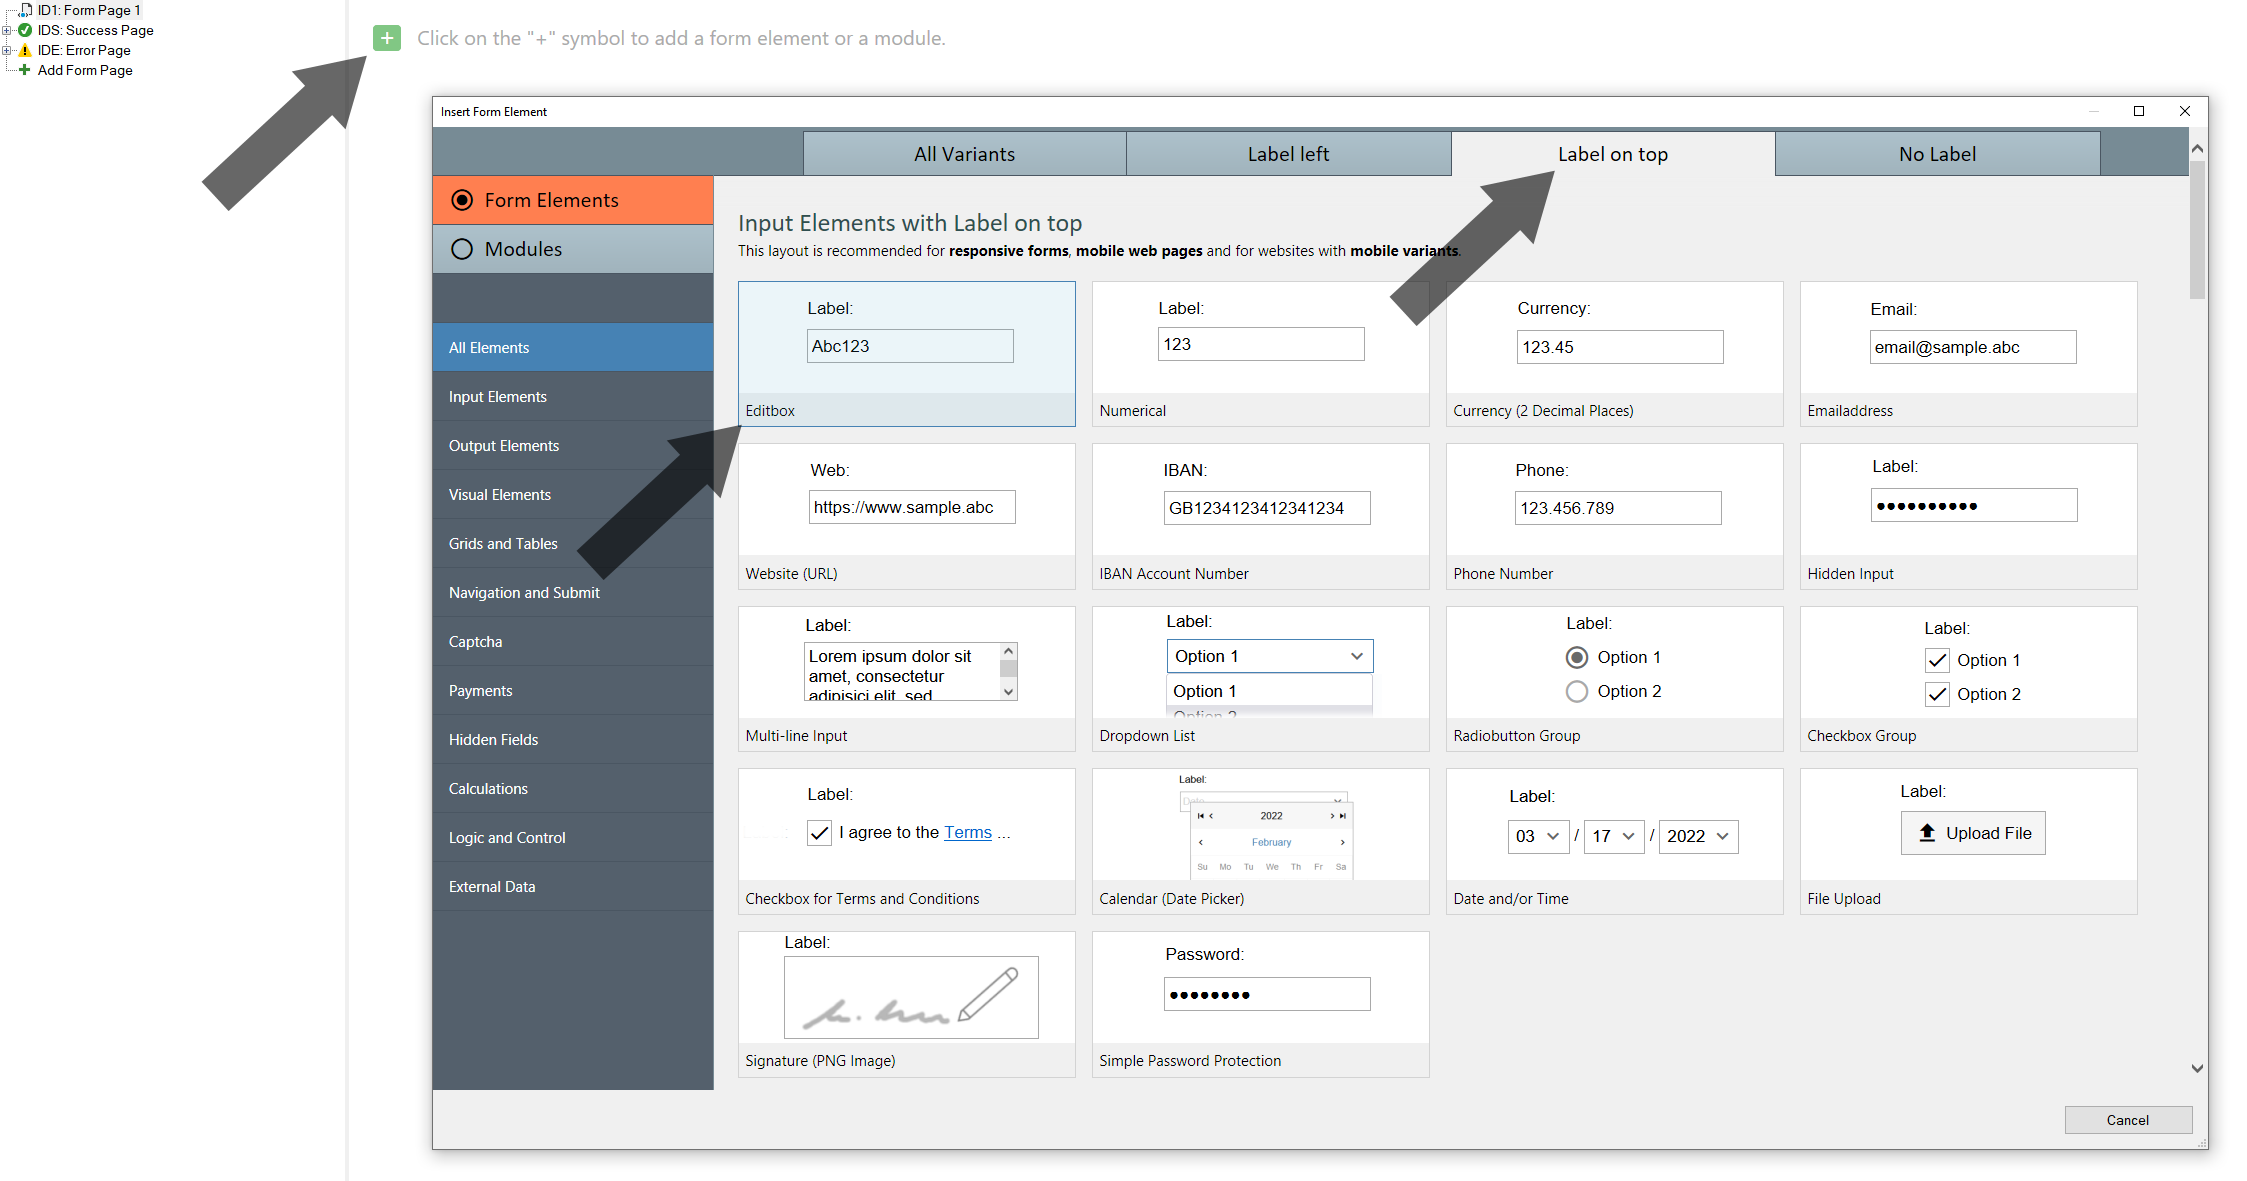
The following example adds a input field of the type "Editbox: Single-line Input" (with Label on top) for entering the name:
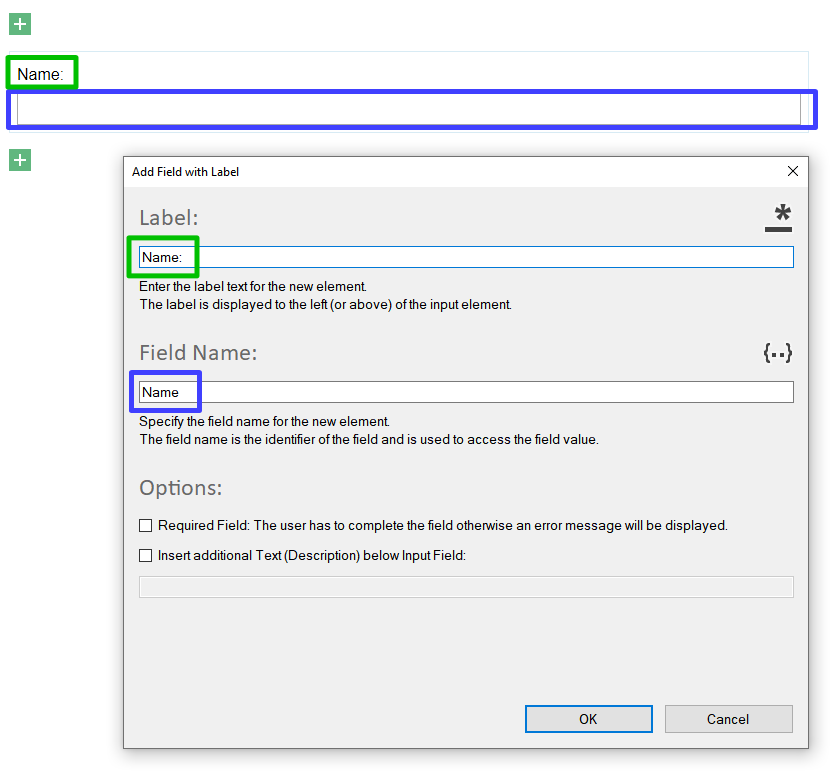
If you want to insert additional text or a description under the input field, then select the option: "Insert additional Text (Description) below Input Field" and enter the corresponding text in the input field below. The text can be changed after inserting e.g. add a link or change the text color.
Please note, that there is a difference between "Label on top" and a normal container with 2 rows. The upper cell uses a reduced padding-bottom and the lower cell uses a reduced padding-top. To apply the new spacing for 2 normal rows, use "Edit Cell" for each row.
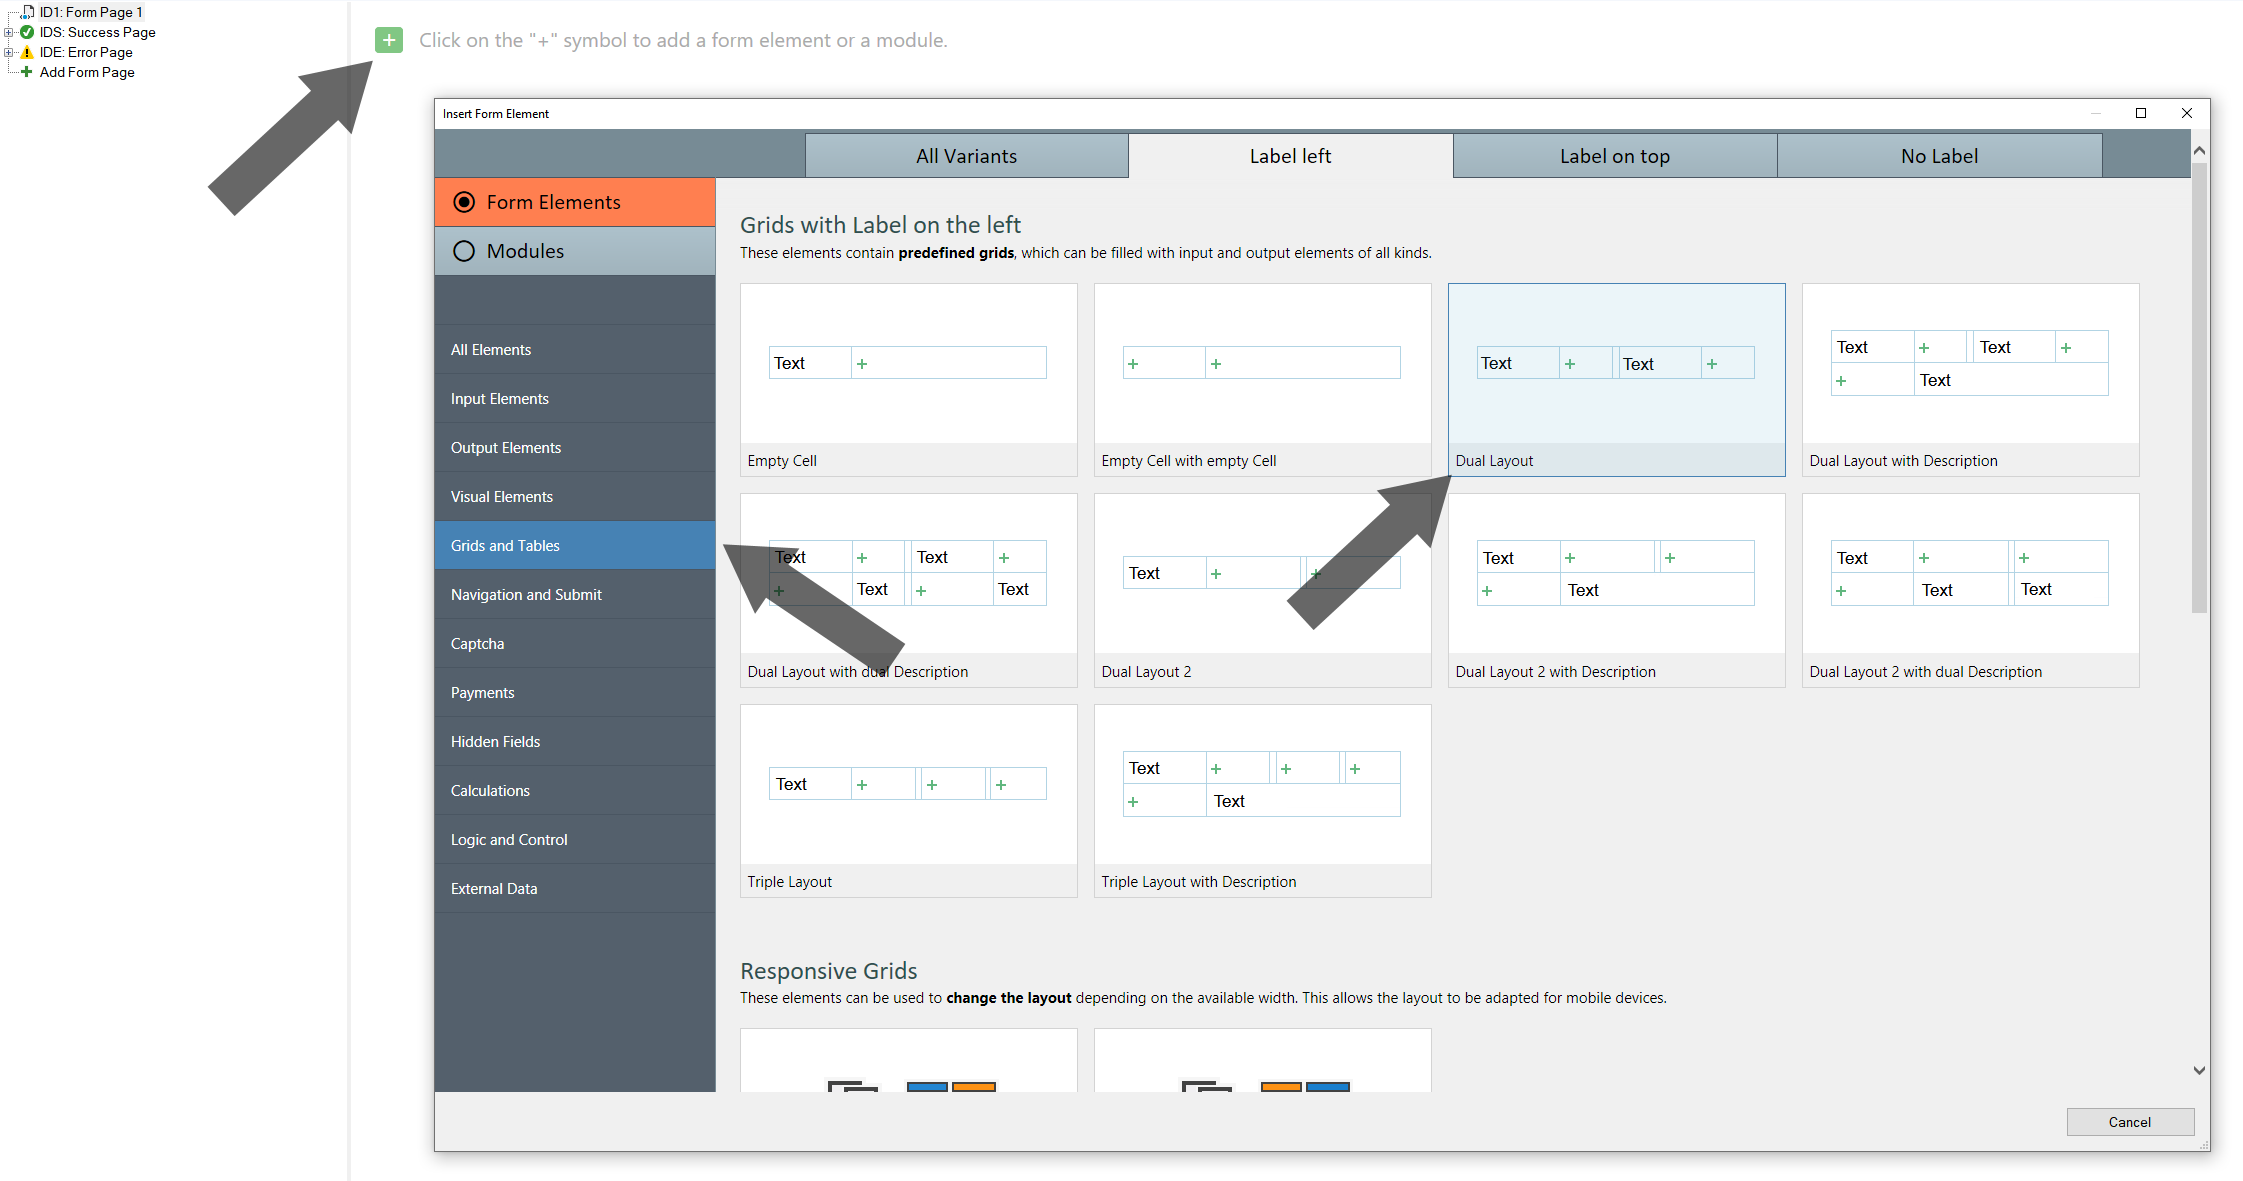
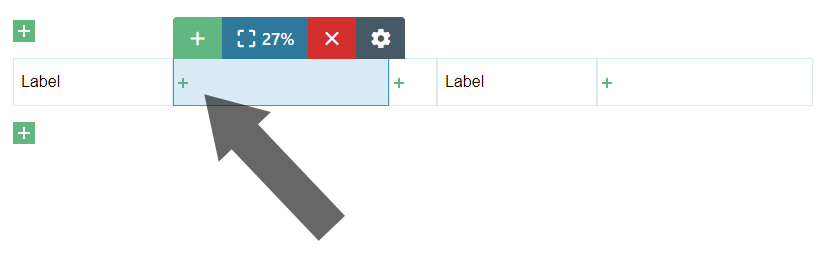
Two (or more) Input Elements with Label in a Row
Go to e.g. "Grids and Tables" > "Label left" and select "Dual
Layout".
It is not required to build the layout by hand!
Click on the "Label" or use the context-menu and select "Edit Label" to edit the label (text):
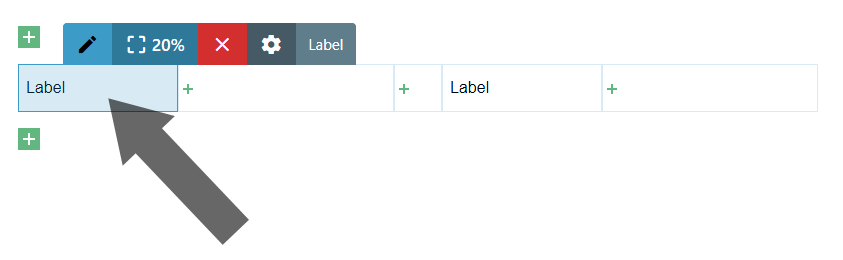
Click on the "+" icon (cell) or use the context-menu and select "Add Element" to insert an "Input Element":
The example explained above is intended to convey the basics.
- You can find many pre-defined custom layouts with "Label
on the left" and "Label on top".
It's not required to build the layout by hand! - With the help of grids almost every layout can be realized.
- You can split cells of a grid or add more rows to a grid.
- It is even possible to insert a container in a cell of a grid.
- You can copy and paste a grid.
- You can also import and export a grid, e.g. to use the grid in another form.
- See also: Grid