Grid (Layout)
Arclab® Web Form Builder
What is a Grid?
A grid (container) is used to arrange the various form elements and allows a freely definable layout.
A form page can contain an unlimited number of grids.
It is not necessary to put all form elements into a single grid.
Basic Sample: Grid with 2 Cells

The grid hosts 2 cells, Cell1 [25%] and Cell2 [75%].
Each cell can contain
a form element:

The grid hosts 2 cells, Cell1 [25%] contains a label and Cell2 [75%] contains an editbox (input field).
See also: Input Elements with Label
Columns and Rows
A grid can host multiple columns and rows.
- Cells (columns) are arranged side by side until the total column width reaches 100% of the grid width.
- A cell with a width of 100% fills a whole row.
Sample: Grid with 3 Cells

The first two cells have a total width of 50% (25%+25%). The third cell
has a width of 75%.
Since the total width of the three cells would exceed
100%, the third cell is pushed to the next row.
See also: Input Elements with Label
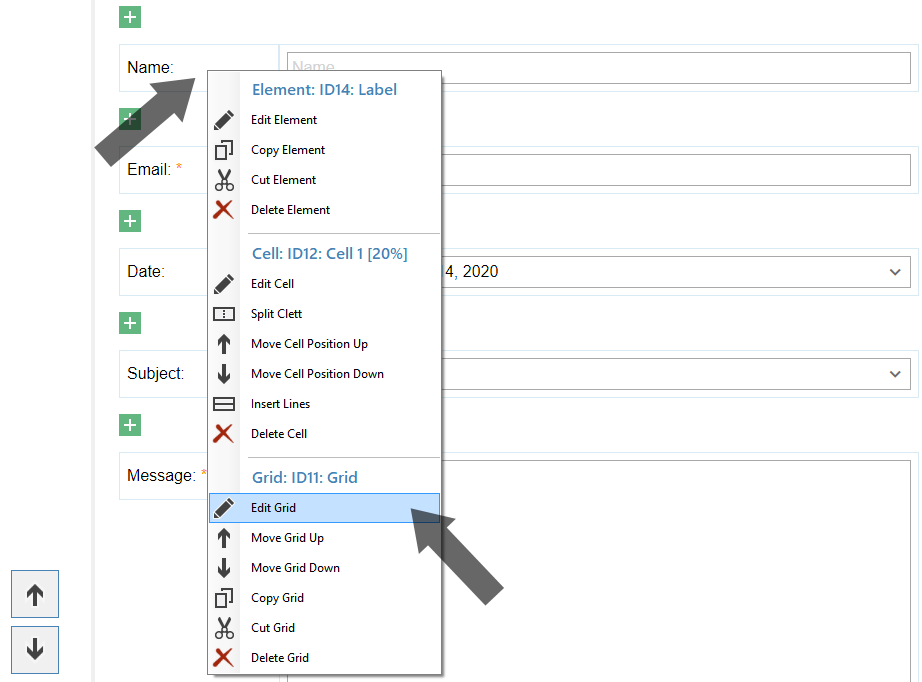
Edit Grid
Right-click to open the context-menu and select "Edit Grid":
In the following dialog you can edit cells, move cells and add more cells:
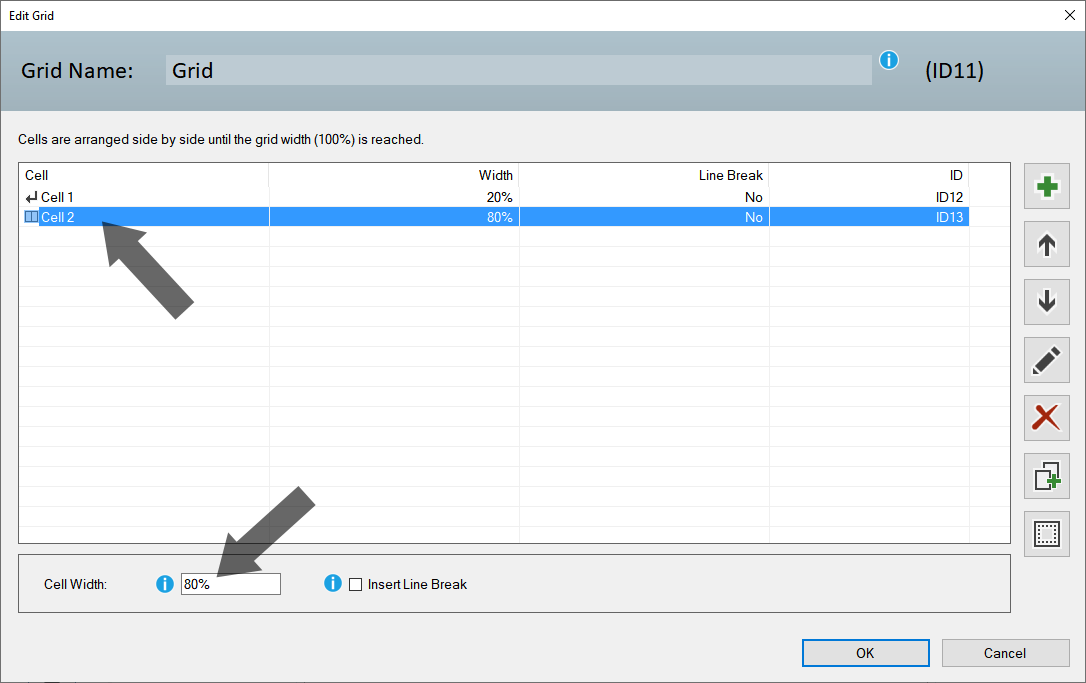
- Click on the Cell and enter the new width of the selected cell.
- Use "Insert Manual Line Break" if the cell should be pushed to the next row even if the total width has not reached 100%.
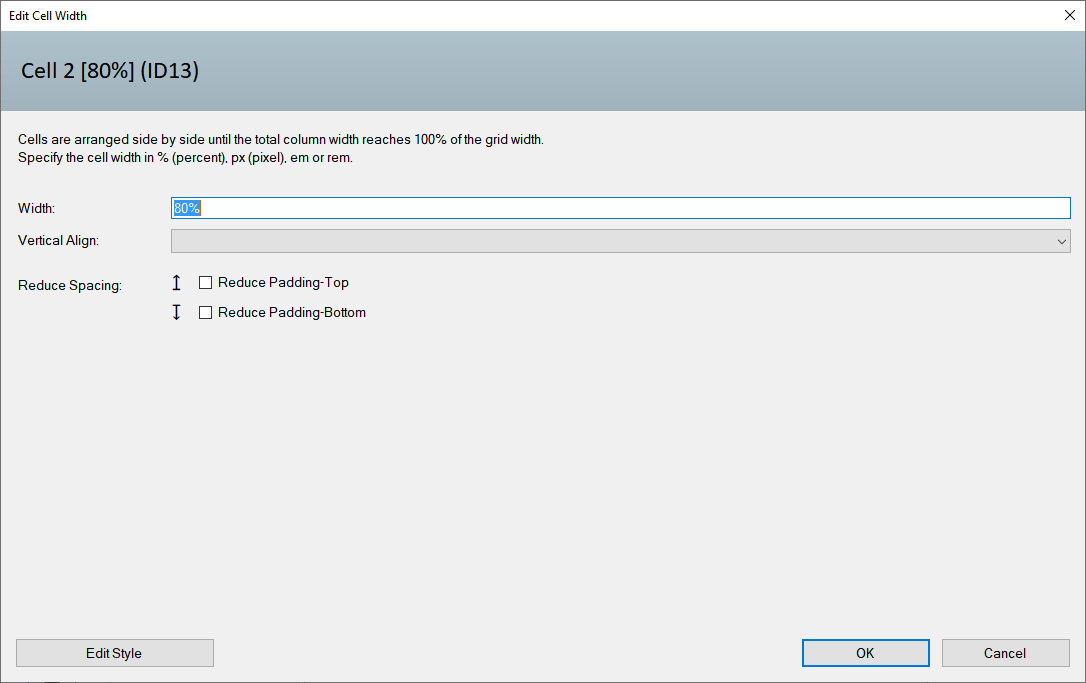
Edit Cell
You can edit a cell directly within a grid. Click on the cell
width in the hover-menu:

You can directly change the cell width or reduce the padding (top/bottom) here:
... or right-click to open the context-menu:
- With the function "Edit Cell" you can easily change the width of the cell.
- Use "Split Cell" to divide an existing cell into several cells.
- The "Insert Lines" function inserts rows, 100% wide, under the current cell.
- Use the "Up" and "Down" arrows to move the position of the cell inside the grid.
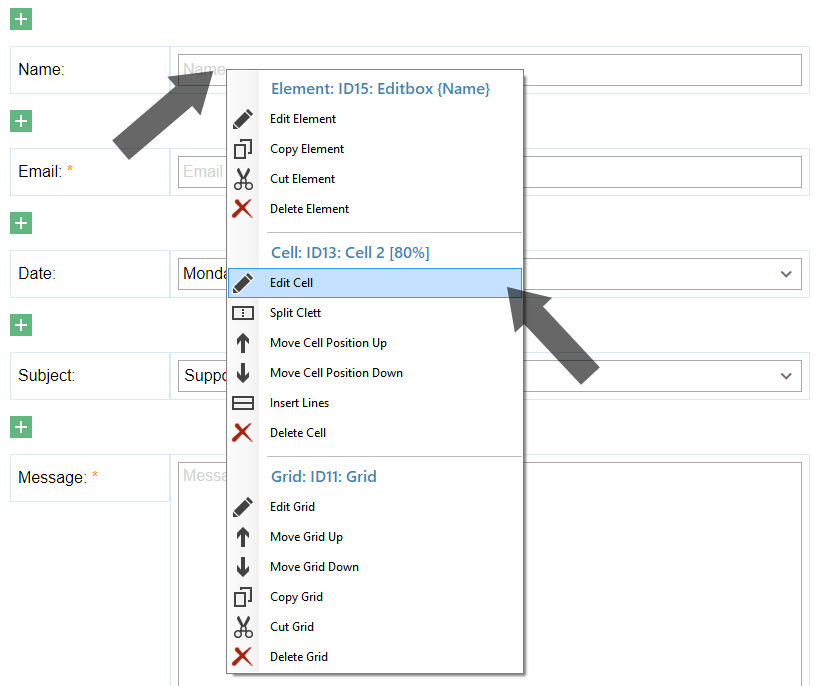
Copy/Cut and Paste a Grid or Element
Right-click on the element or grid to open the context-menu:
- Use "Copy Grid" to make a copy of the grid.
- Use "Cut Grid" to move the grid to a different position or form page.
- You can also copy or cut "Elements".
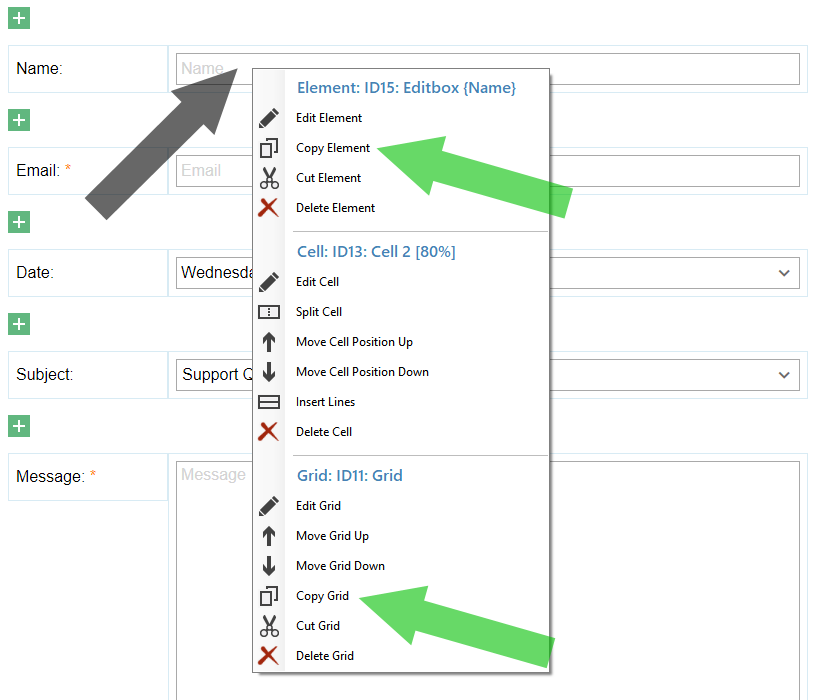
New in version
5.5.5:
If you copy or cut an element and then use "Insert Element"
a new clipboard dialog will appear.
This dialog can be activated or deactivated
via "Program Options" > "Editor Configuration" > "Show Clipboard".
If you have deactivated the new clipboard dialog or are using an old
version, proceed as follows:
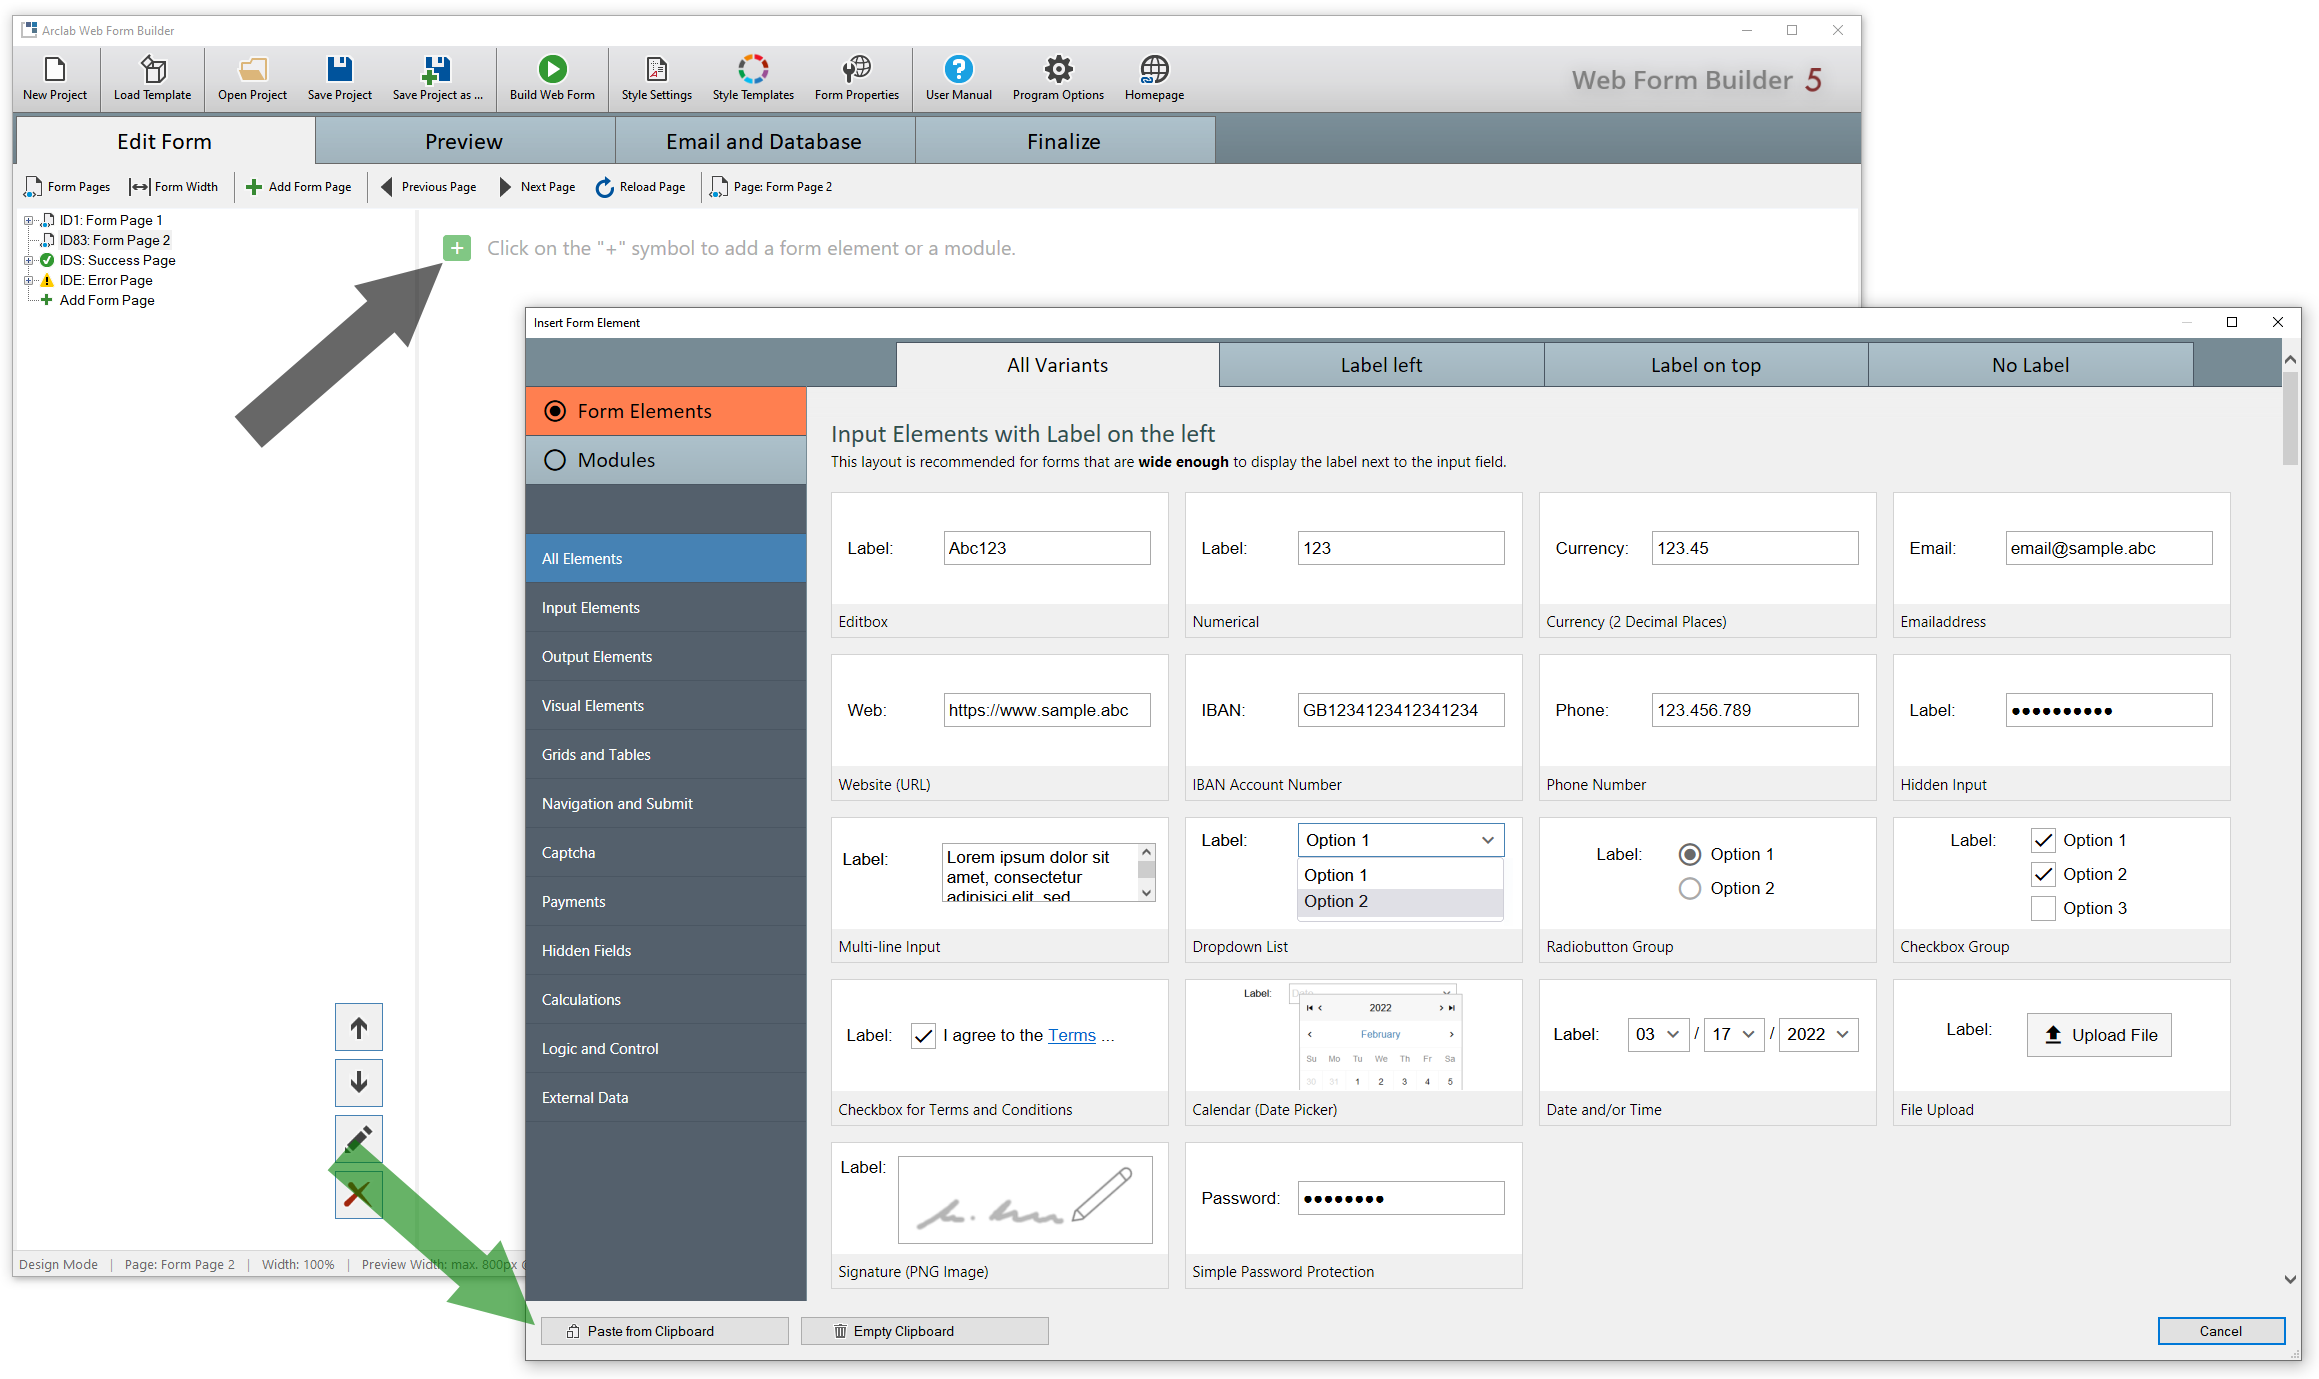
Use "Add Element" or click
on the "Add" icon to paste the element or grid.
In the
"Insert Form Element" dialog click on the button "Paste from Clipboard"
at the bottom:
Rename a Grid
Right-click to open the context-menu and select "Edit Grid":
In the following dialog you can edit the name of the grid:
(this name
is only for better identification of the grid and
has no effect on the form)
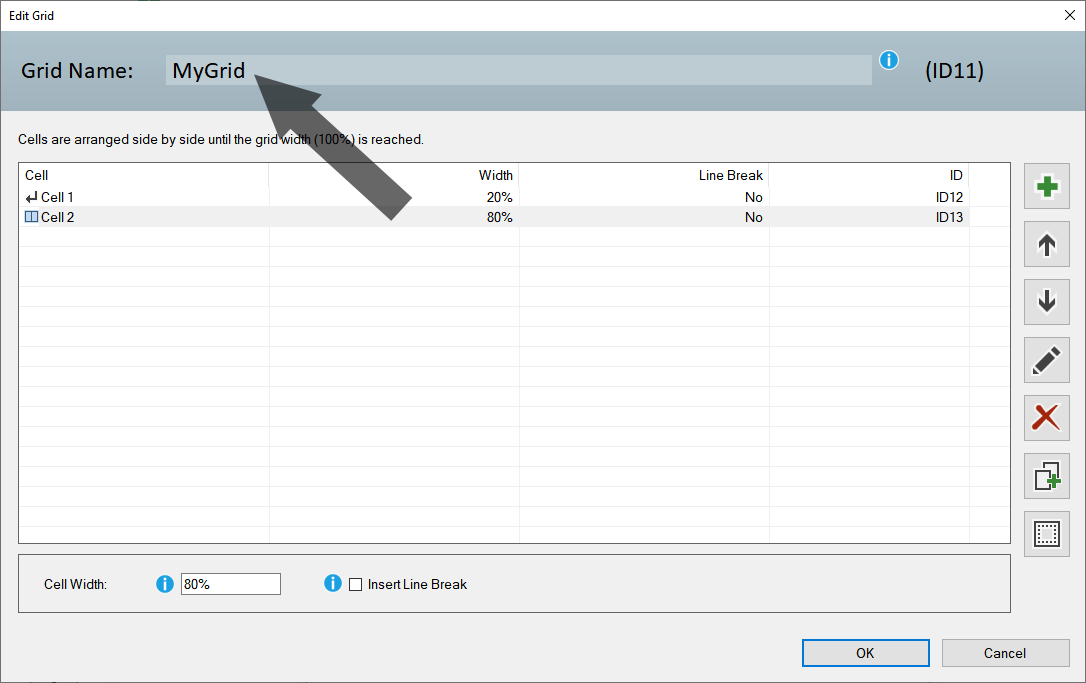
Simply remove the name (leave empty) to remove/reset the grid name.
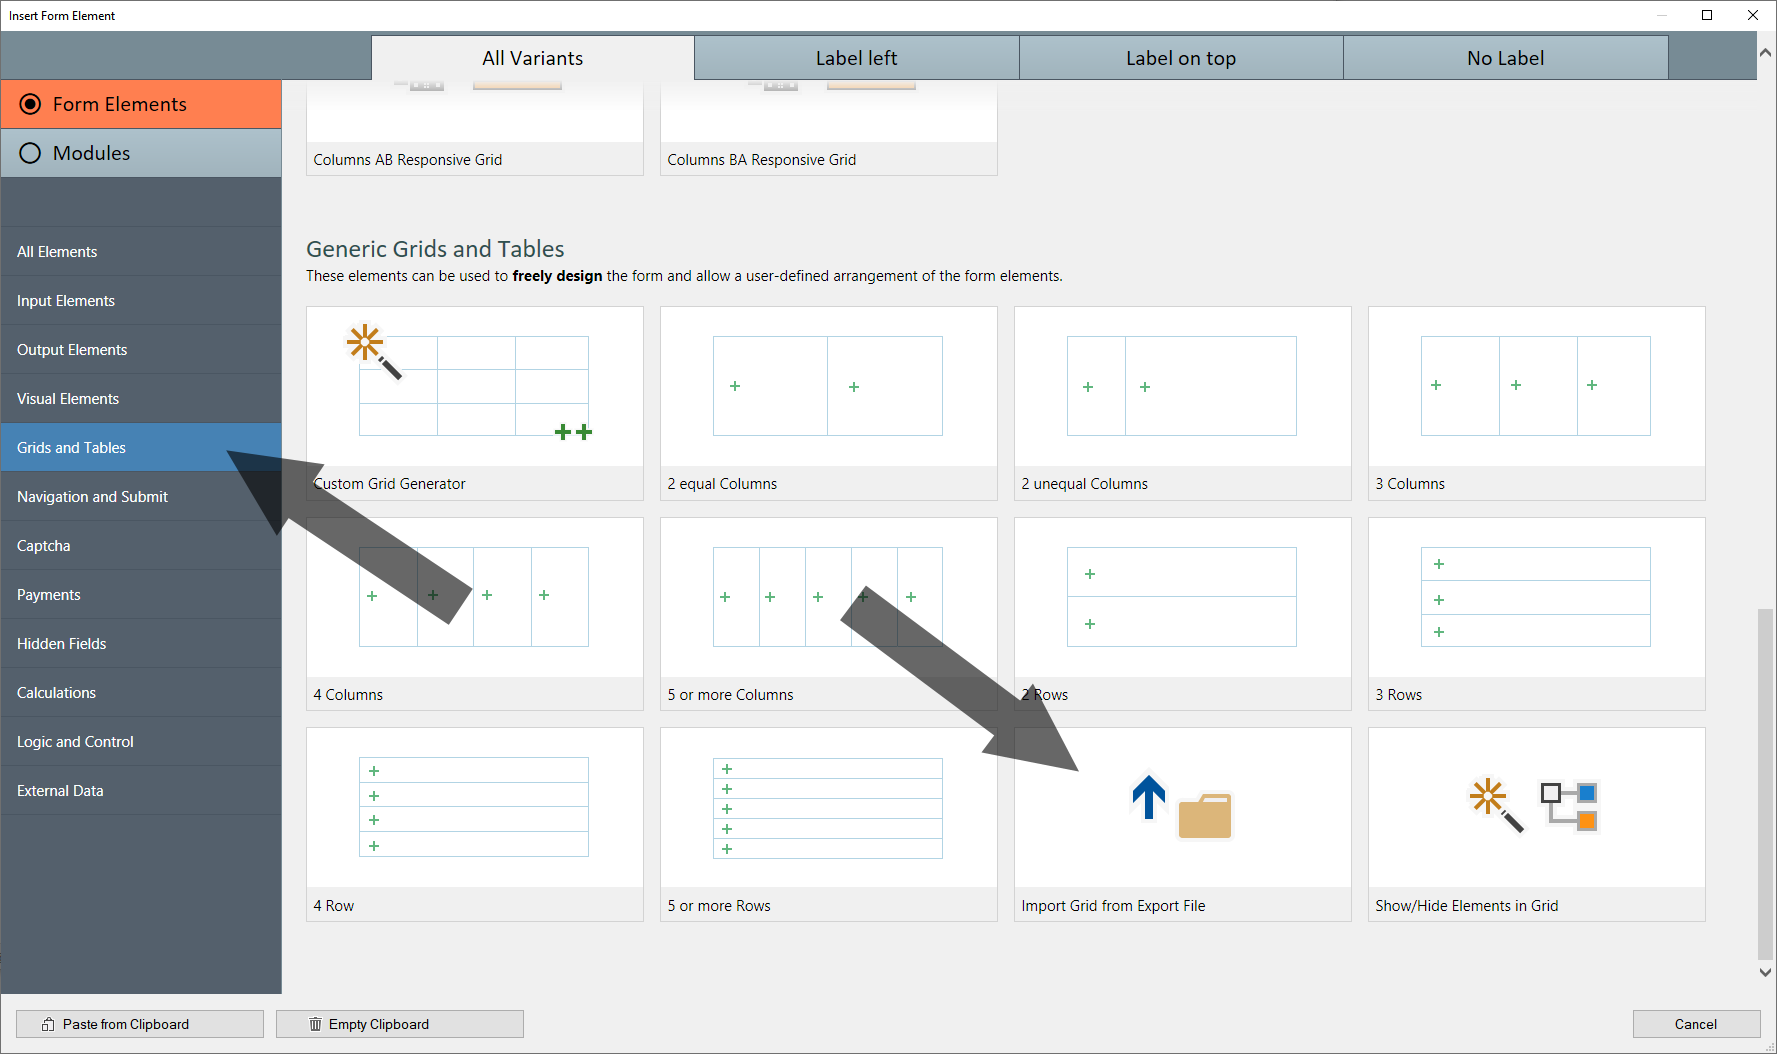
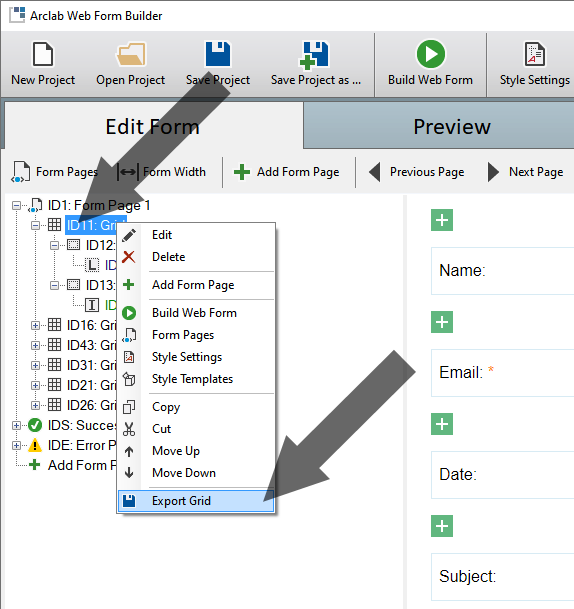
Import and Export
If you want to reuse a grid in another form, you can export the grid to a file and import it into another form. Please note that you can only export grids, not entire pages. If you want to reuse entire pages, we recommend that you create a form (project) as a template instead.
Export a Grid:
Right-click on the grid in the tree view (on the left) and select "Export Grid" to save the selected grid. This allows you to use the grid in another form.
Import a Grid
Add a new form element and select "Import Grid from Export File" in "Custom Grid" to import a grid: