Arclab® Web Form Builder
How to Insert Web Form Data into MS Excel, MS Access or ODBC
using
Arclab® Web Form Builder and Arclab® Inbox2DB
Transfer of the Form Data to Your PC
With the forms created using Arclab® Web Form Builder, the form data can be easily sent by email or inserted into a MySQL database on the web server. What is generally not possible with a form or script on the web server is the direct transfer of the form data from the web server to an MS Excel file, MS Access file on your computer or to a local database (ODBC).
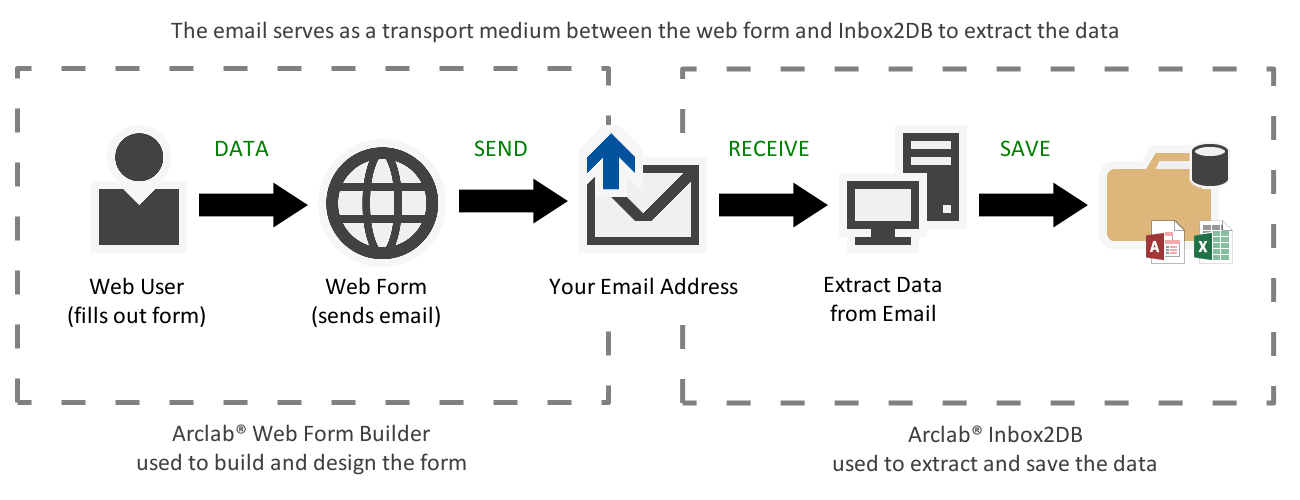
A different approach is needed here, which establishes a connection between the web server and the target files or databases on your computer. This is where Arclab® Inbox2DB comes into play. With the Windows program you can extract data from emails and save them in an MS Excel file, MS Access file or in a local database (ODBC). By using email as a transport medium for data between the web server and your local PC or server, a fast and simple connection is created.
The two programs: Arclab® Web Form Builder and Arclab® Inbox2DB can be used to accomplish this task:
- Use Arclab® Web Form Builder to create a web form that sends the data via email to your email address.
- Use Arclab® Inbox2DB to receive the emails on your PC or local server and insert them into the file or database on your computer or local network.
- This method also has the advantage that no direct access to the web server is necessary.
- Please note that these are two different programs, for each of which you need a separate license.
How it works ...
The following diagram should illustrate the process and interaction of the two programs:
- You can test both programs on your own system before purchasing.
- These are software products that run on your systems and are not a hosted service, which means that no data is transferred to third parties.
- The web form runs on your own website and Inbox2DB runs on your own PC or server.
Arclab® Web Form Builder
Web Form Development Software and Visual Form Editor for Windows
PC
Further information and details
open_in_new
Arclab® Inbox2DB
Email/Form to Database Parser Software for Windows PC and Server
Further information and details
open_in_new
MS Excel File Sample
In the following example, the user input from a form is to be written to an MS Excel table. The procedure for an Access file or ODBC database only differs in the definition of the field names and data types, so that you can easily adapt the example for other databases.
First create the form using Arclab® Web Form Builder:
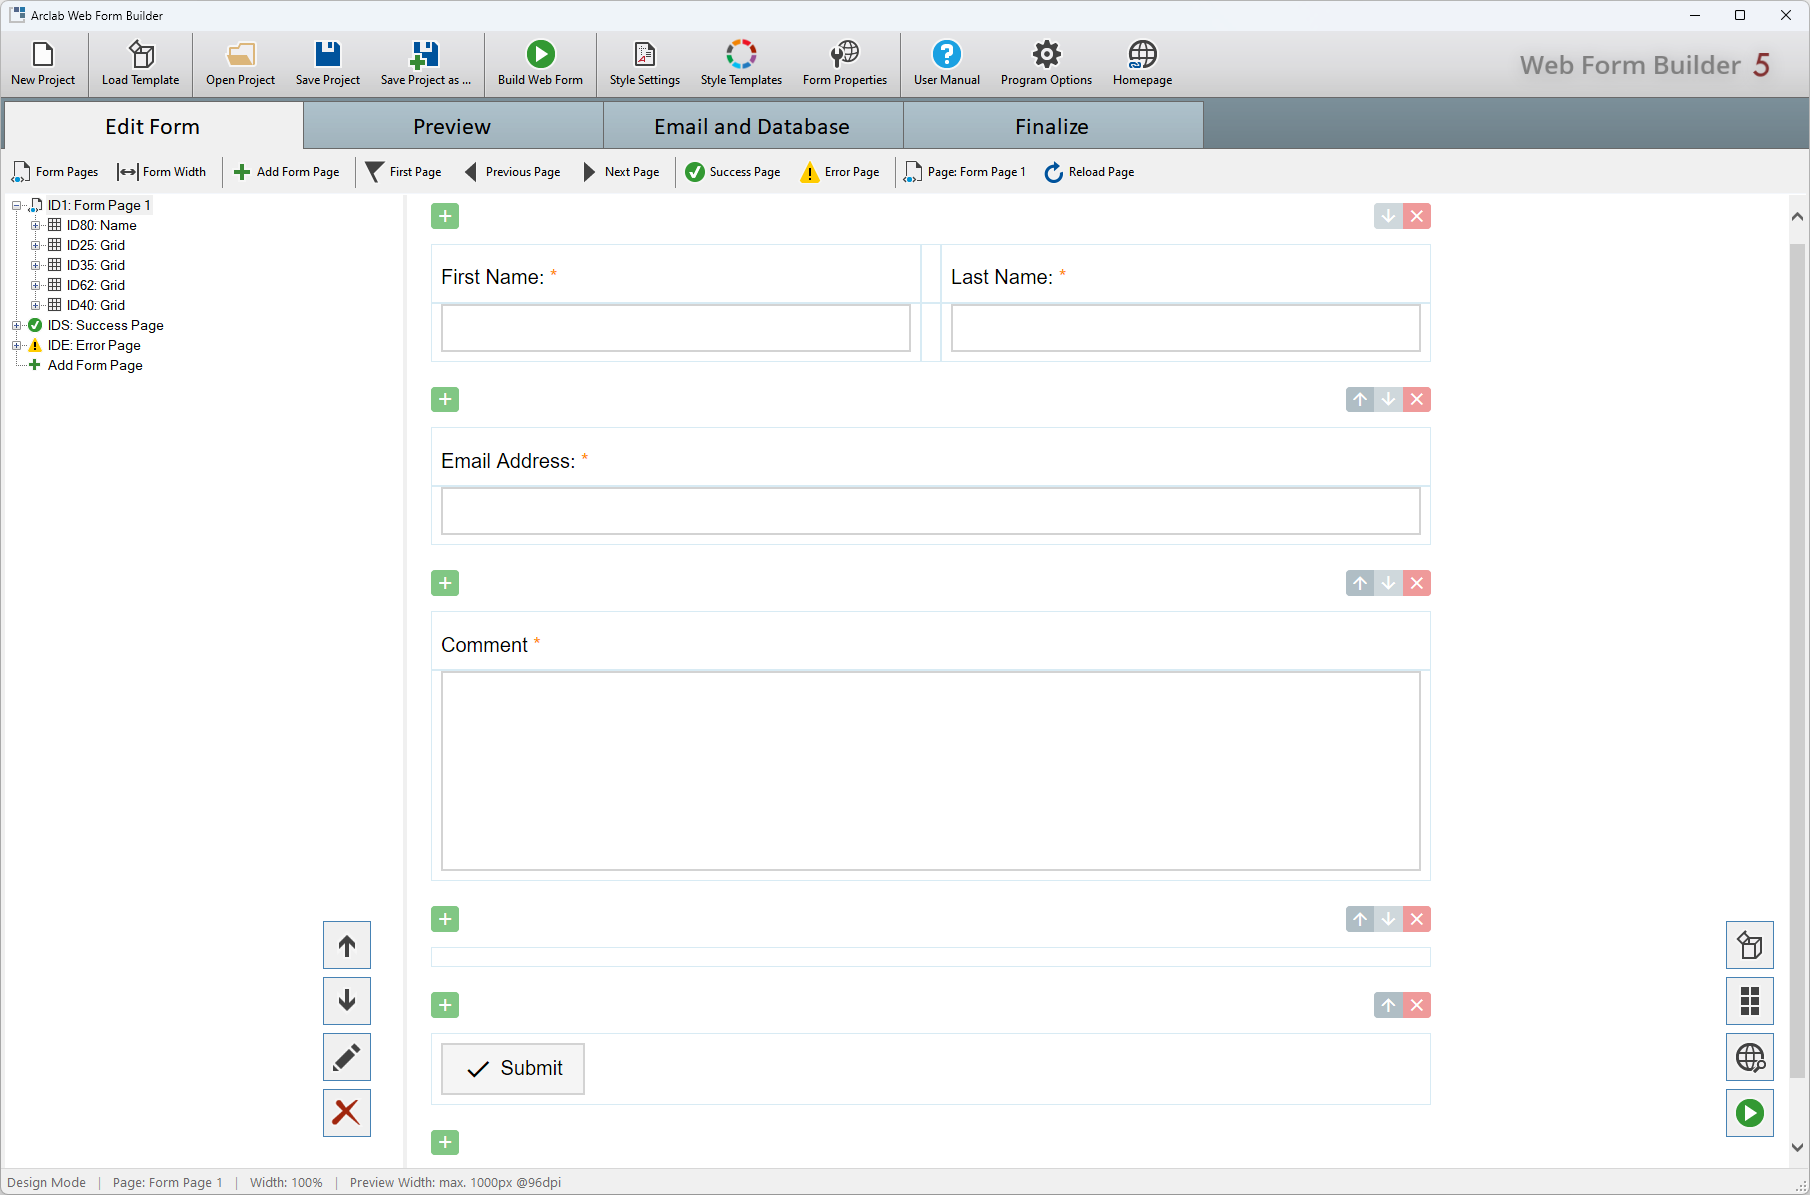
The user input ("First Name", "Last Name", "Email Address" und "Comment")
should be automatically inserted into the Excel file.
To do this,
create a corresponding table in Excel:

Since you can only specify field names and data types in Excel indirectly, the Excel table must be prepared accordingly:
- The first line in MS Excel must contain the field names.
Important: Do not use spaces, quotes or operators ("+-,/*...") for the field names. If you want to separate two words, use an underscore instead of a space. - The second line should contain an example record.
This is particularly important if you want it to contain more than just
plain text.
For long text fields (>255 characters), the example line must also contain an example record with more than 255 characters.
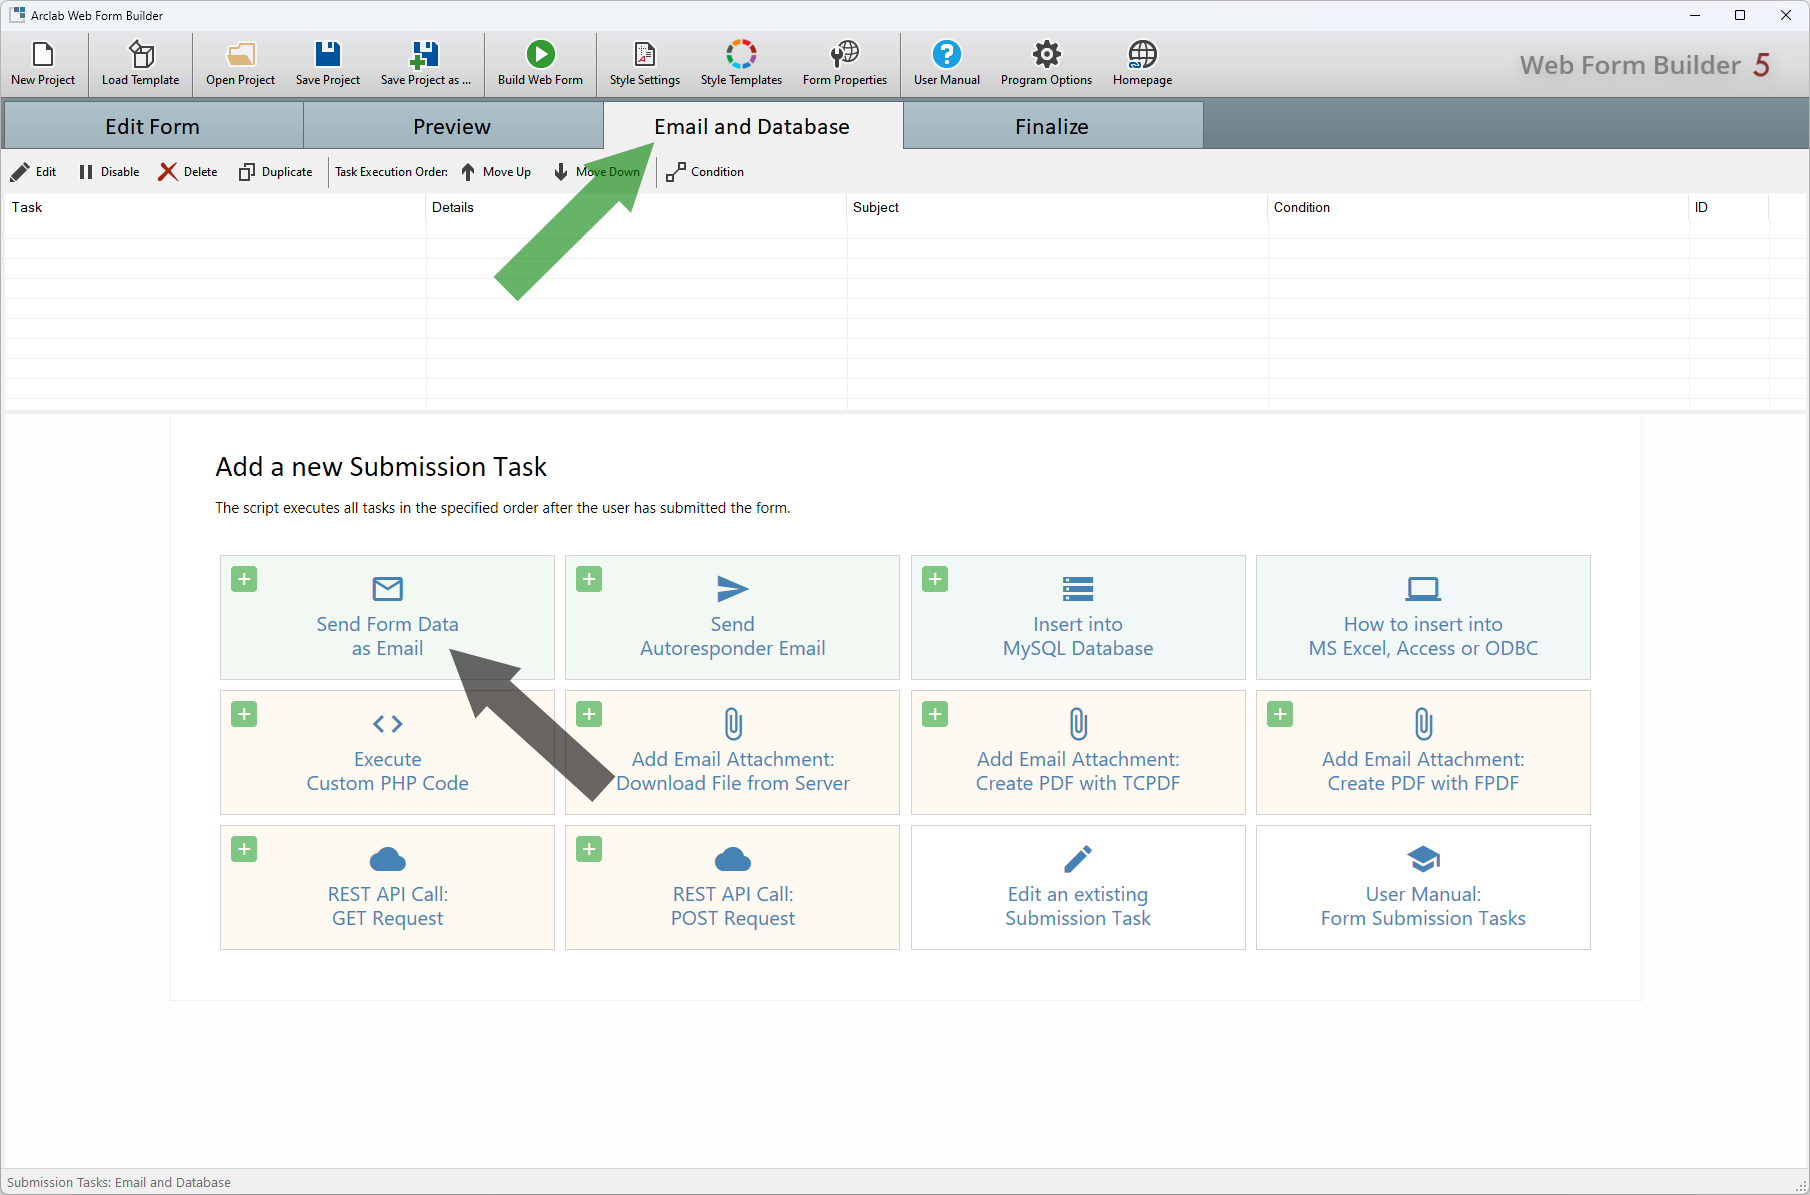
Create a task in Arclab® Web Form Builder to send the
email with the data to be inserted into Excel.
Important: Use
a special “Subject” for the email so that Inbox2DB can distinguish
the email to be processed from the other emails.
Switch to "Edit: Automatic Mode" and click on "Edit Fields, Order and Label" if the "Field Labels" (on the left) don't match the field names in Excel:
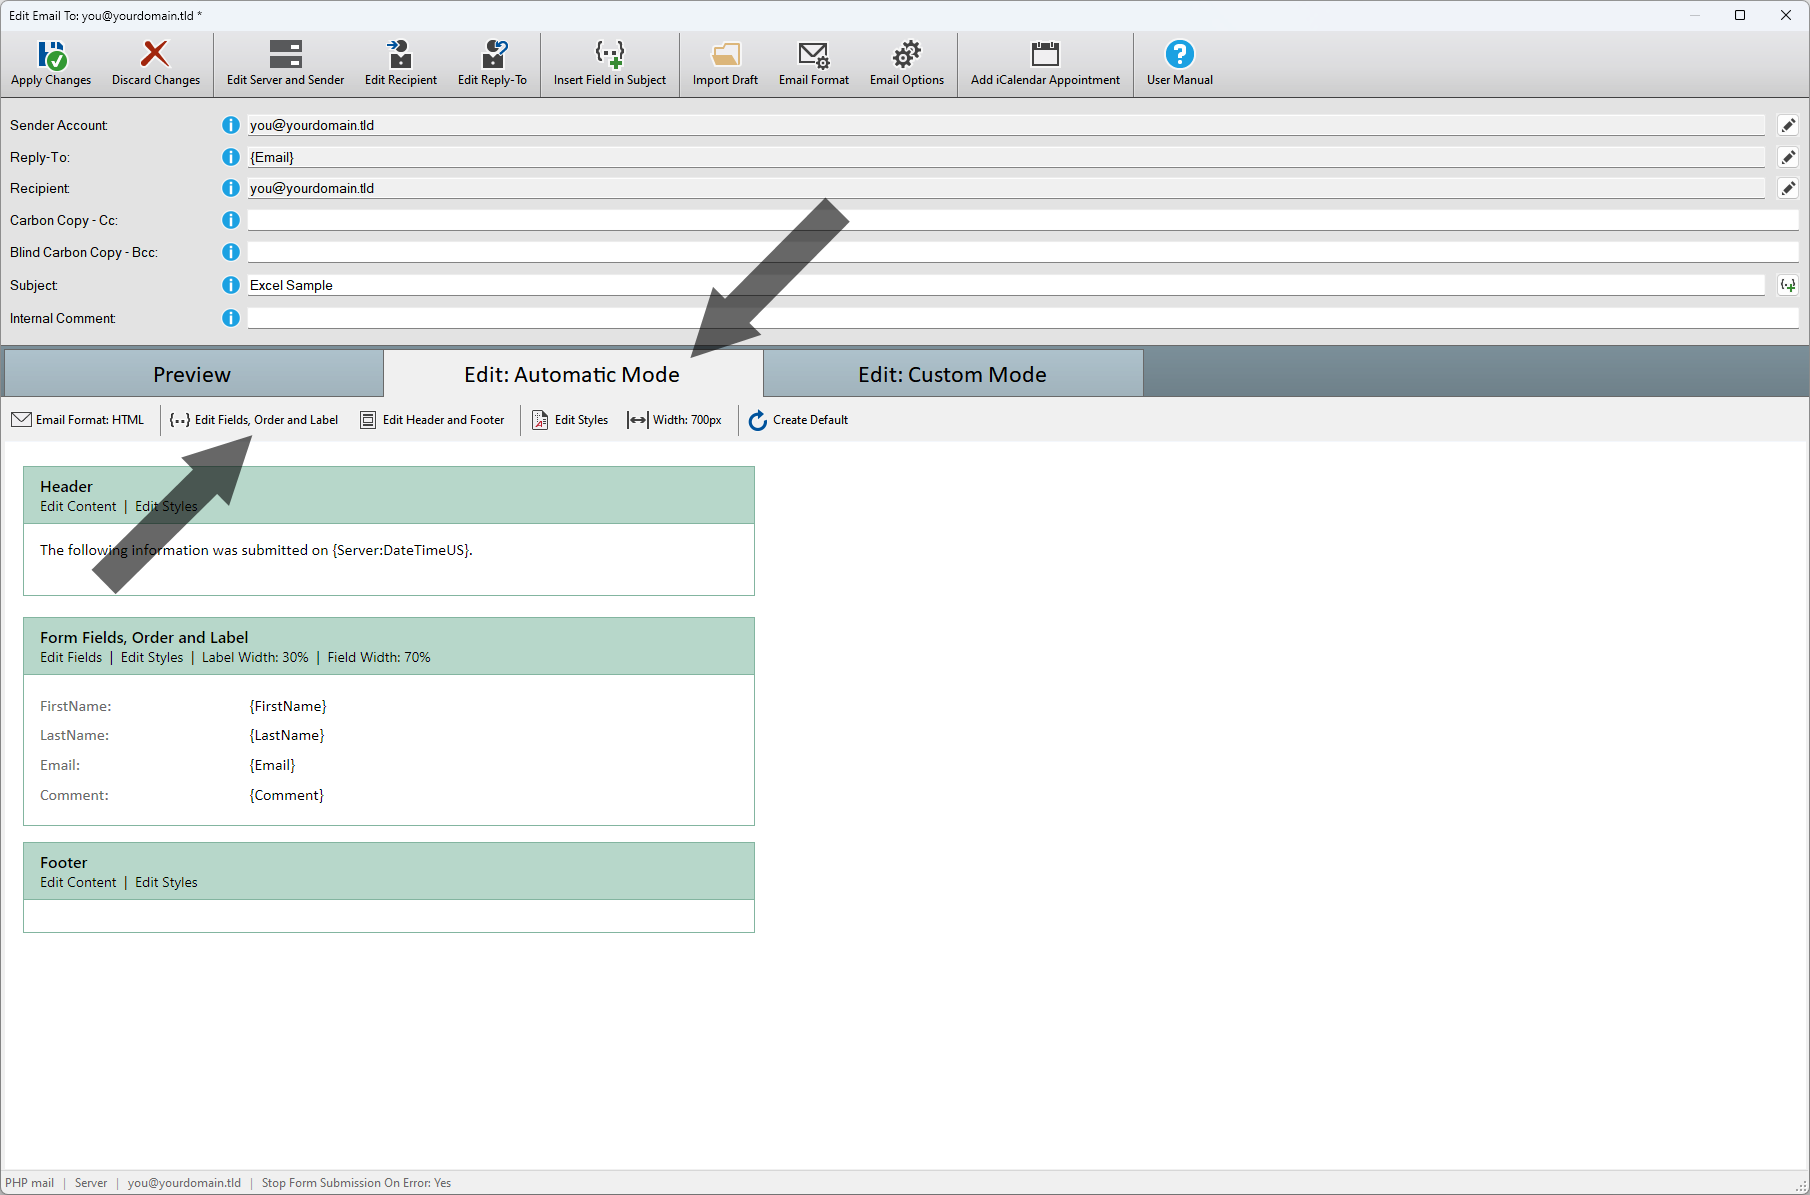
So that Arclab® Inbox2DB can automatically
assign the “Field Labels” to the email, they should match.
If
this is not possible, you must assign the fields manually.

- Upload the form created with Arclab® Web Form Builder to your website, open the form in your web browser, fill out the form and submit it.
- Start Arclab® Inbox2DB and create a new "Data Connection".
- If "Field Label" (Email) and "Field Name" (Excel) match, the fields
are automatically assigned by Inbox2DB.
If not, you can assign manually for "Source Field incl. Separator".
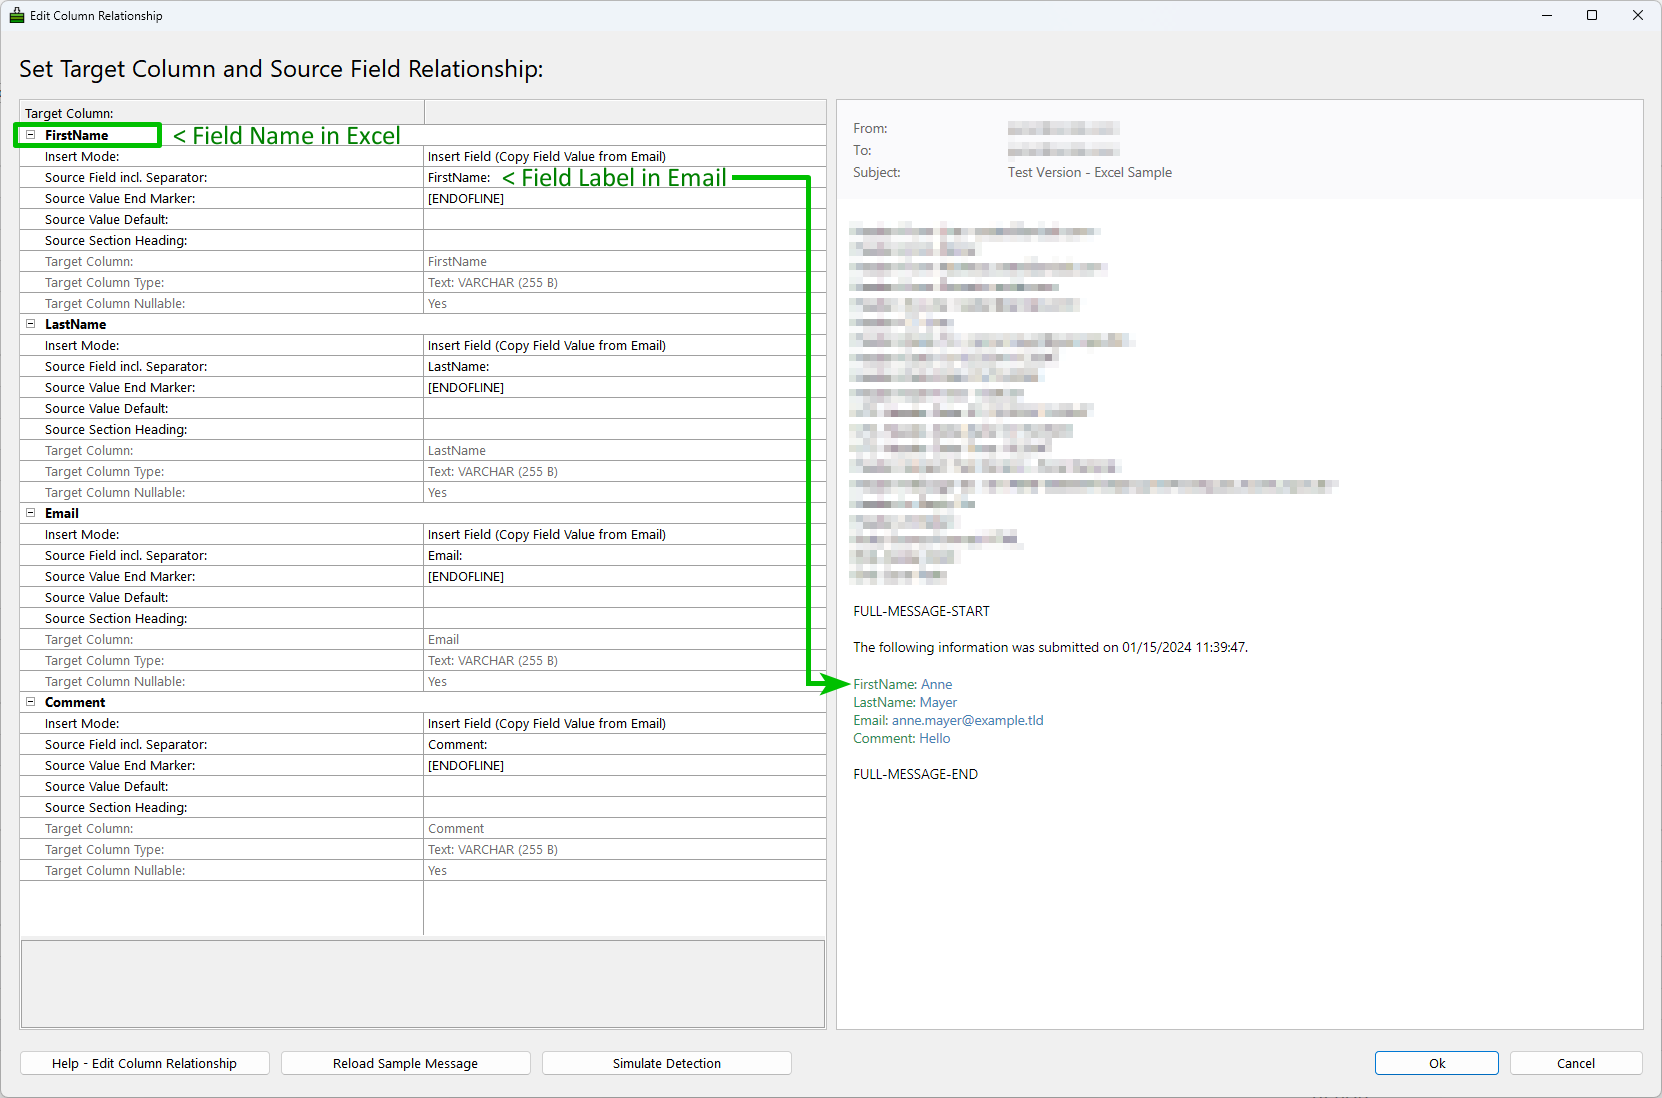
- You should now be able to see the correct field assignment in Inbox2DB.
- Now set a filter so that Inbox2DB only processes the messages created by the form.
- You can use the sender of the form and/or the subject line specified in the email settings as a filter.
- Adjust both accordingly so that only the desired emails are processed!
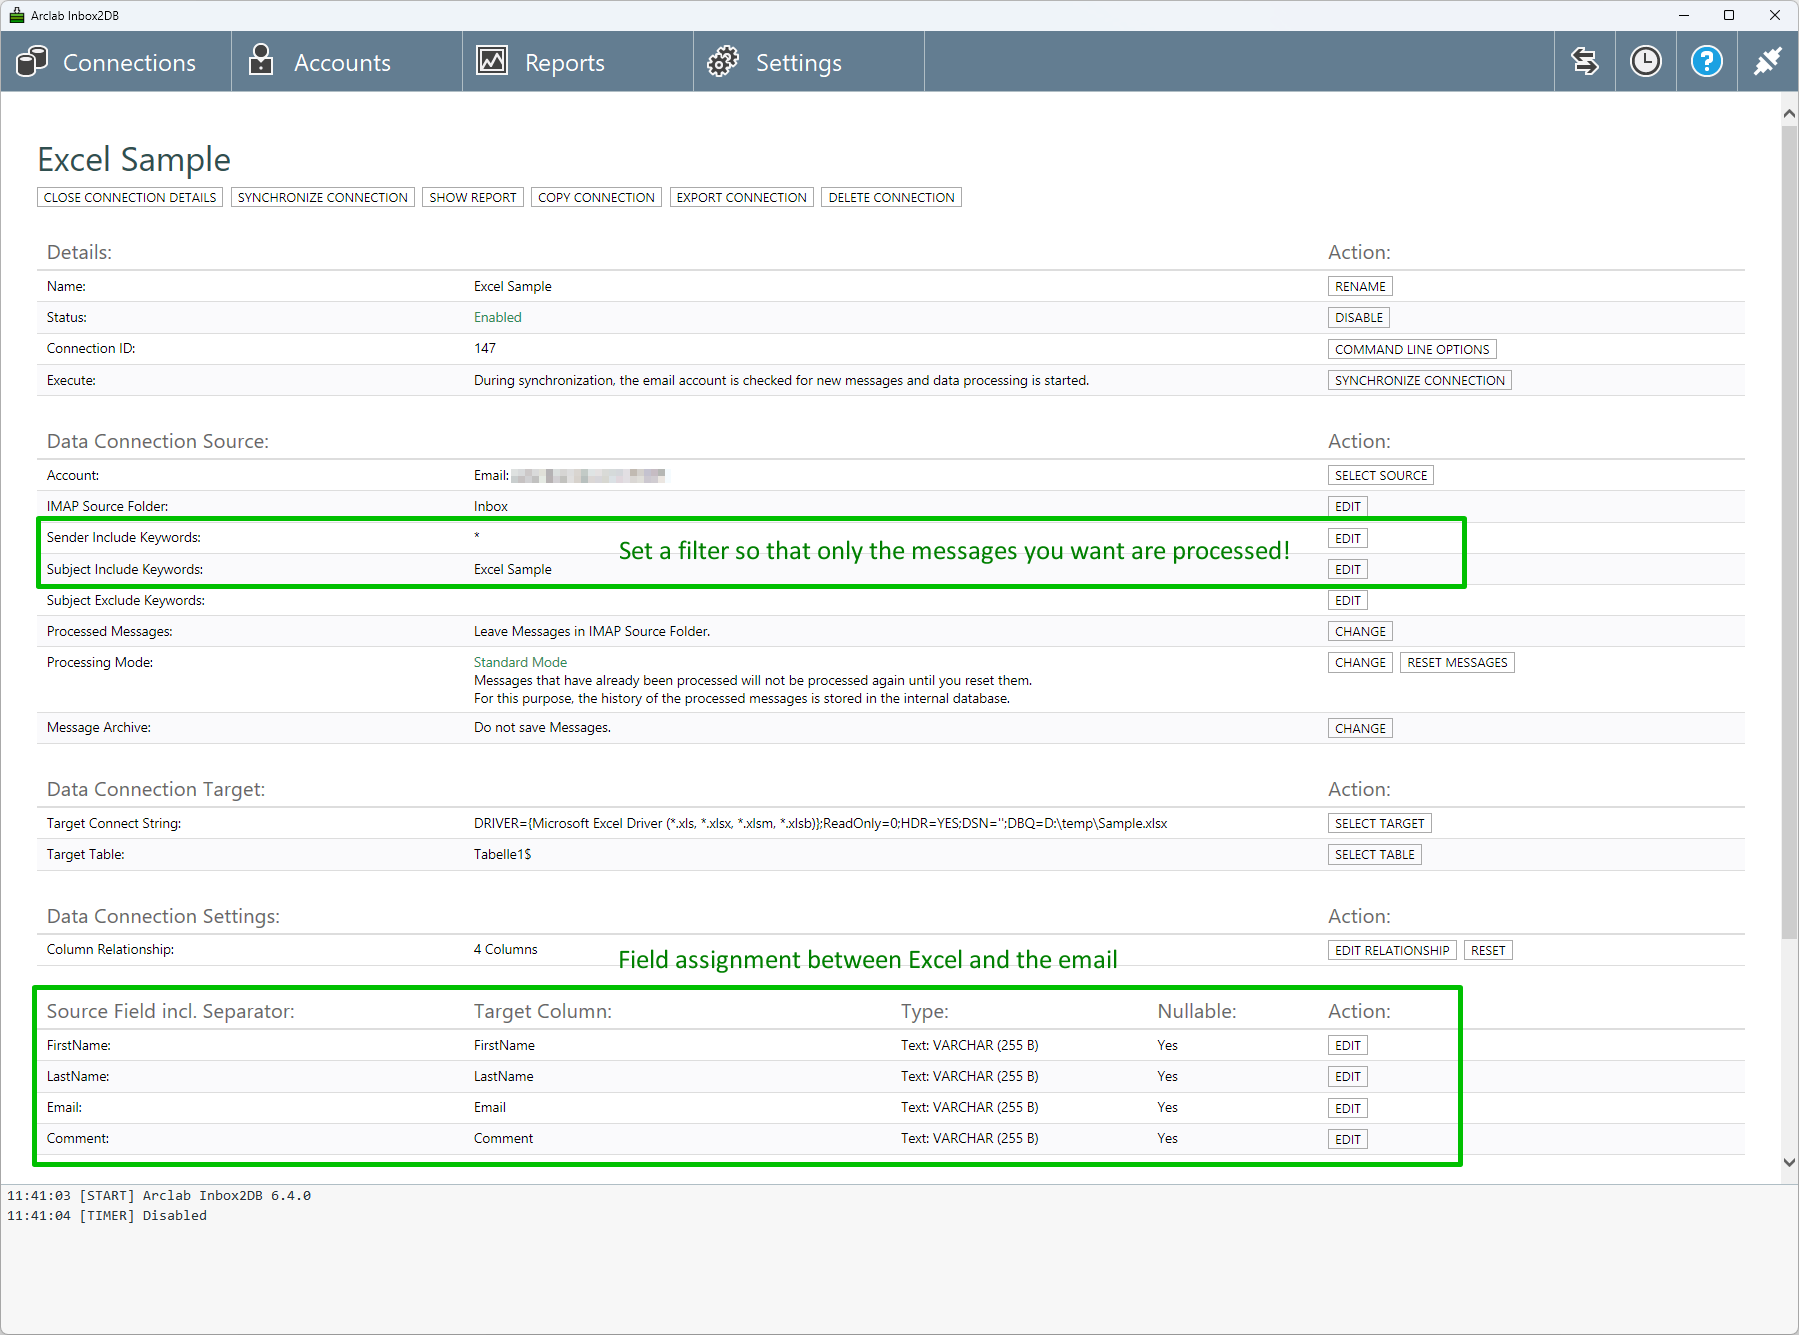
- Check all settings again and then click on “Synchronize Connection” or the sync icon.
- If everything has been set up correctly, you should now see that the data you entered in the form has been transferred to the Excel file.