Submission Tasks
Arclab® Web Form Builder
Form Submission Tasks
Arclab Web Form Builder allows you to define multiple tasks to be executed
after the user submits the form.
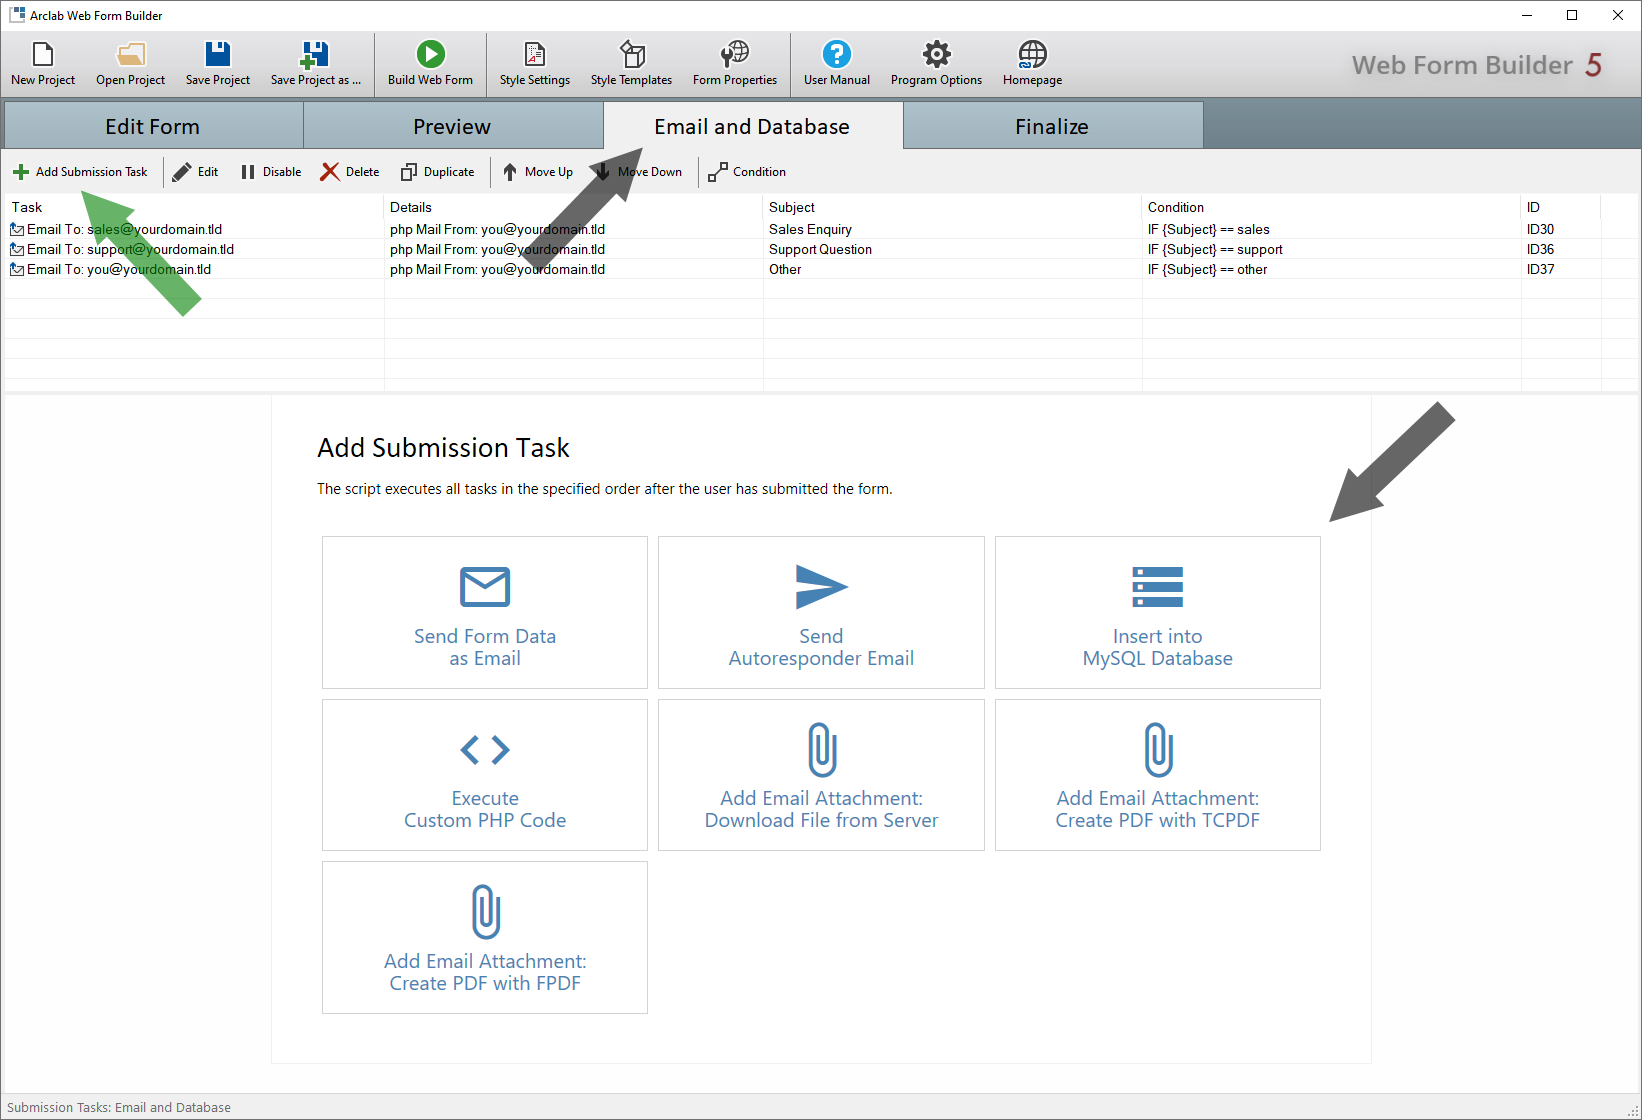
Switch to the "Email and Database"
tab and select the type of task you want to add under "Add Submission
Task":

You can change the order using the up and down arrows. It is also possible to pause and copy tasks.
Arclab Web Form Builder allows you to define a sequence of submission tasks which will be executed on form submission.

Submission Email
The script generates an email out of the submitted form content after
the user hits submit on the (final) form page.
The form results will
arrive directly in your inbox after the form was submitted.
Autoresponder Email
An optional autoresponder (automated response) or custom message can be sent to the person filling out the form.
Continue: Send Email
MySQL
The script created by the program can not only send the form data via
email, but also insert it directly into a MySQL database.
For this, only
a form field (source field) has to be assigned to the respective database
field (target field).
Continue: Insert into MySQL Database
Execute Custom PHP Code
Web Form Builder also allows you to execute custom PHP code on form submission.
Please note that this functionality is only available
in the "Test Version" or in the "Developer Edition".
See also:
- Access and Manipulate Form Data in PHP
- Create Custom Email File Attachment
- Add Email Attachment: Download a File from Your Web Server
- Add Email Attachment: Create a PDF File using TCPDF
- Add Email Attachment: Create a PDF File using FPDF
Continue: Execute Custom PHP Code
(Optional) Condition
Conditions can be used for many applications. Thus, depending on the
user's choice in the form, various tasks can be performed after submitting
the form.
You can use conditions e.g, to send an email to different recipients
or to send the autoresponder only if the user wants a copy.
- You can add a condition to each task, which must be fulfilled for
the task to be executed.
The condition is shown in the column "Condition".
- If you do not add a condition, the task will always
be executed.
This will be displayed as "Always" under "Condition".
Sample: Conditional Recipients
In the following example, depending on a selection made by the user in the form, the email should be sent to different recipients.
For this we use a dropdown element with the name "Subject".
Depending
on the selection or the value of the field, an email should be sent to the
respective recipient.
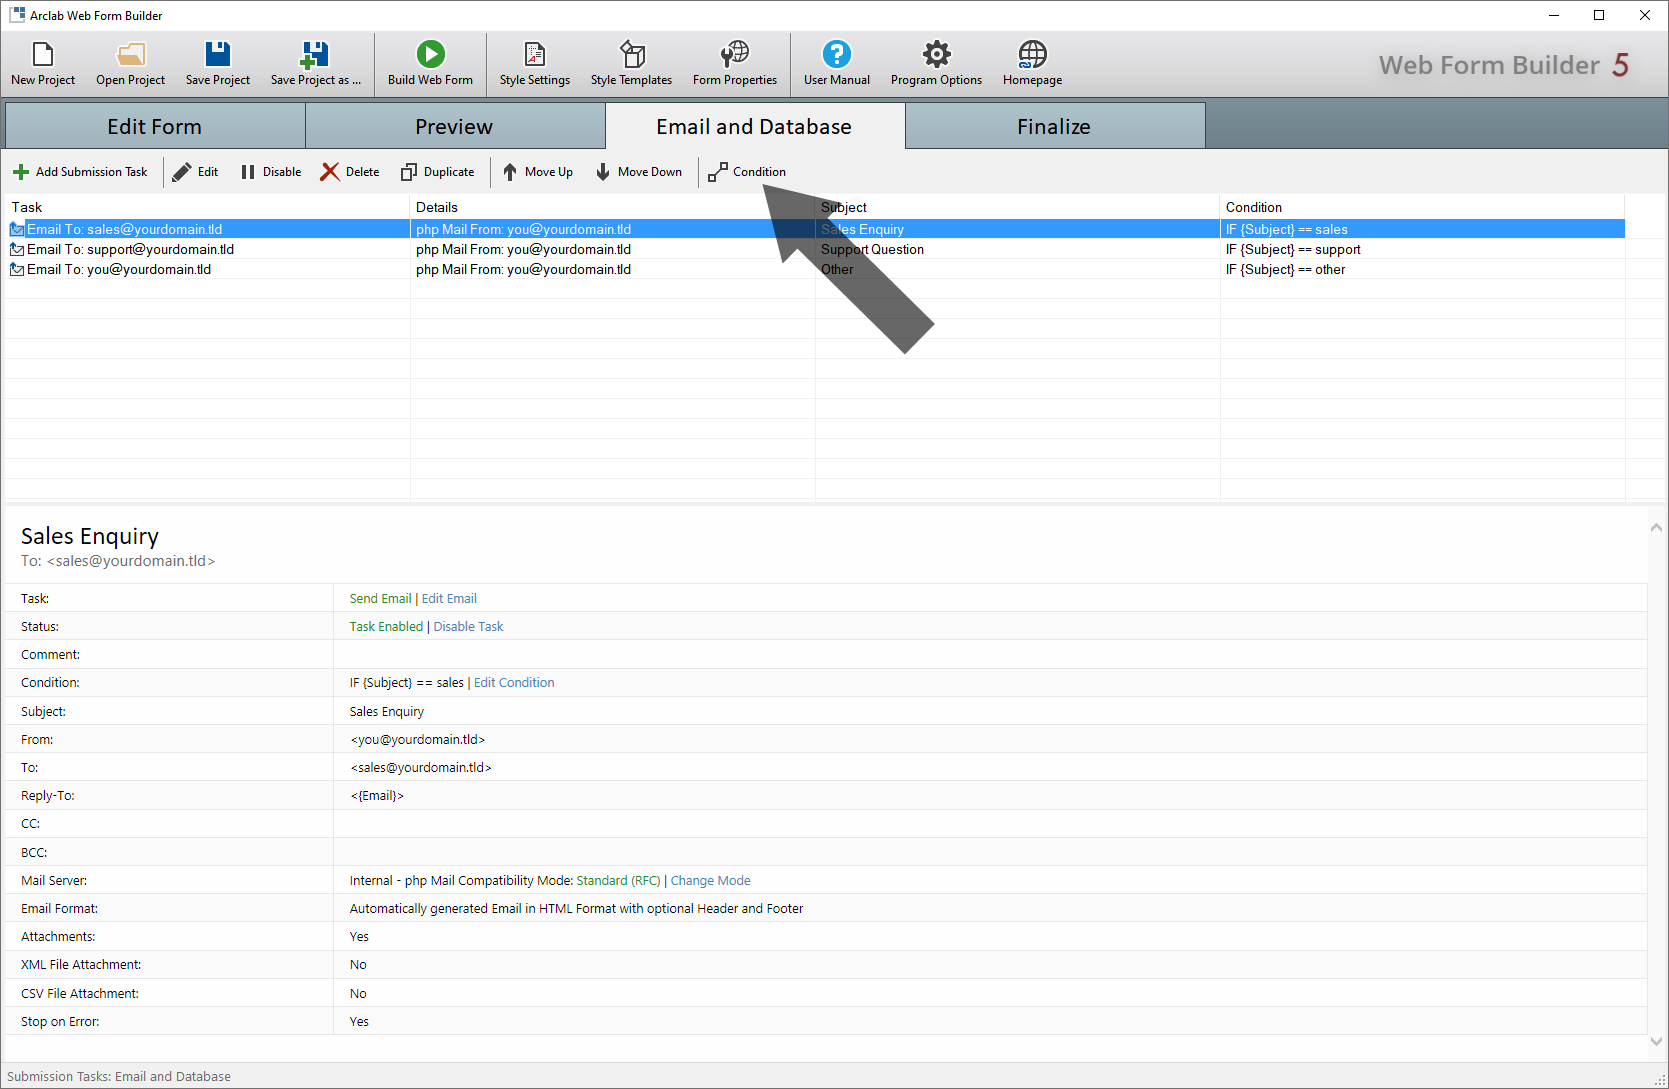
First create a separate task for each recipient.
You can use the "Duplicate
Task" function for this purpose and only change the recipient.
Click on "Condition" to set a condition for each of the messages:

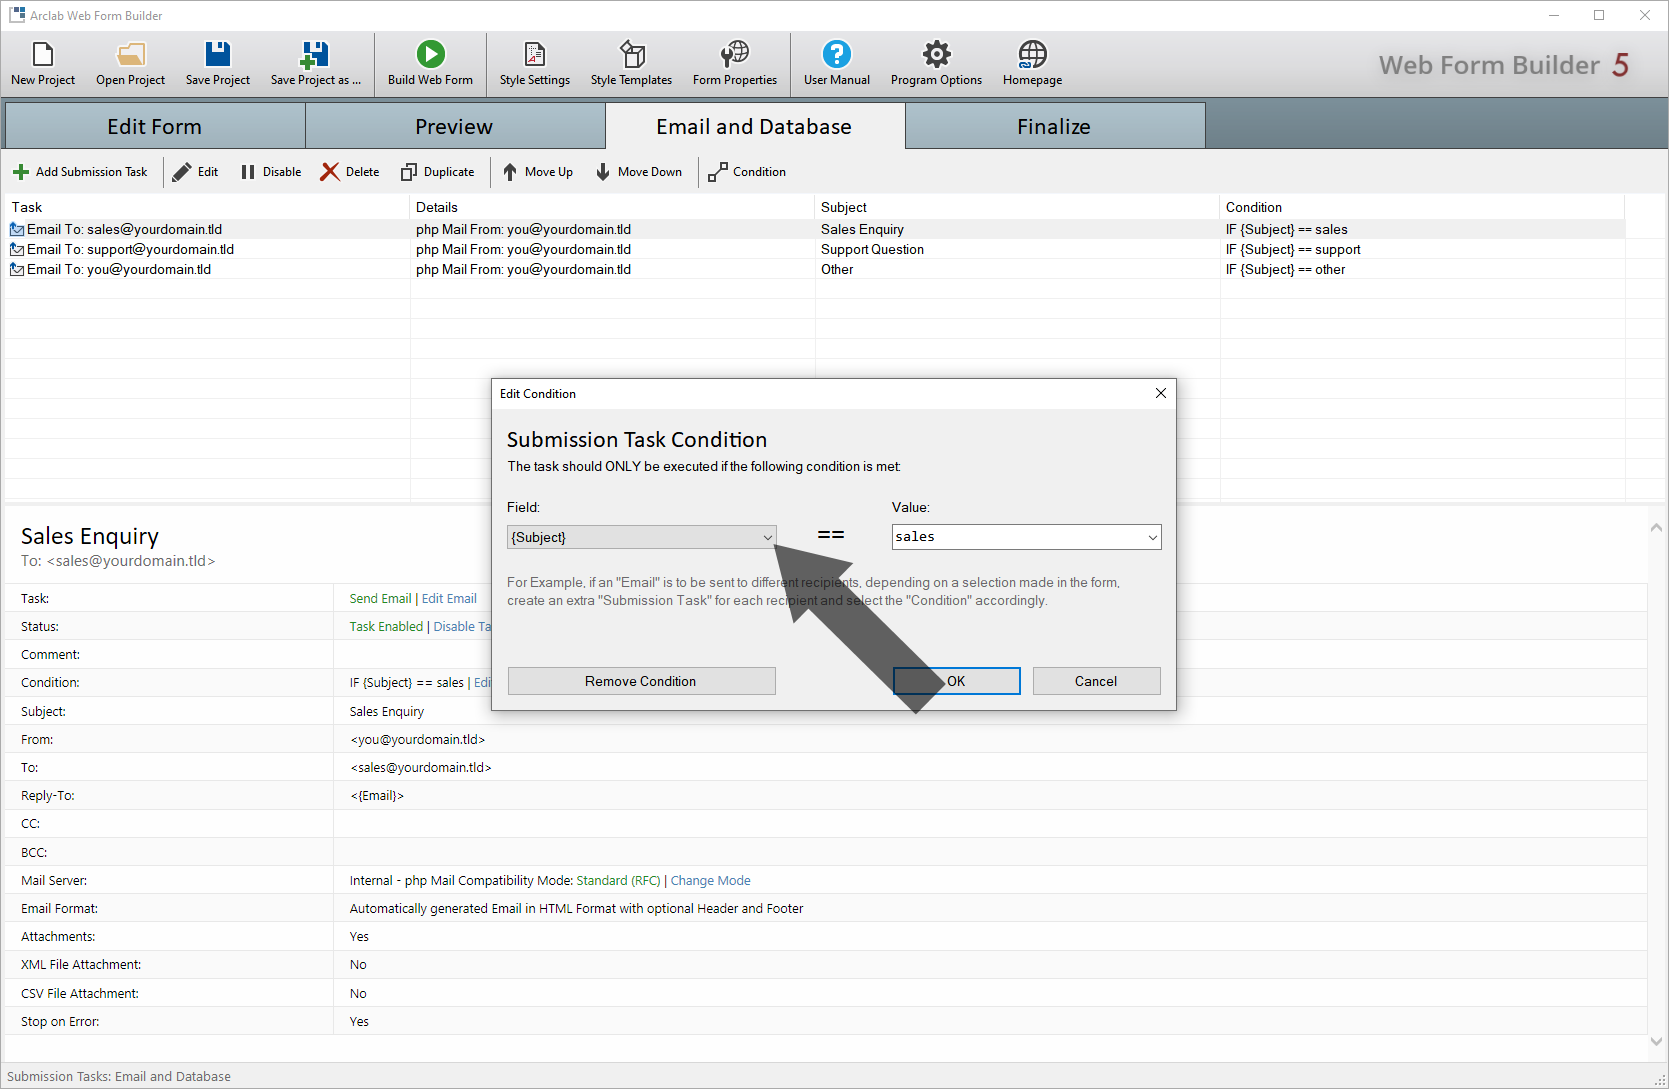
Select the field to which the condition should be applied and enter the
value for the condition.
Please note that the value and the displayed
text for e.g. a dropdown items can be different.

In this sample an email message should be sent to "sales@yourdomain.tld"
if the "subject" is "sales".
Select the appropriate condition for each
email or task.